Fushimi Inari Taisha needs no introduction.
It’s probably THE most iconic tourist destination in Kyoto and for good reason. When I visited I was blown away by the views on top of being enamored by the architecture, culture, and just general vibes of the place.
Read on further if you want to know more about my experience or just want to check out the pictures that I took during my visit.
Getting to Fushimi Inari Taisha is going to be really easy. It’s considered one of the most accessible shrines in the city with JR Nara Line and Keihan Line having stations close to it. Personally, I’d recommend taking the JR Nara Line (you’ll need to go to Kyoto Station for this) and just stopping at Inari Station.
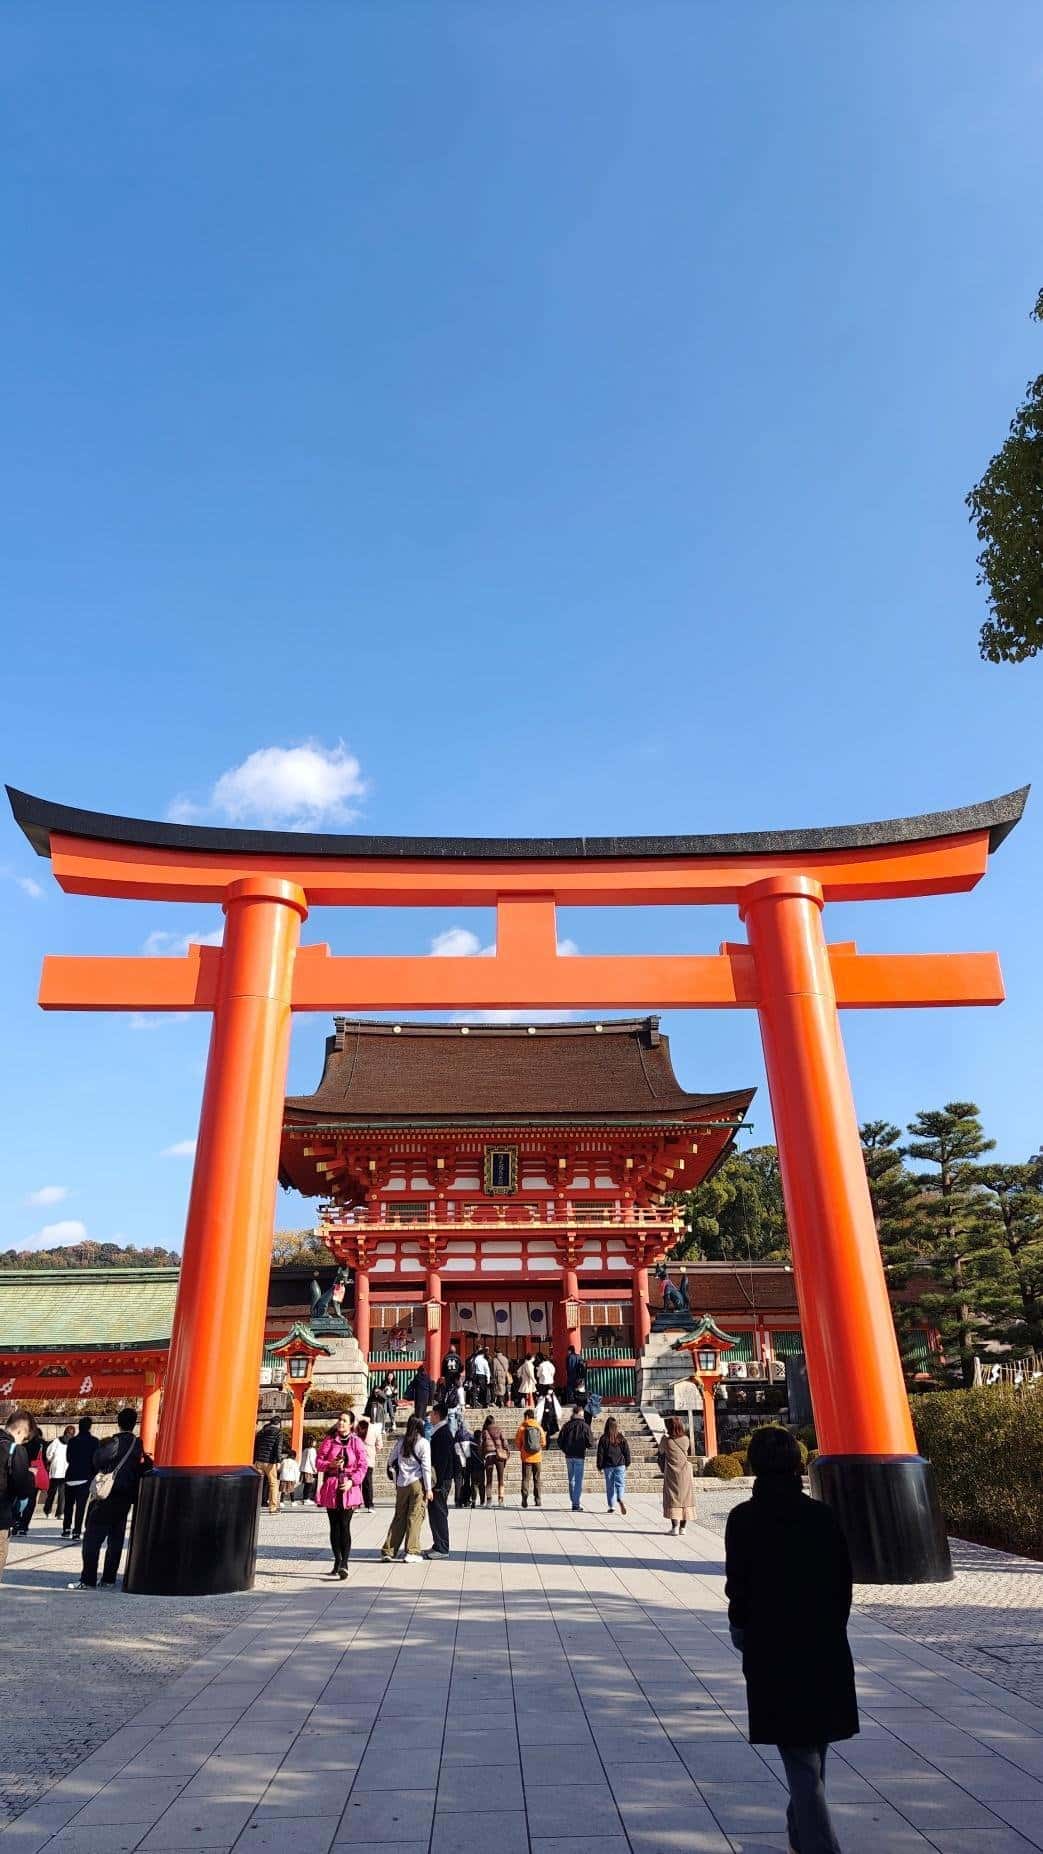
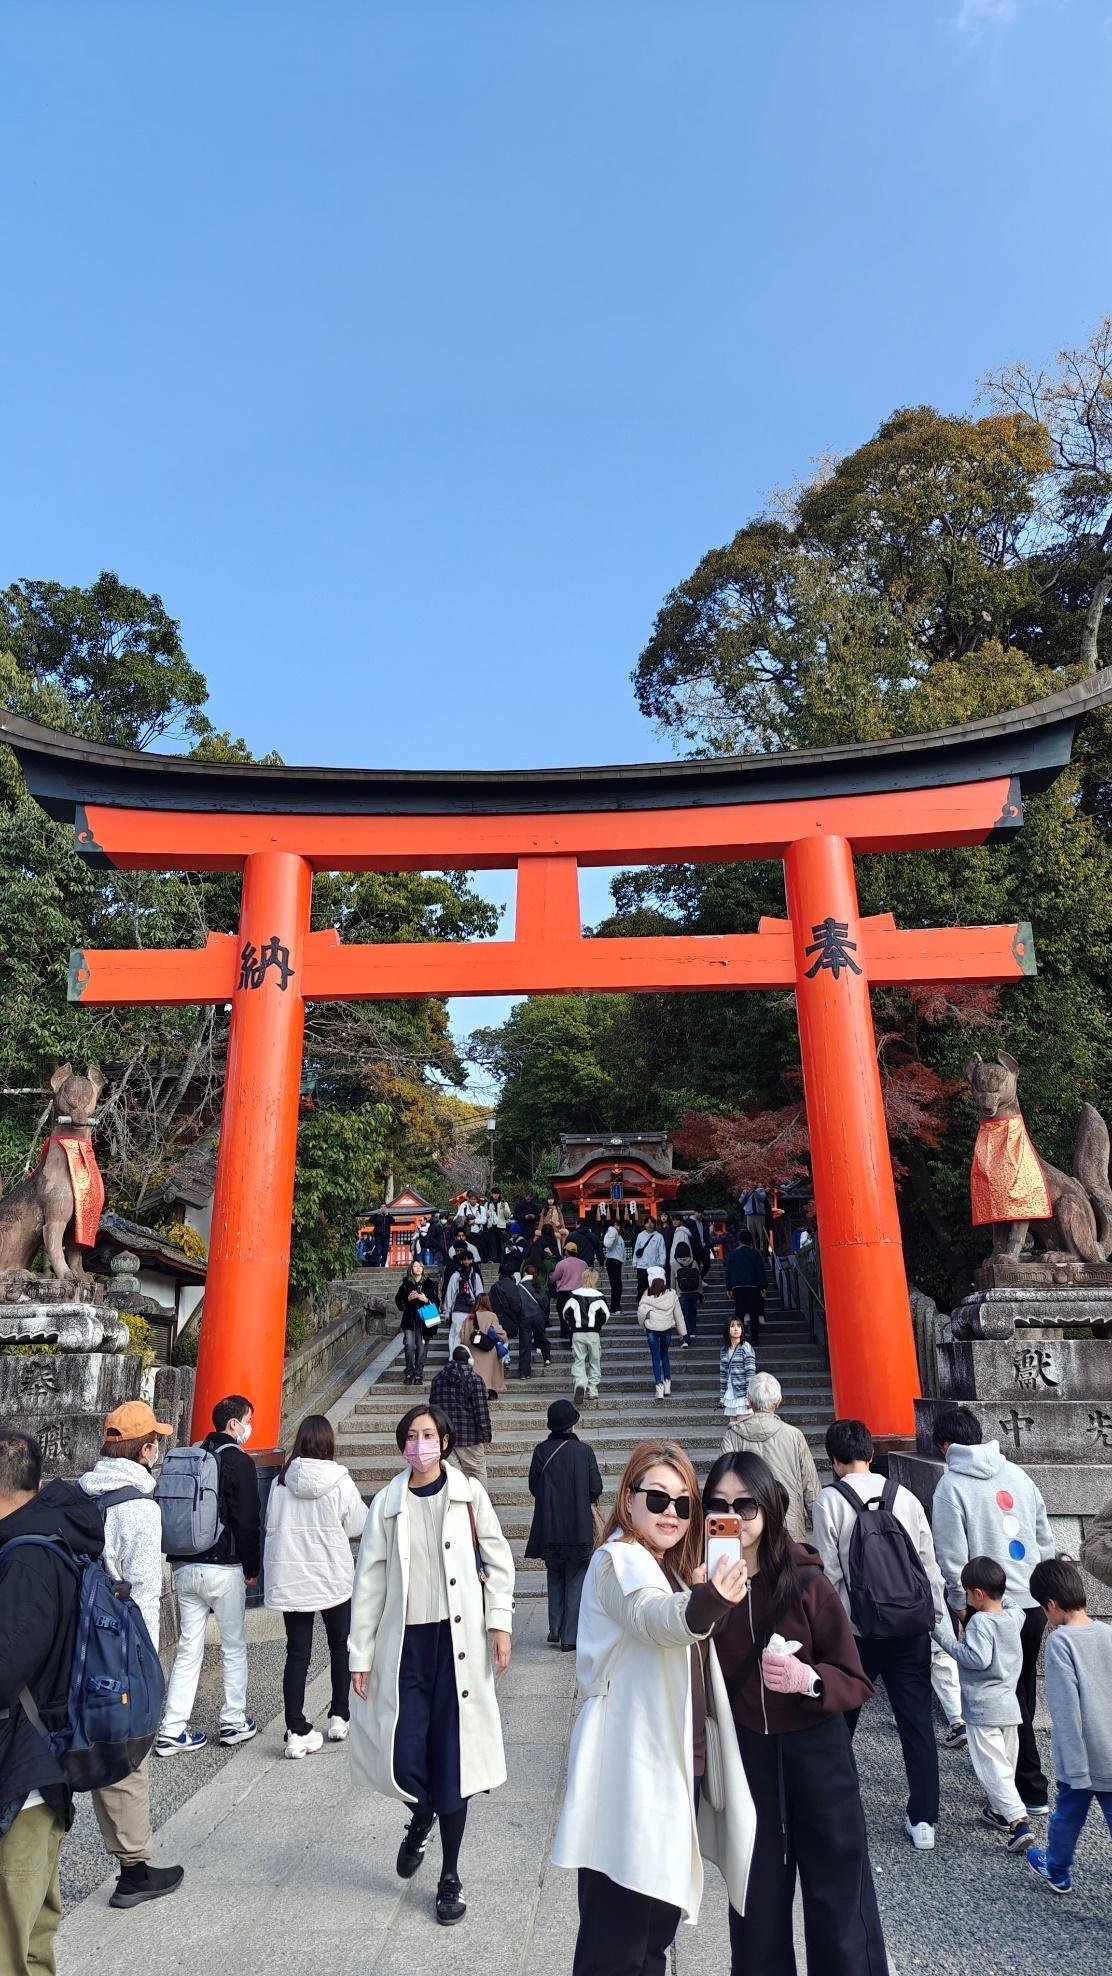
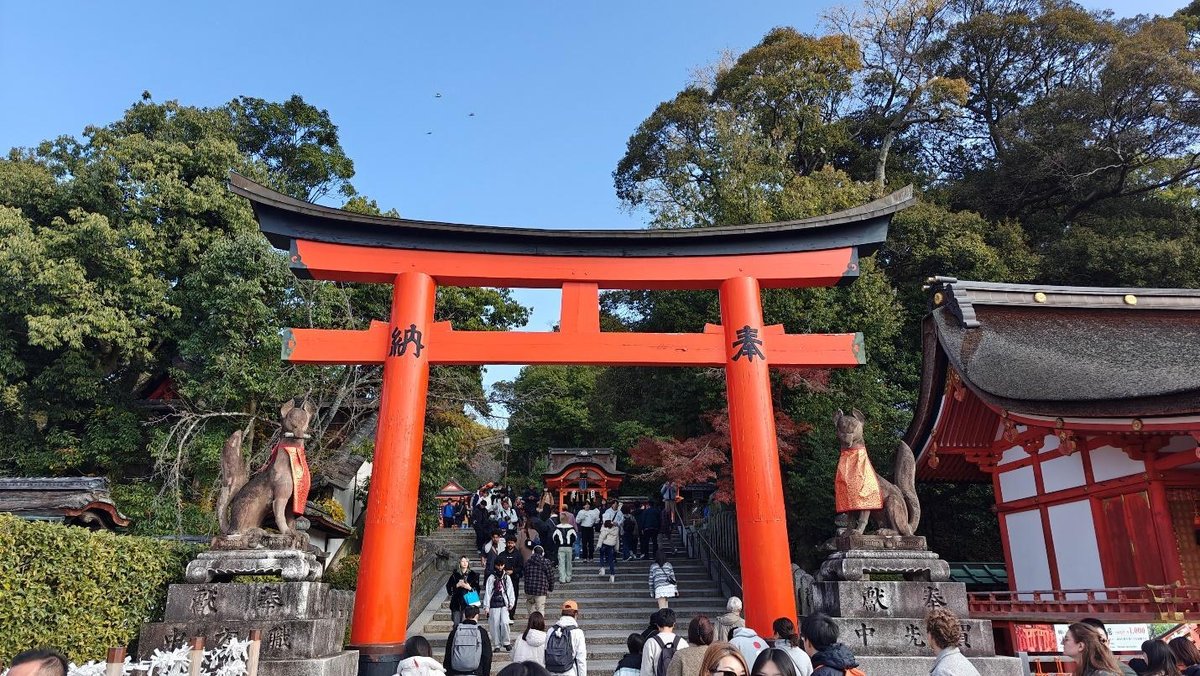
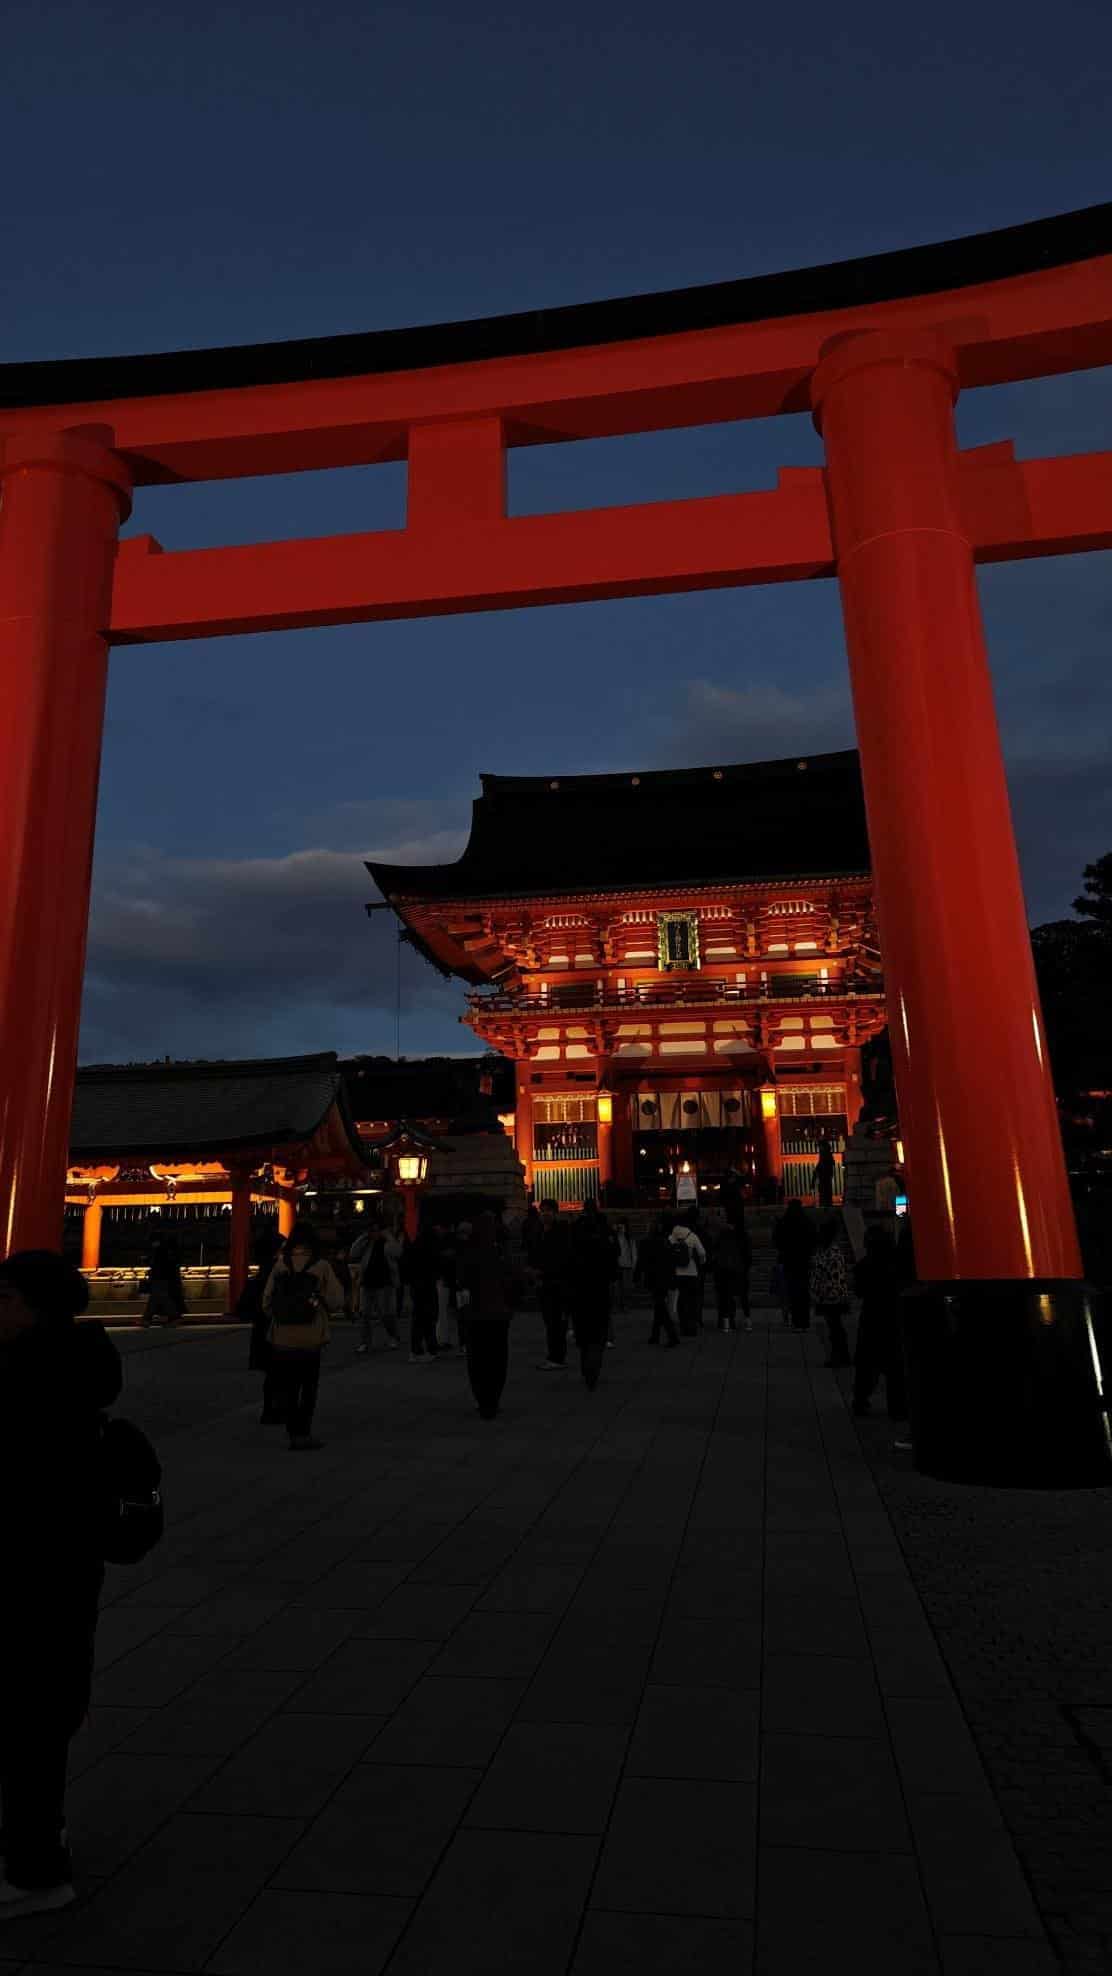
The entrance to the shrine is one of the first things you’ll literally see as you step out of the station and after a short walk, you’ll eventually come across this sight. This is actually the second torii gate with the first one being at the street entrance.
Visiting Fushimi Inari Taisha: Getting There, Highlights and Day-to-Night Tips
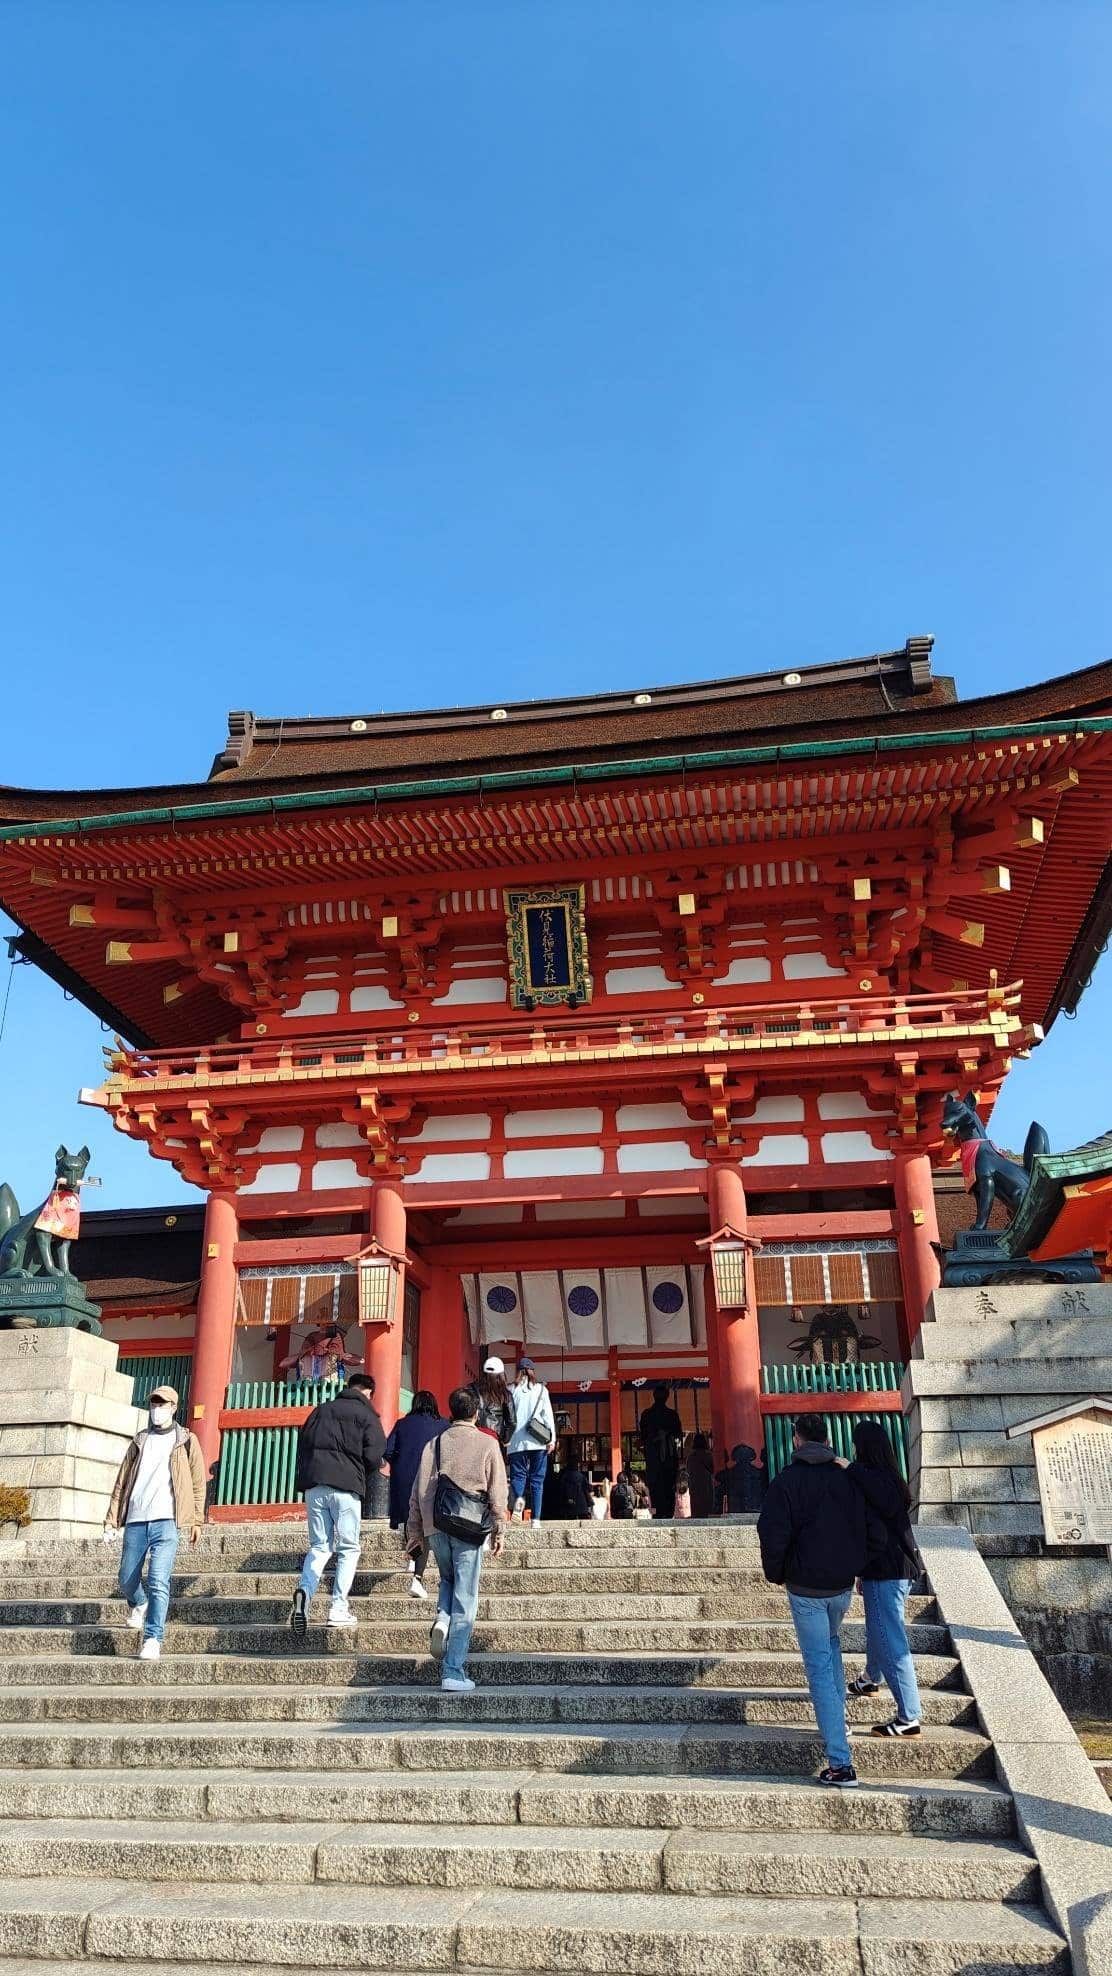
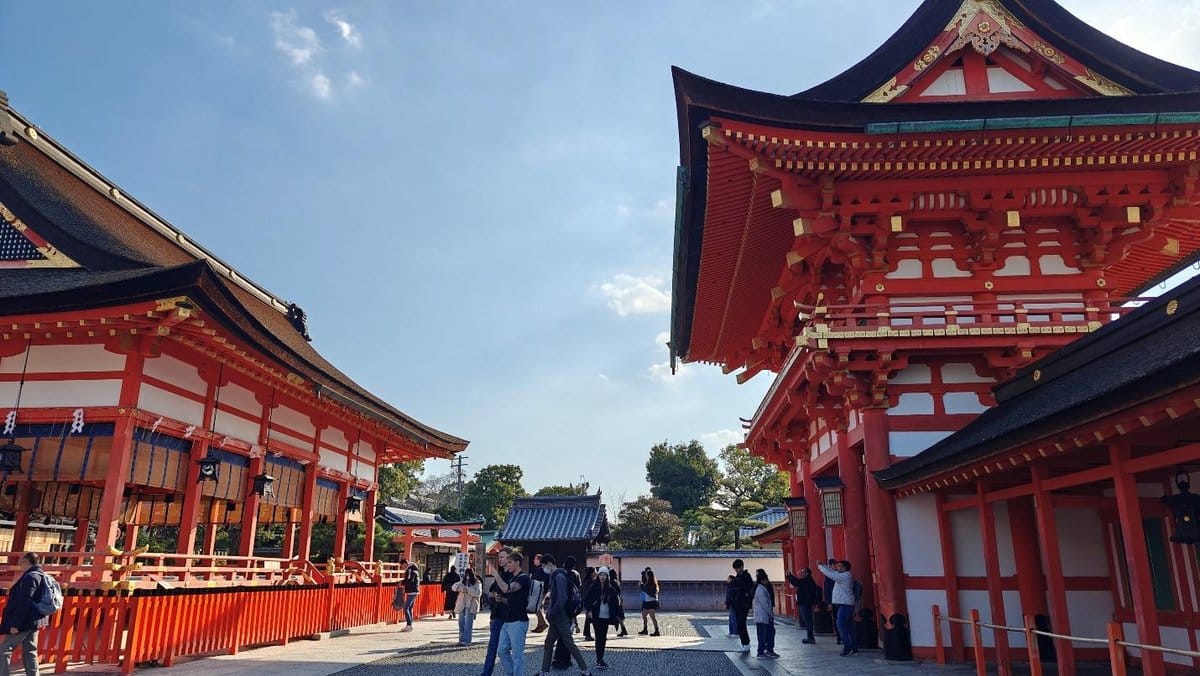
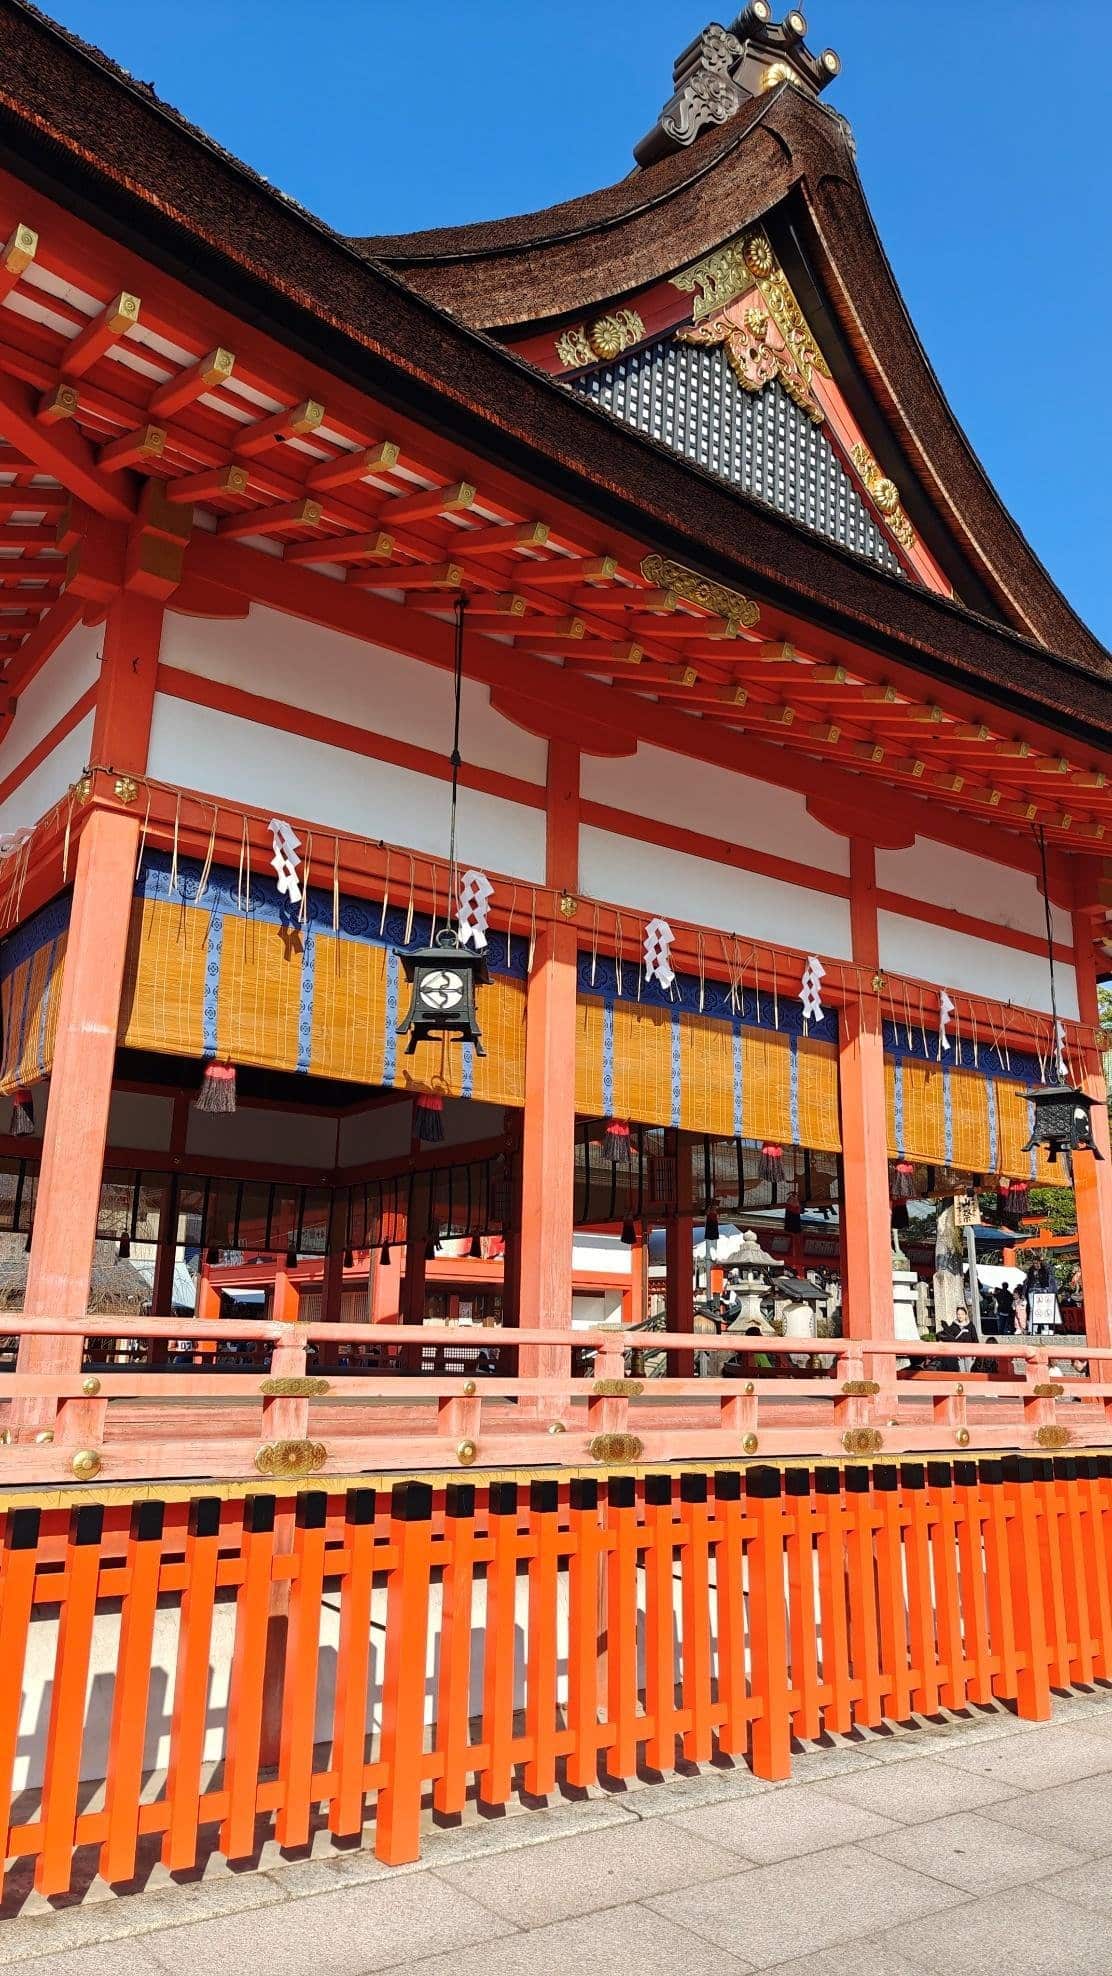
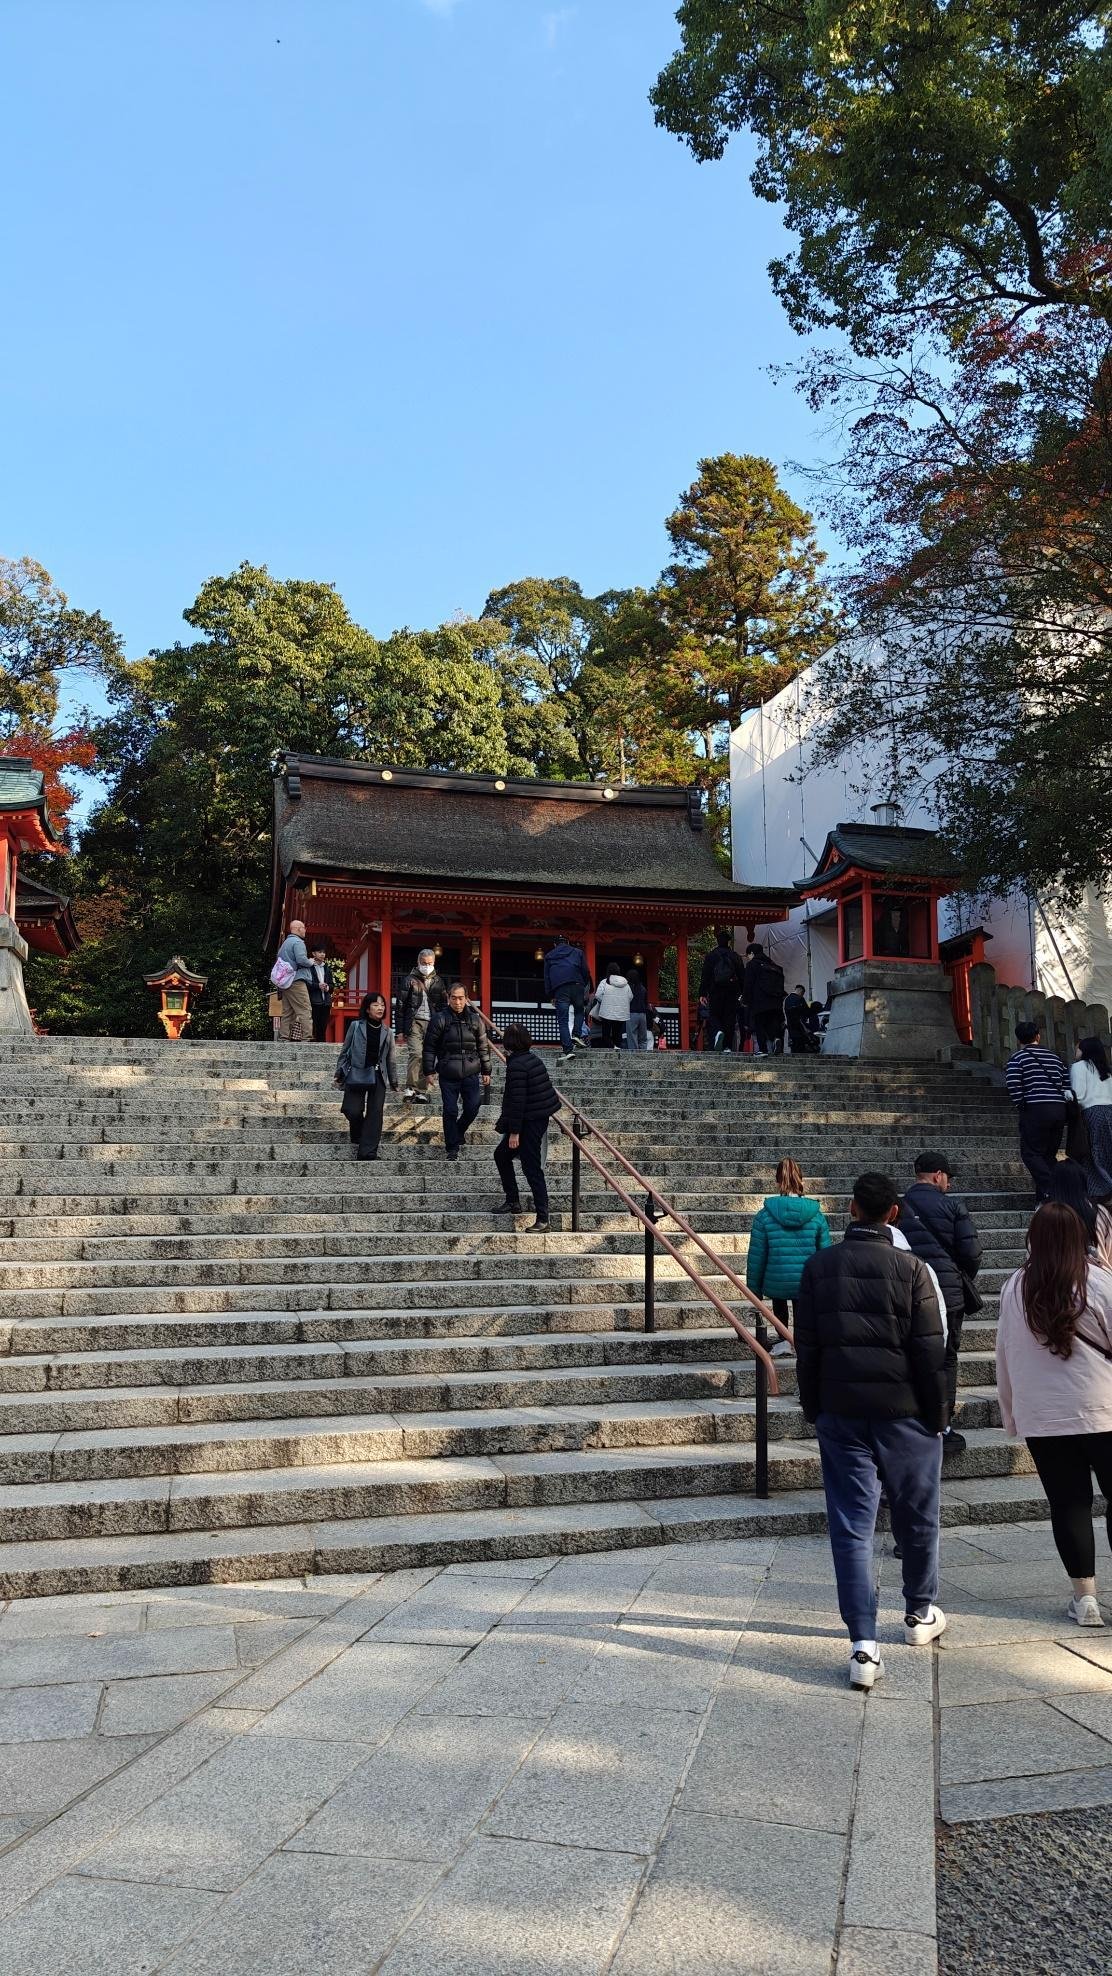
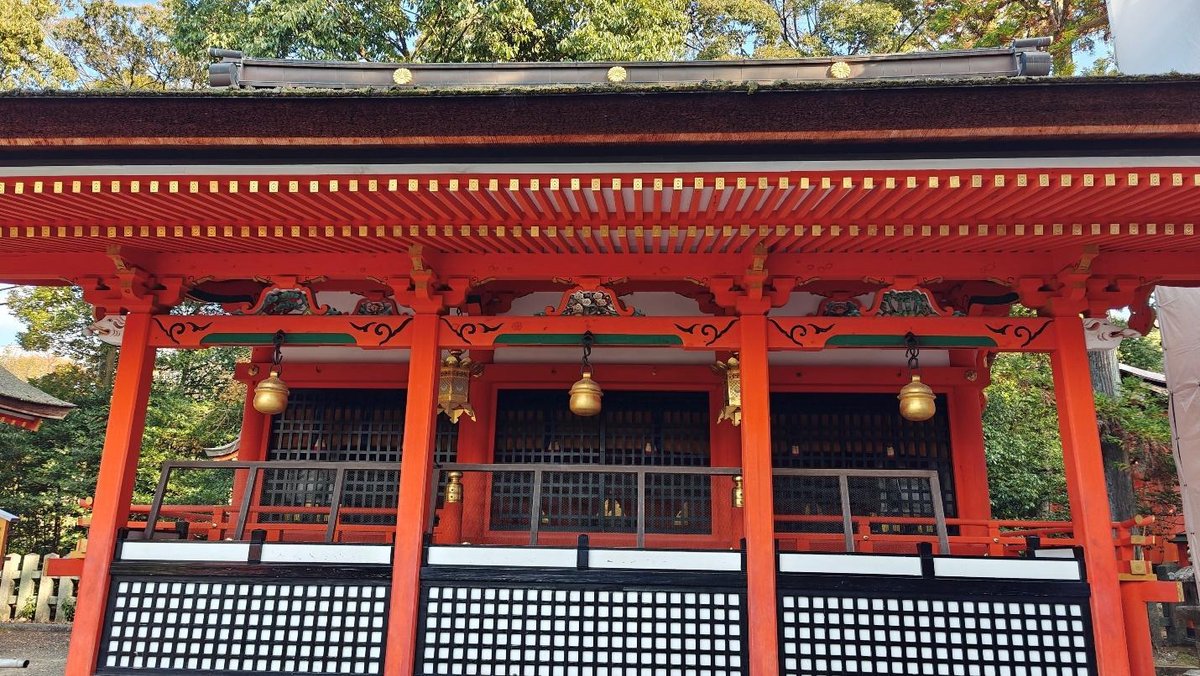
After passing the second torii gate, you’ll then be greeted by the entrance gate (or Romon) to the shrine complex. The Romon was constructed by Toyotomi Hideyoshi in 1589 making it more than 400 years old as of this writing. Like Kiyomizu-dera, the wood here is painted vermillion with some gold highlights.
At the top of the stairs you’ll notice some cool-looking fox statues called komakitsune that you’ll know more about later. Looking at the Romon from this vantage point, I’m kind of reminded of the entrance of Tsurugaoka Hachimangu’s Hongu (which I’d visited early in 2025).
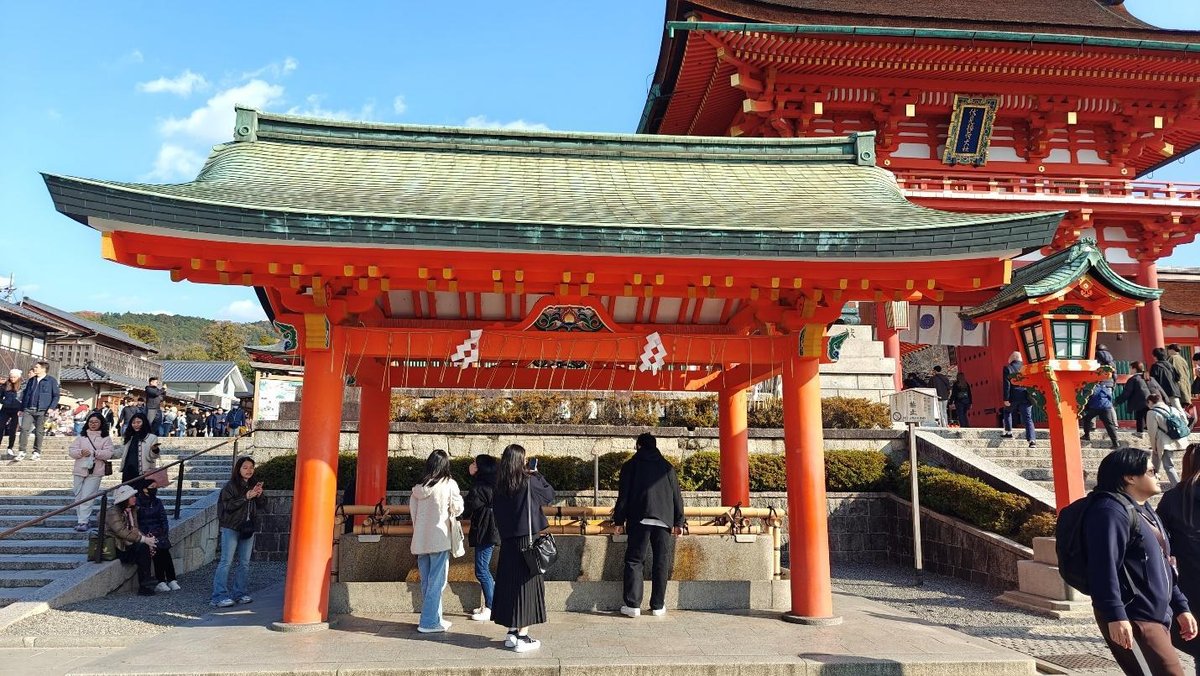
As with a lot of the shrines and temples that I’ve visited in Japan, Fushimi Inari Taisha also has a chozubachi near the entrance gate. This is where visitors and pilgrims can wash their hands and rinse their mouths (a symbol of ritual purification) before they enter the shrine.


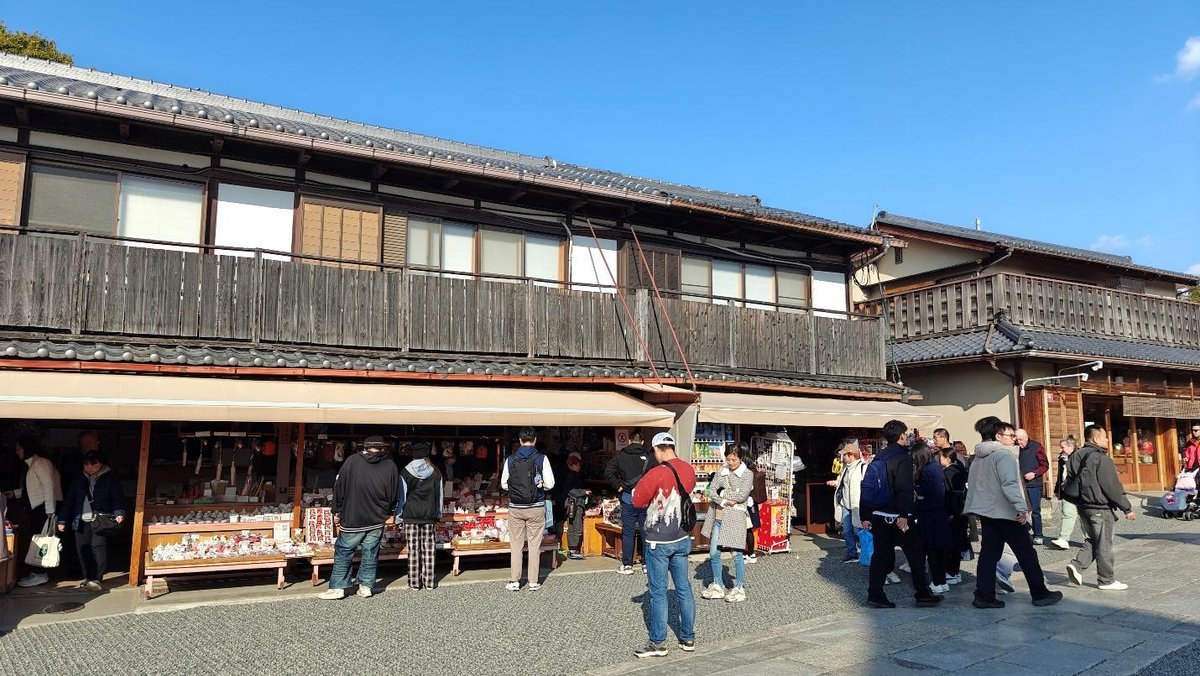
To the left of the Romon is the Fushimi Inari Taisha back approach road which you can also use to enter the shrine. The area to the left of the street has buildings where you can find shops selling souvenirs, chinaware, and religious goods.

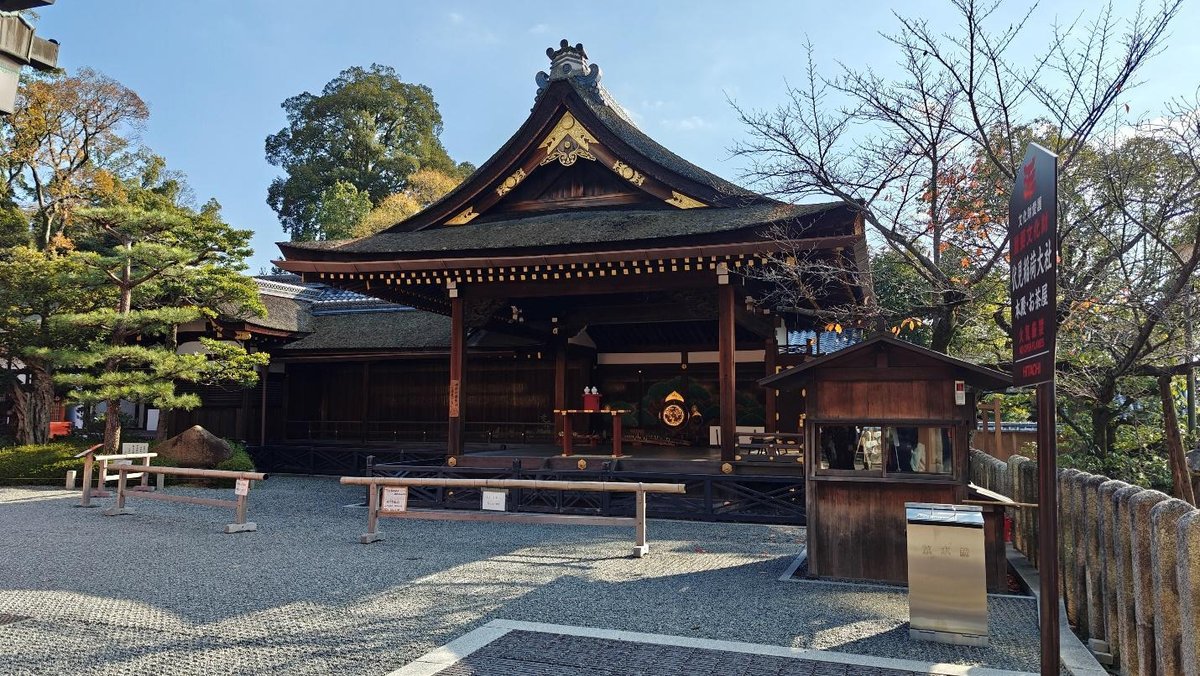
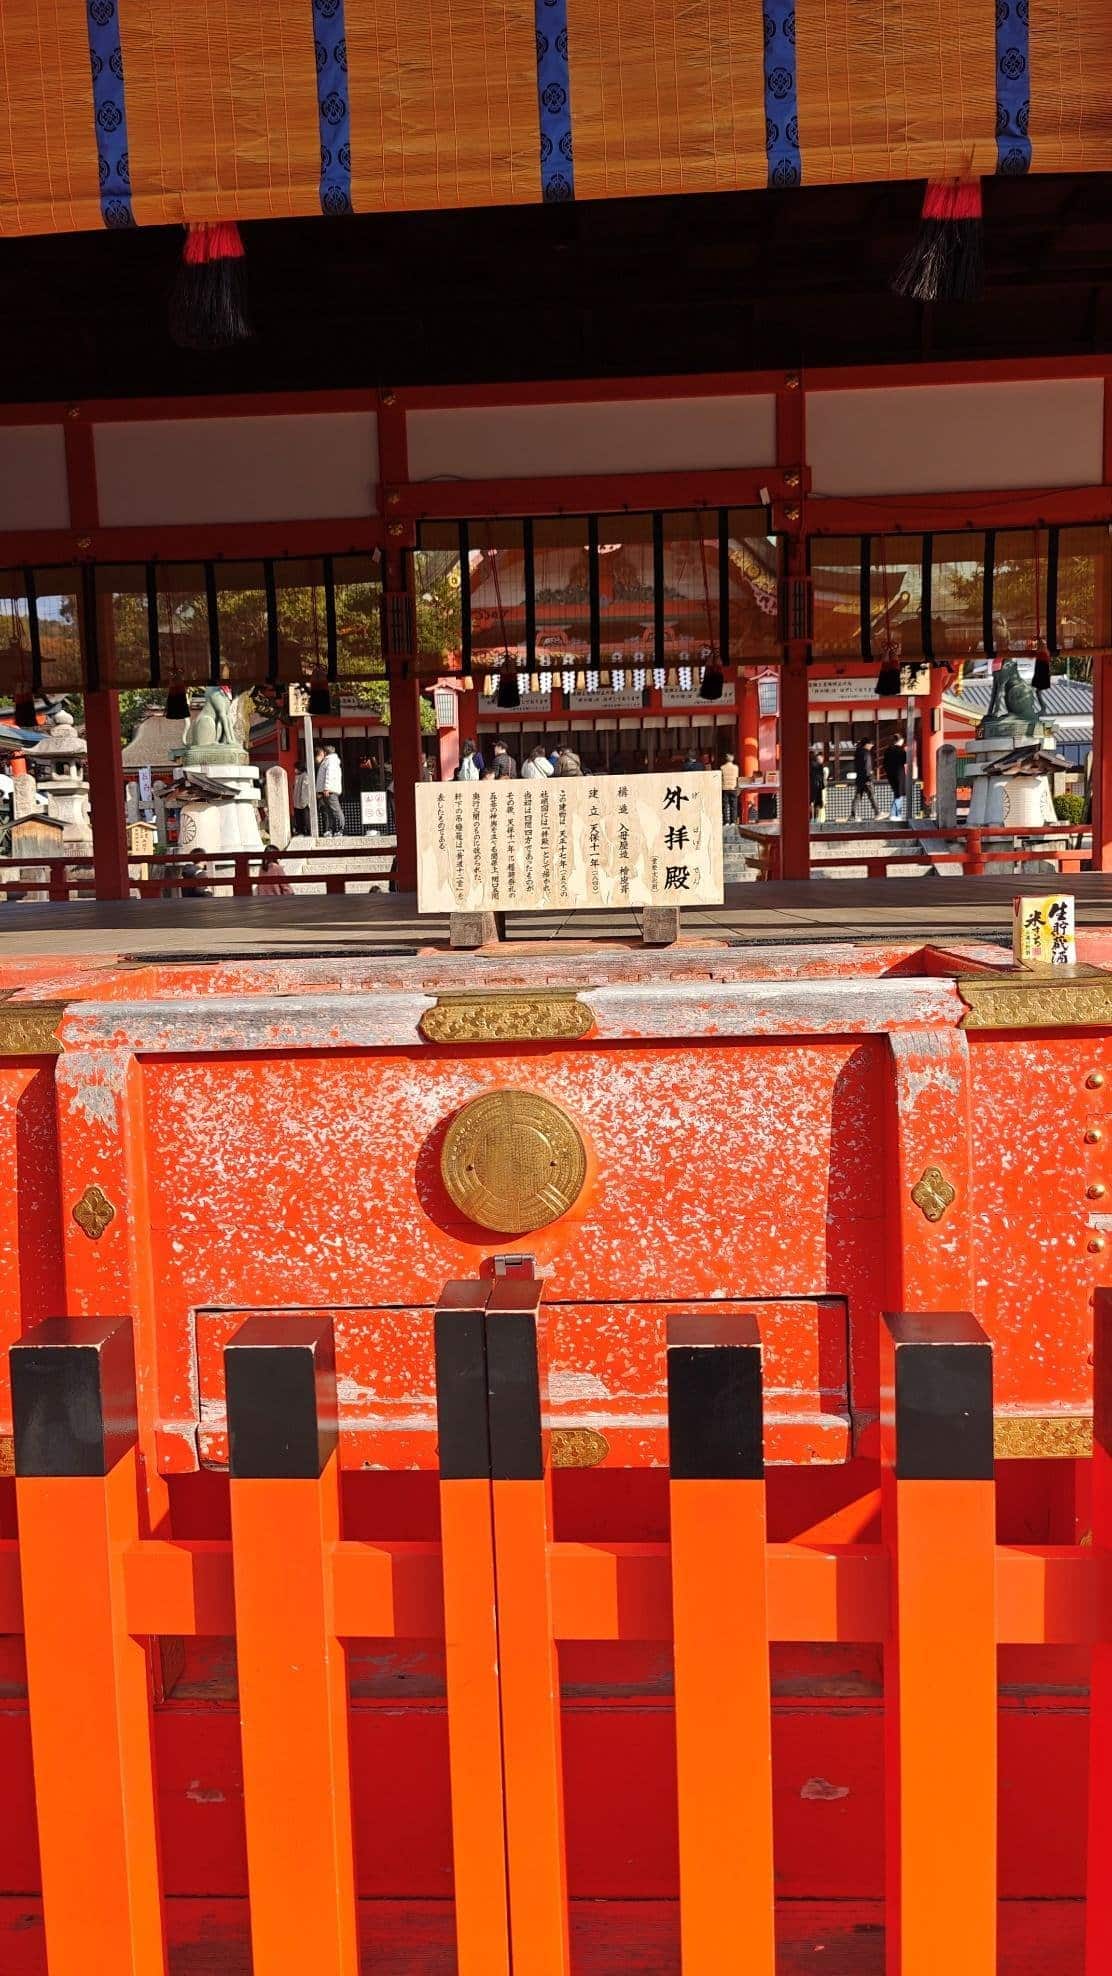
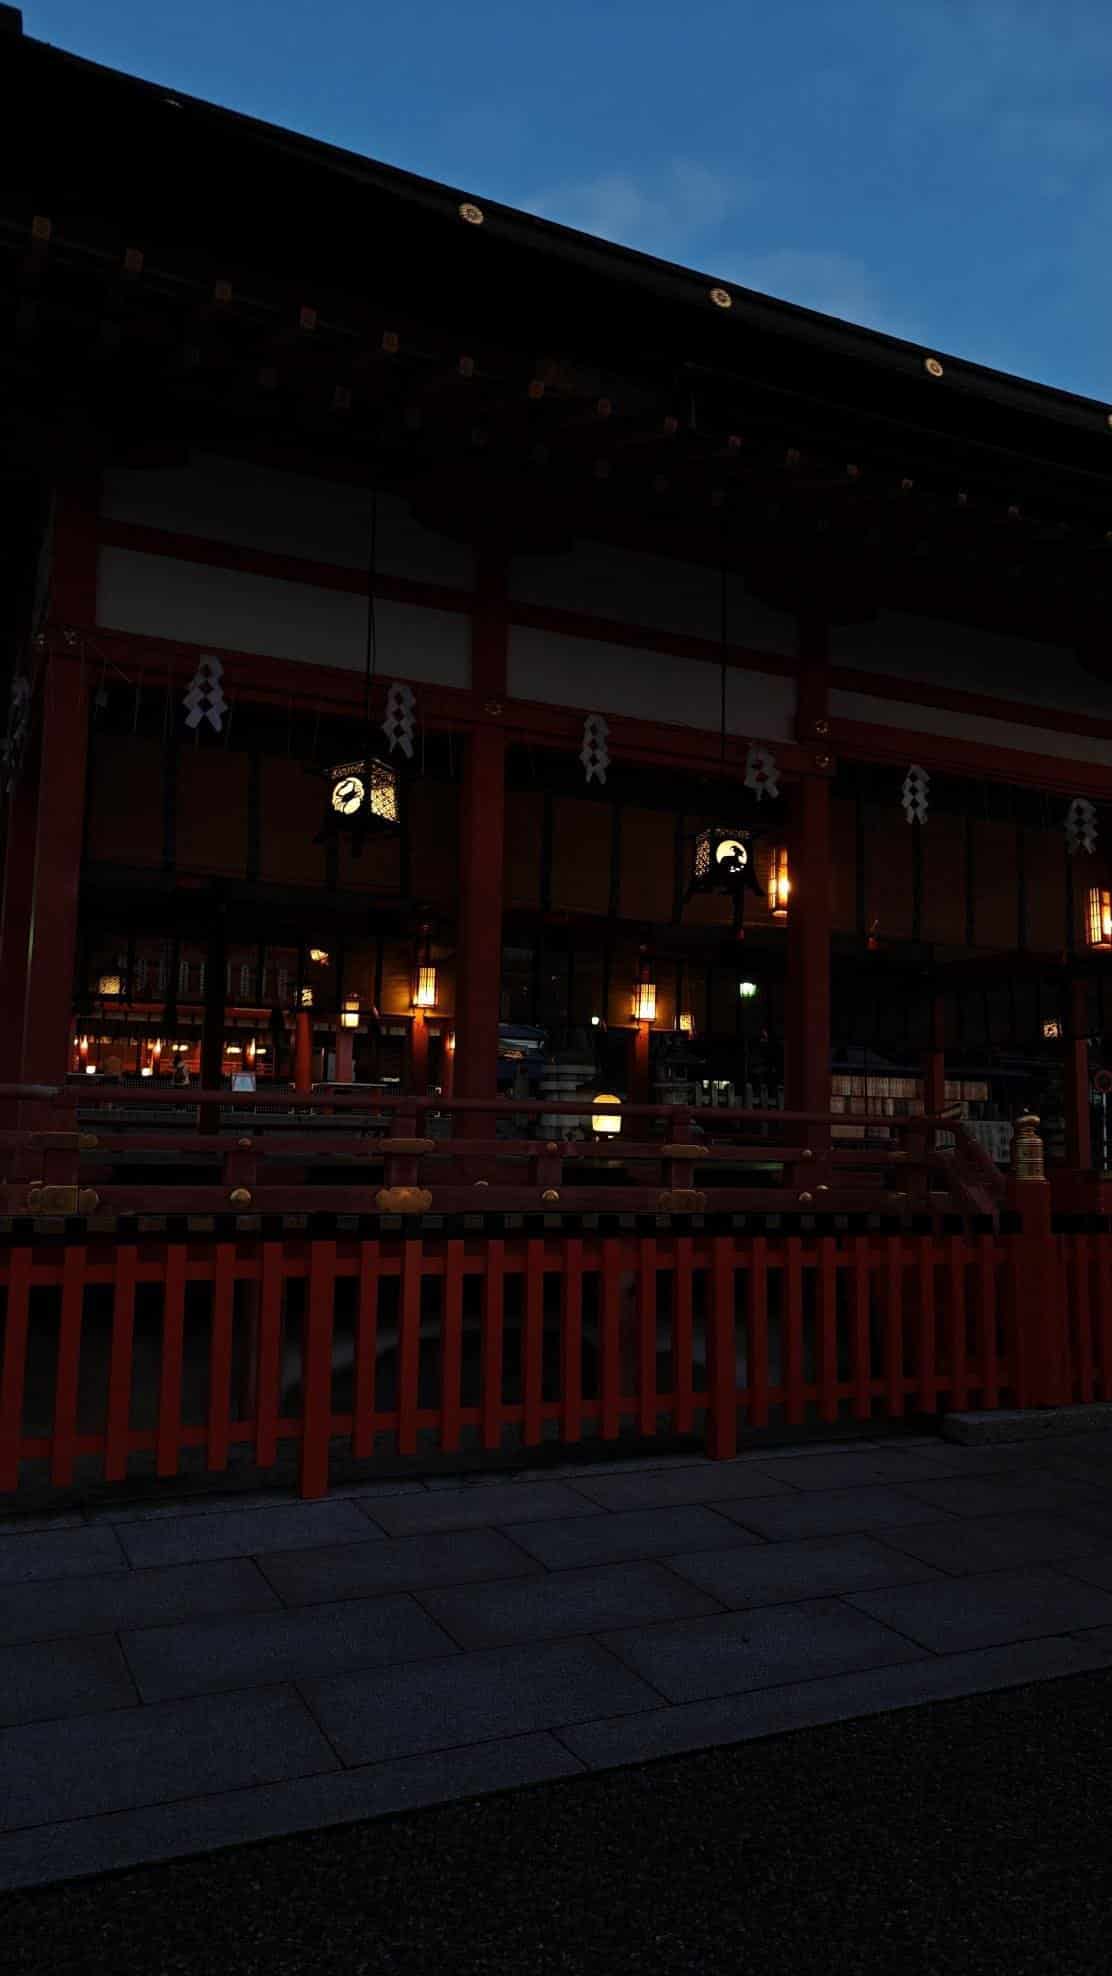
Opposite the buildings from earlier is the Gehaiden or Outer Oratory or Outer Worship Hall. This is typically used as a stage kind of like the Maidono at Tsurugaoka Hachimangu. In front of it (to the right of this image) is the Romon while behind it is the Honden or the Main Hall of the shrine.

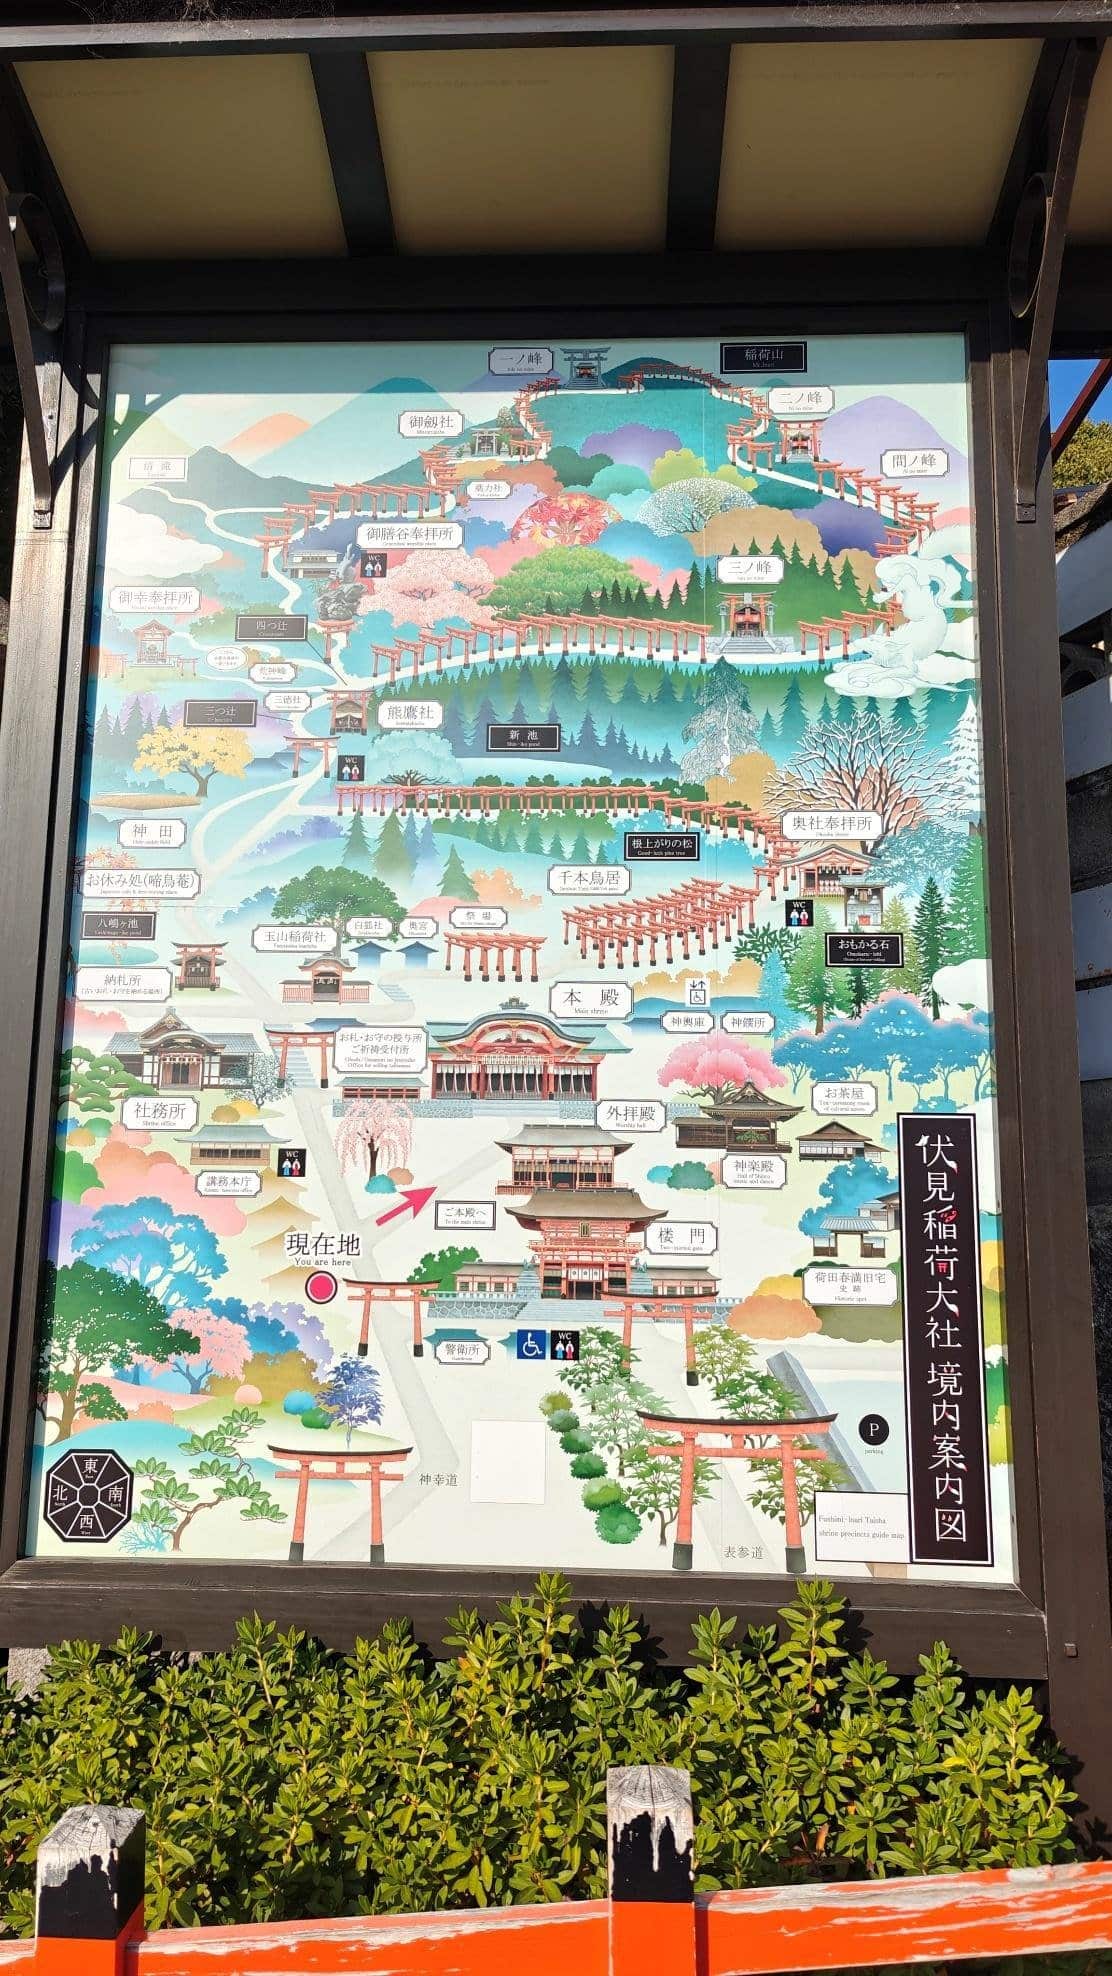
Sitting in between the shop area and the Gehaiden is the shrine’s guide map. Take a picture of this to get a better idea of the location of the notable buildings and attractions in the shrine. Take note though that while the guide map might make it look small, in actuality Fushimi Inari Taisha covers a really large area.
Additionally, the map only covers landmarks up to a certain point up the mountains. If you’re interested in seeing the rest of the landmarks then there’s another guide map in the area that covers those.
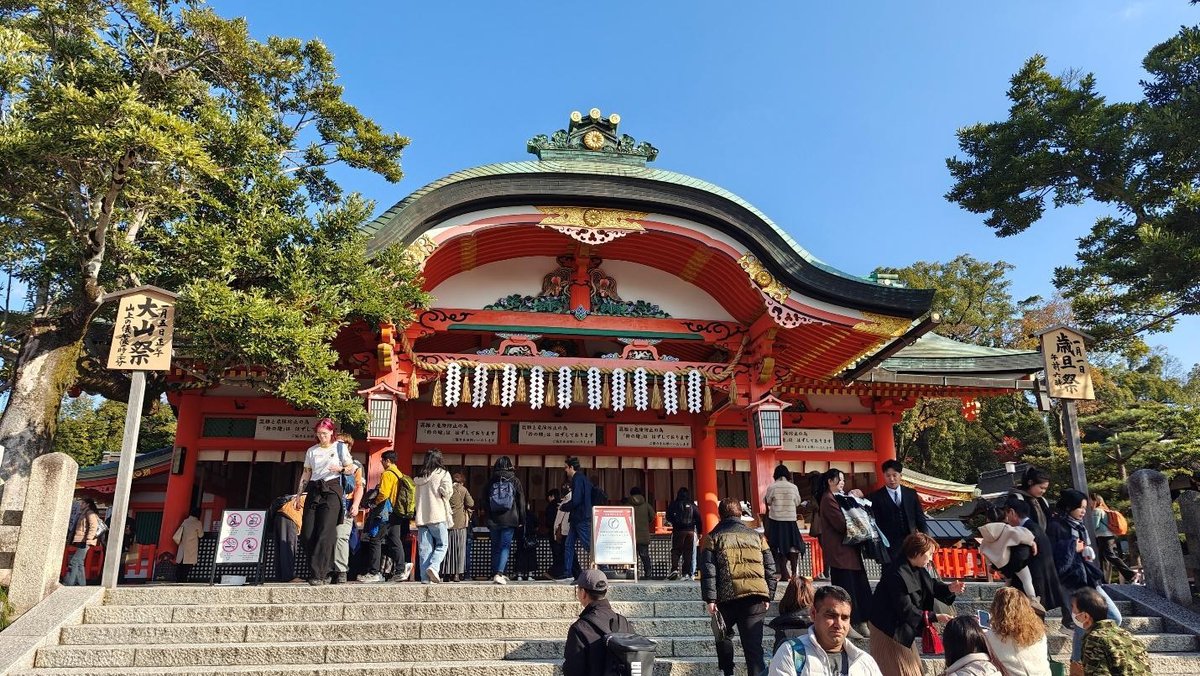
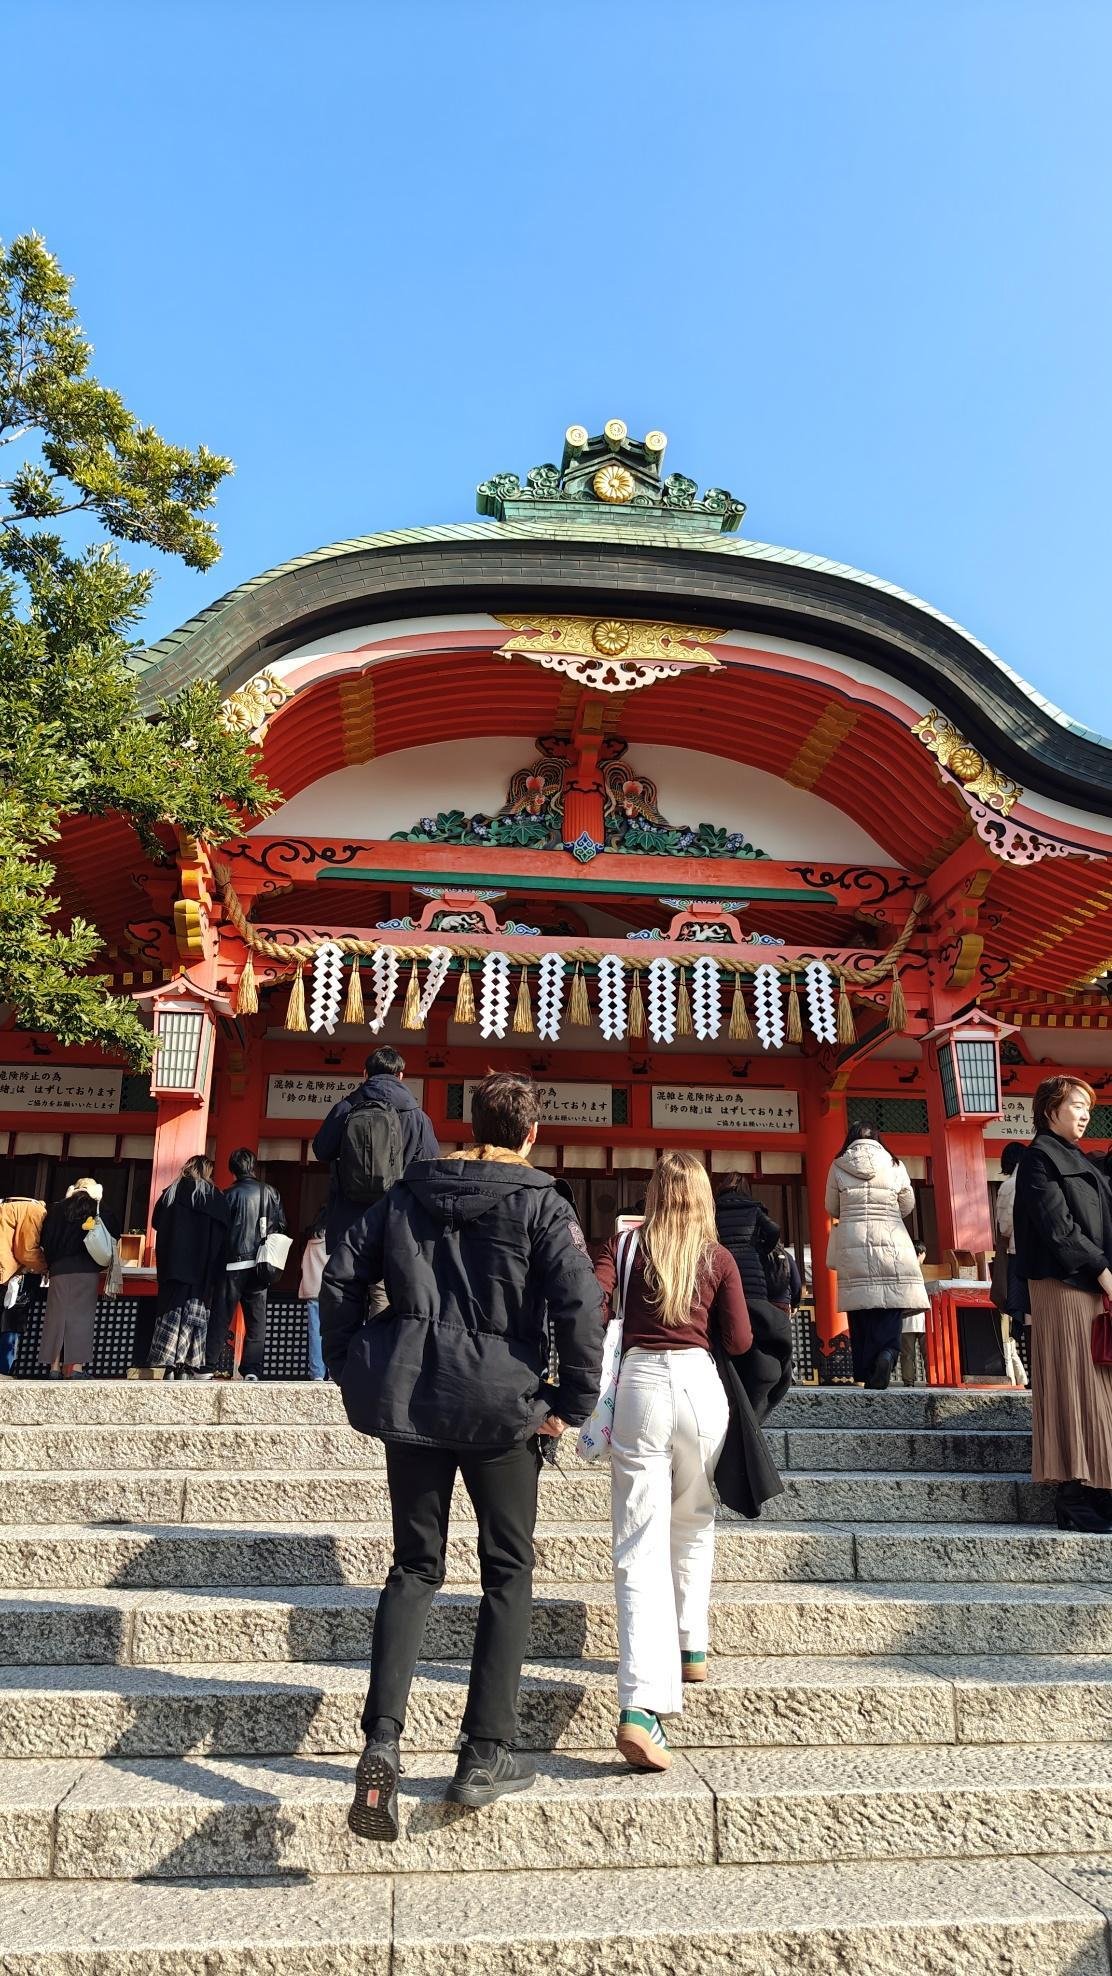
Speaking of the Honden, here’s what it looks like. In case you’re wondering, the people lining up here are likely making offerings in exchange for their wishes being granted. Essentially, you just need to look for the saisenbako or offering boxes and place your coins/offerings there.
Once you’ve placed your offerings (usually coins), bow twice, clap twice, and then make your wish before bowing for the last time.

Beside the Honden (to your right if you’re facing it) is another building called the Kaguraden. As its name implies, this building is where the Shinto dance and musical performance called kagura is performed. Unfortunately, kagura is only typically performed during major festivals.
I’ve read that you can arrange for private kagura performances but I’m not quite sure how to avail of these or how much they cost.

Before going to the Senbon Torii, I decided to check out the area surrounding the Honden. To the right of the stairs leading up to the Honden and just behind the Gehaiden, I saw this rack that lists the shrine’s major donors. Directly south of the Gehaiden is a path leading to a shrine for the poet Kada no Azumamaro.
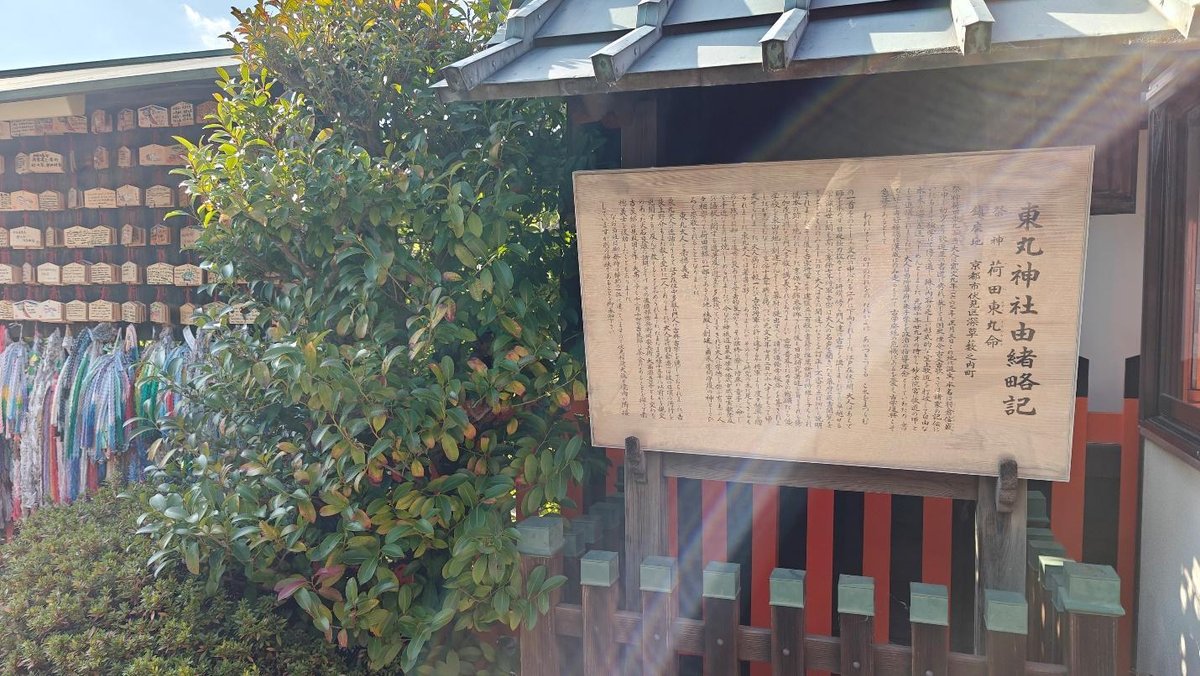
What was so intriguing about this path though was the emagake that lined both its sides.

Here’s what the shrine to Kada no Azumamaro that I was talking about earlier looks like. While it is a minor shrine here, it’s actually quite significant historically as Kada no Azumamaro was a major figure in the revival of Shinto as the state religion. Consequently, Kada no Azumamaro’s efforts also resulted in the restoration of the emperor and the imperial family into power (during the Meiji Restoration).

If the guide map is a little too hard to understand, you could always look for this sign post with directions to the notable locations in this area. It’s actually just off to the side of the large guide map from earlier and is on the garden bed in between the Haiden and the buildings with shops. Behind it is the building where you can get your Goshuin.
Other than the Honden, most of the minor shrines and buildings here also have saisenbako or offering boxes. Of course, these aren’t compulsory and you could honestly just enjoy the views here at the shrine complex without the need to place money here. That said, donations received through these actually help in the upkeep of the shrine complex so you might also want to consider putting in some of your spare change.
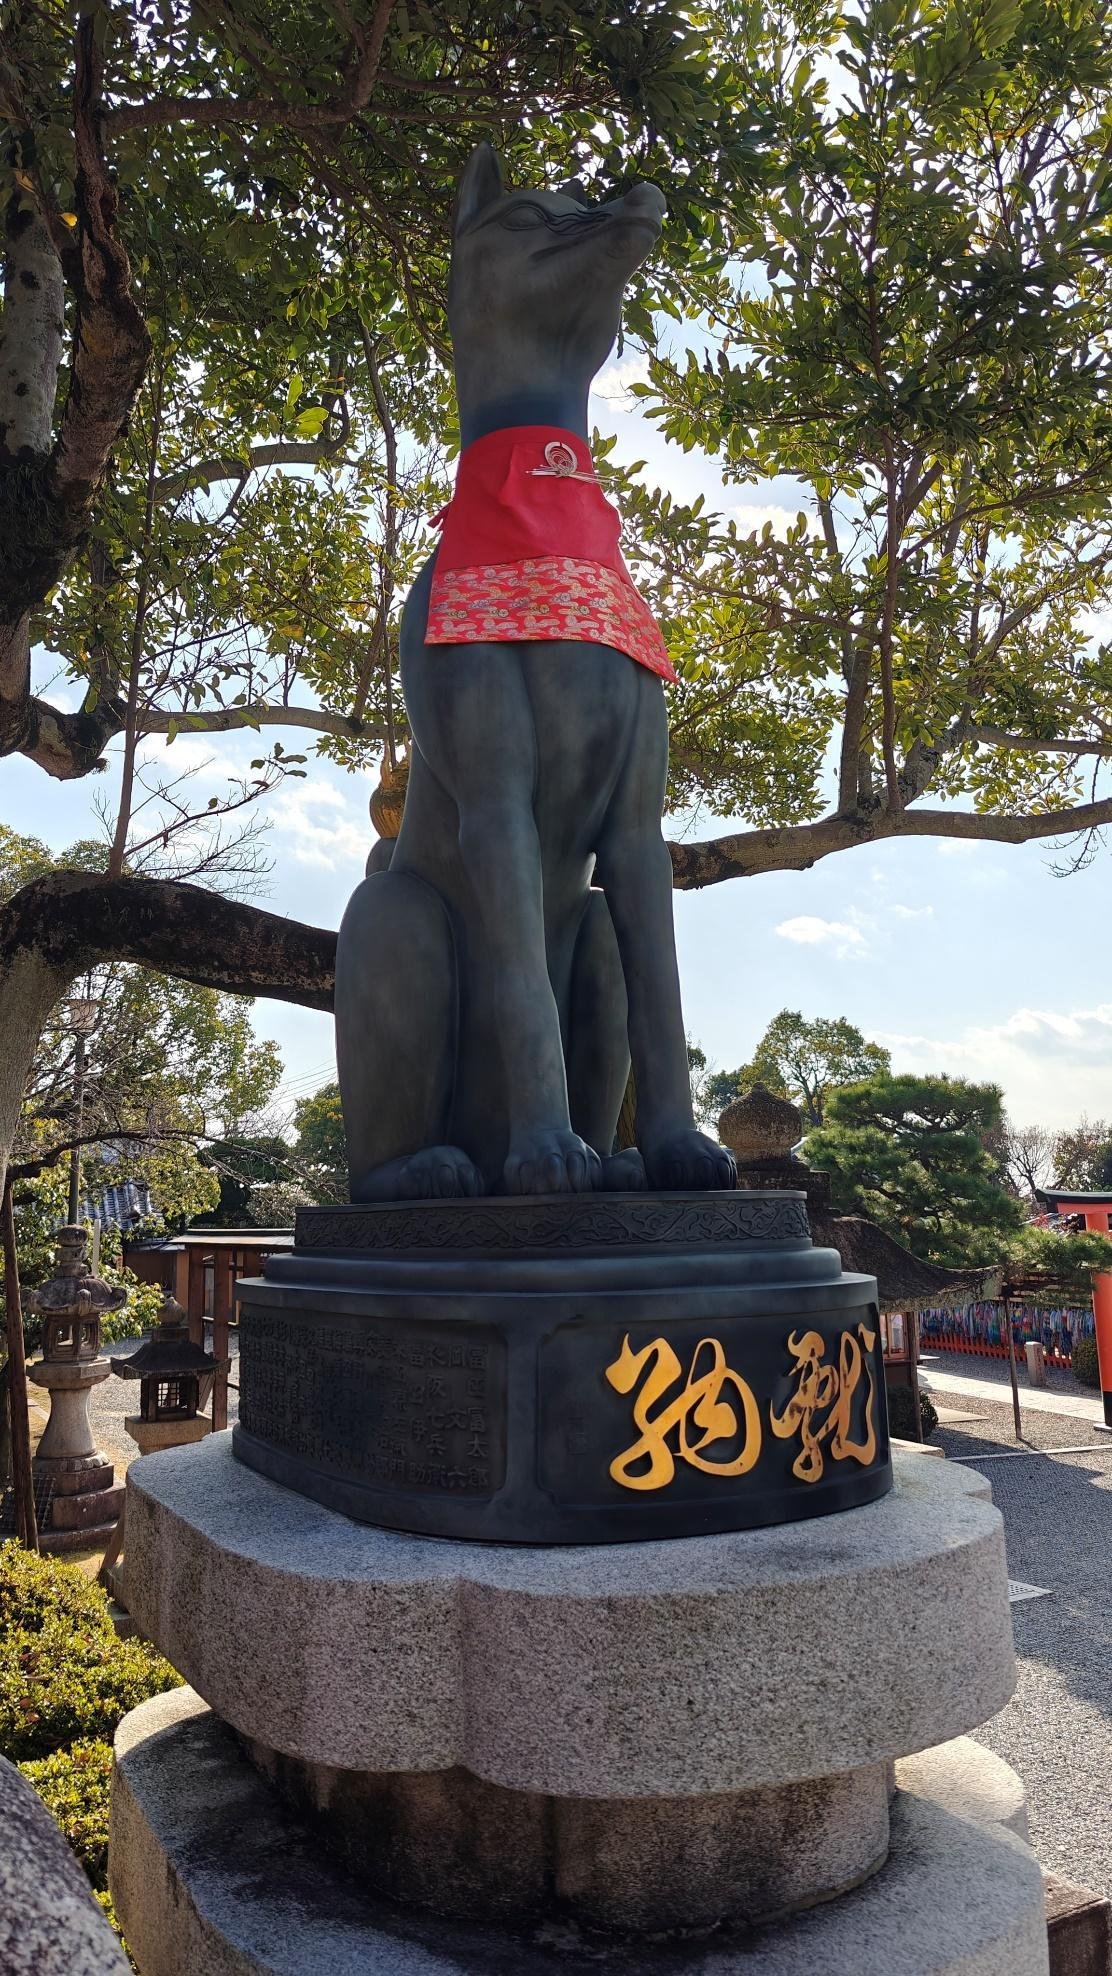
So one thing that’s going to be really egregious in your visit to Fushimi Inari Taisha is the presence of these fox statues. You’ll typically find a pair opposite each other at the top or bottom of the stairs here (e.g. the one in the image is on top of the stairs leading to the Honden). These fox statues or komakitsune are said to be the messengers of Inari and were also historically believed to have served as protectors of the rice fields as they hunted for rodents.
Aside from statues, you’ll also see a lot of kitsune themed souvenirs as well as goods being sold specially at the shops near the back approach road that you saw earlier.
Speaking of the back approach road, if you follow it past the Omamori no Jyuyosho building (which itself is beside the Honden) then you should find yourself at this torii gate at the bottom of a staircase. Again, these stairs and the torii gate are flanked by a pair of komakitsune. Now this area is a little busy due to it not only being a great spot for taking photos but also due to it leading to what’s perhaps the most iconic section of the shrine complex.
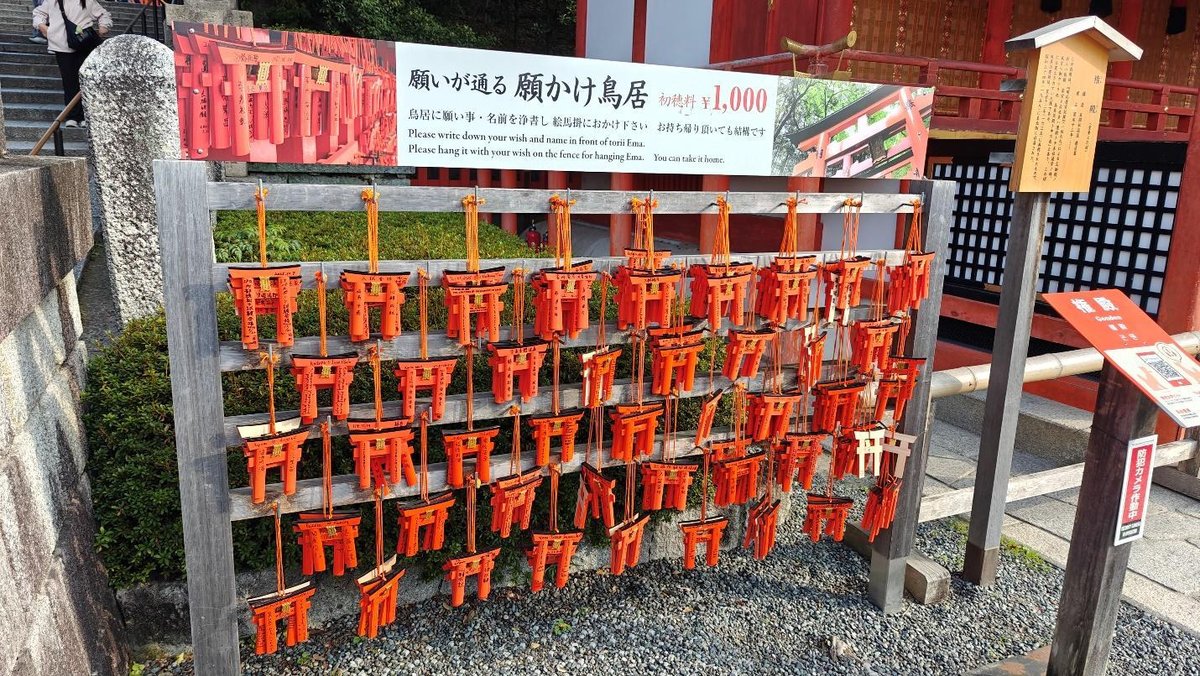
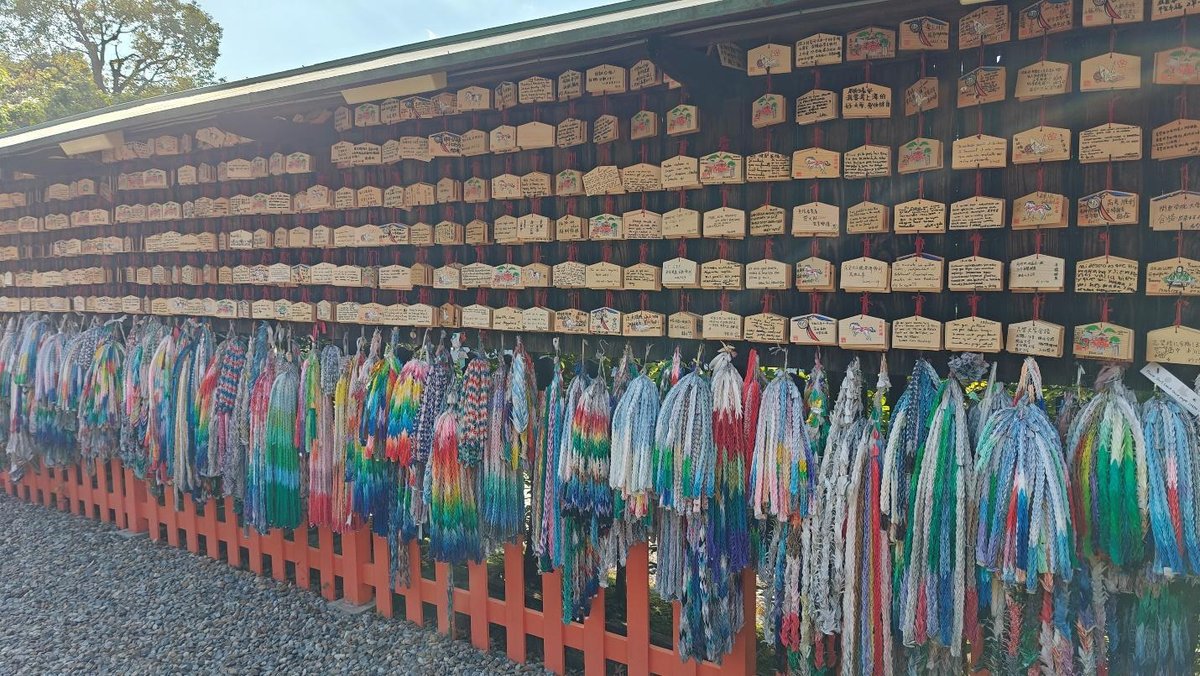
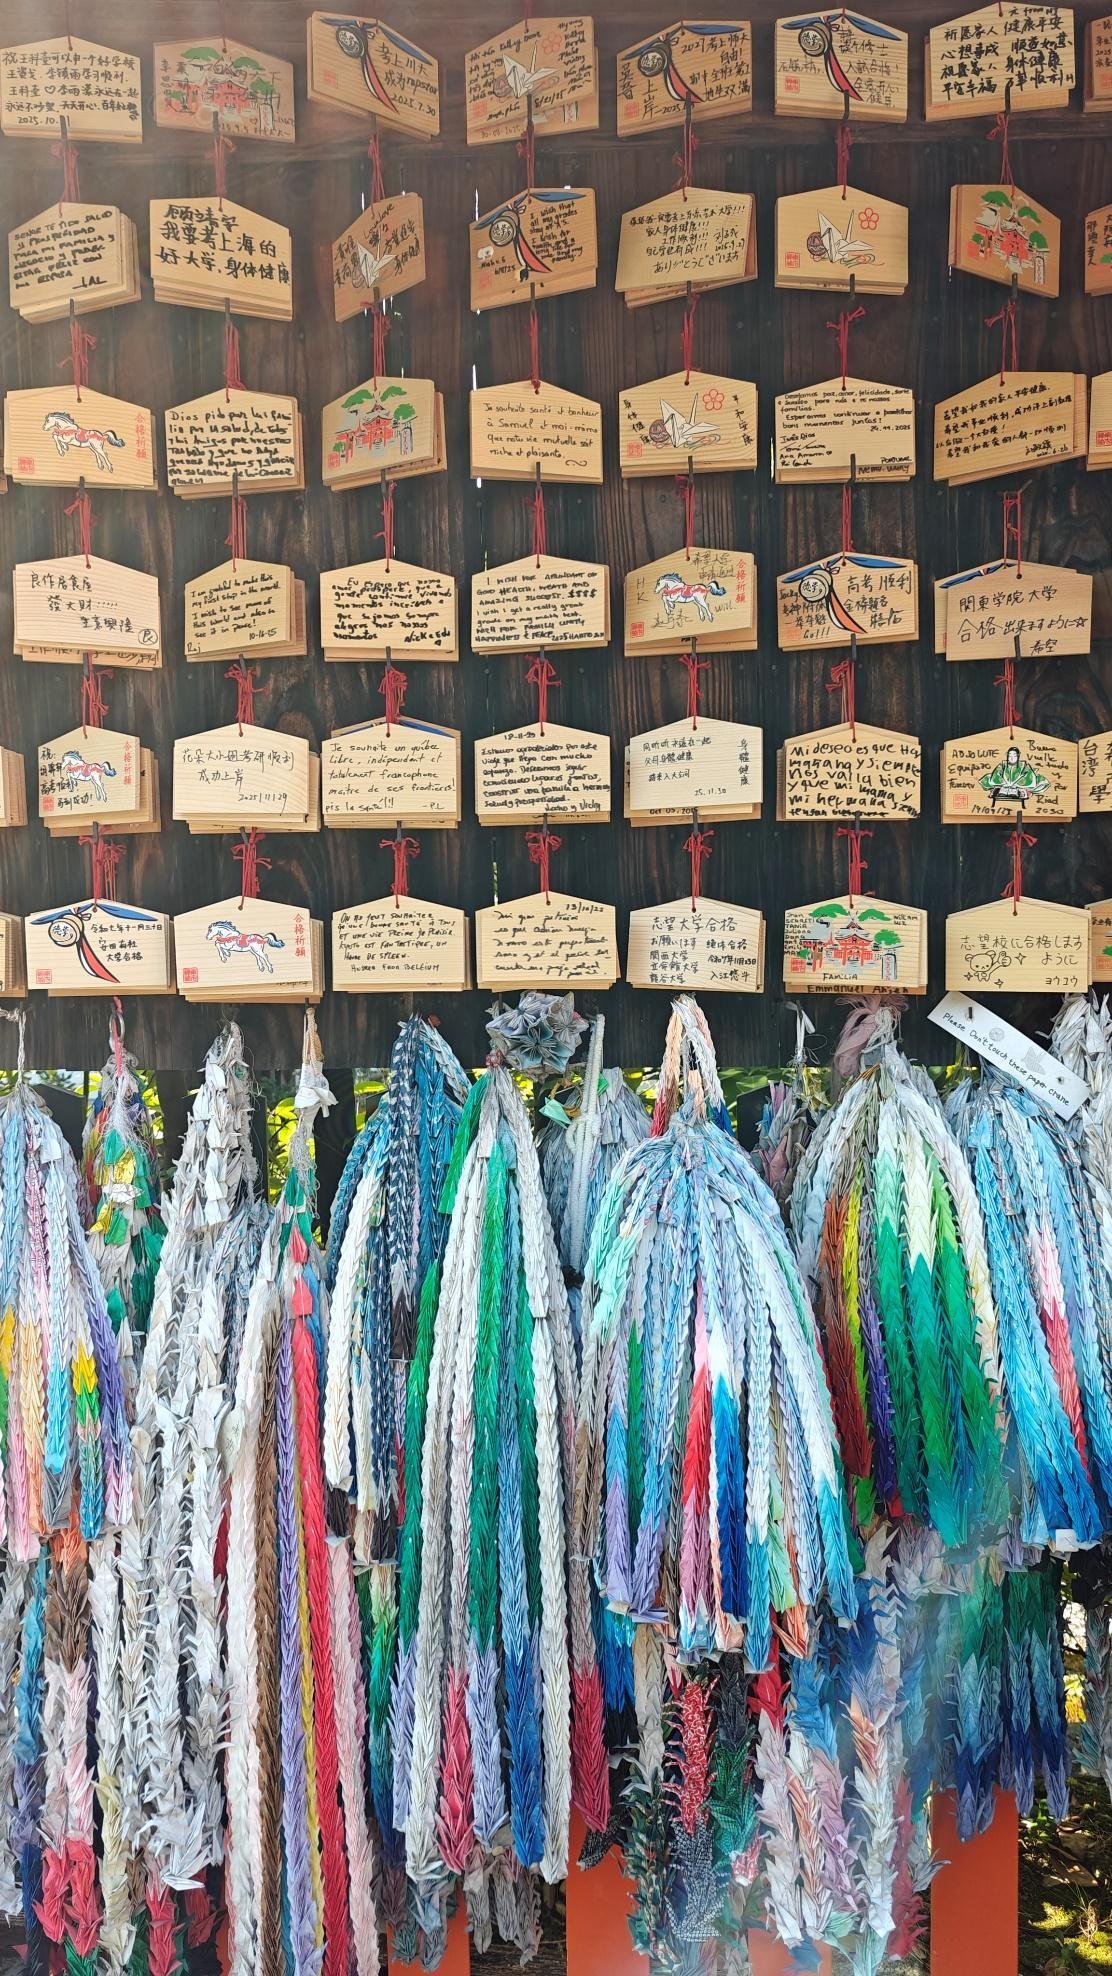
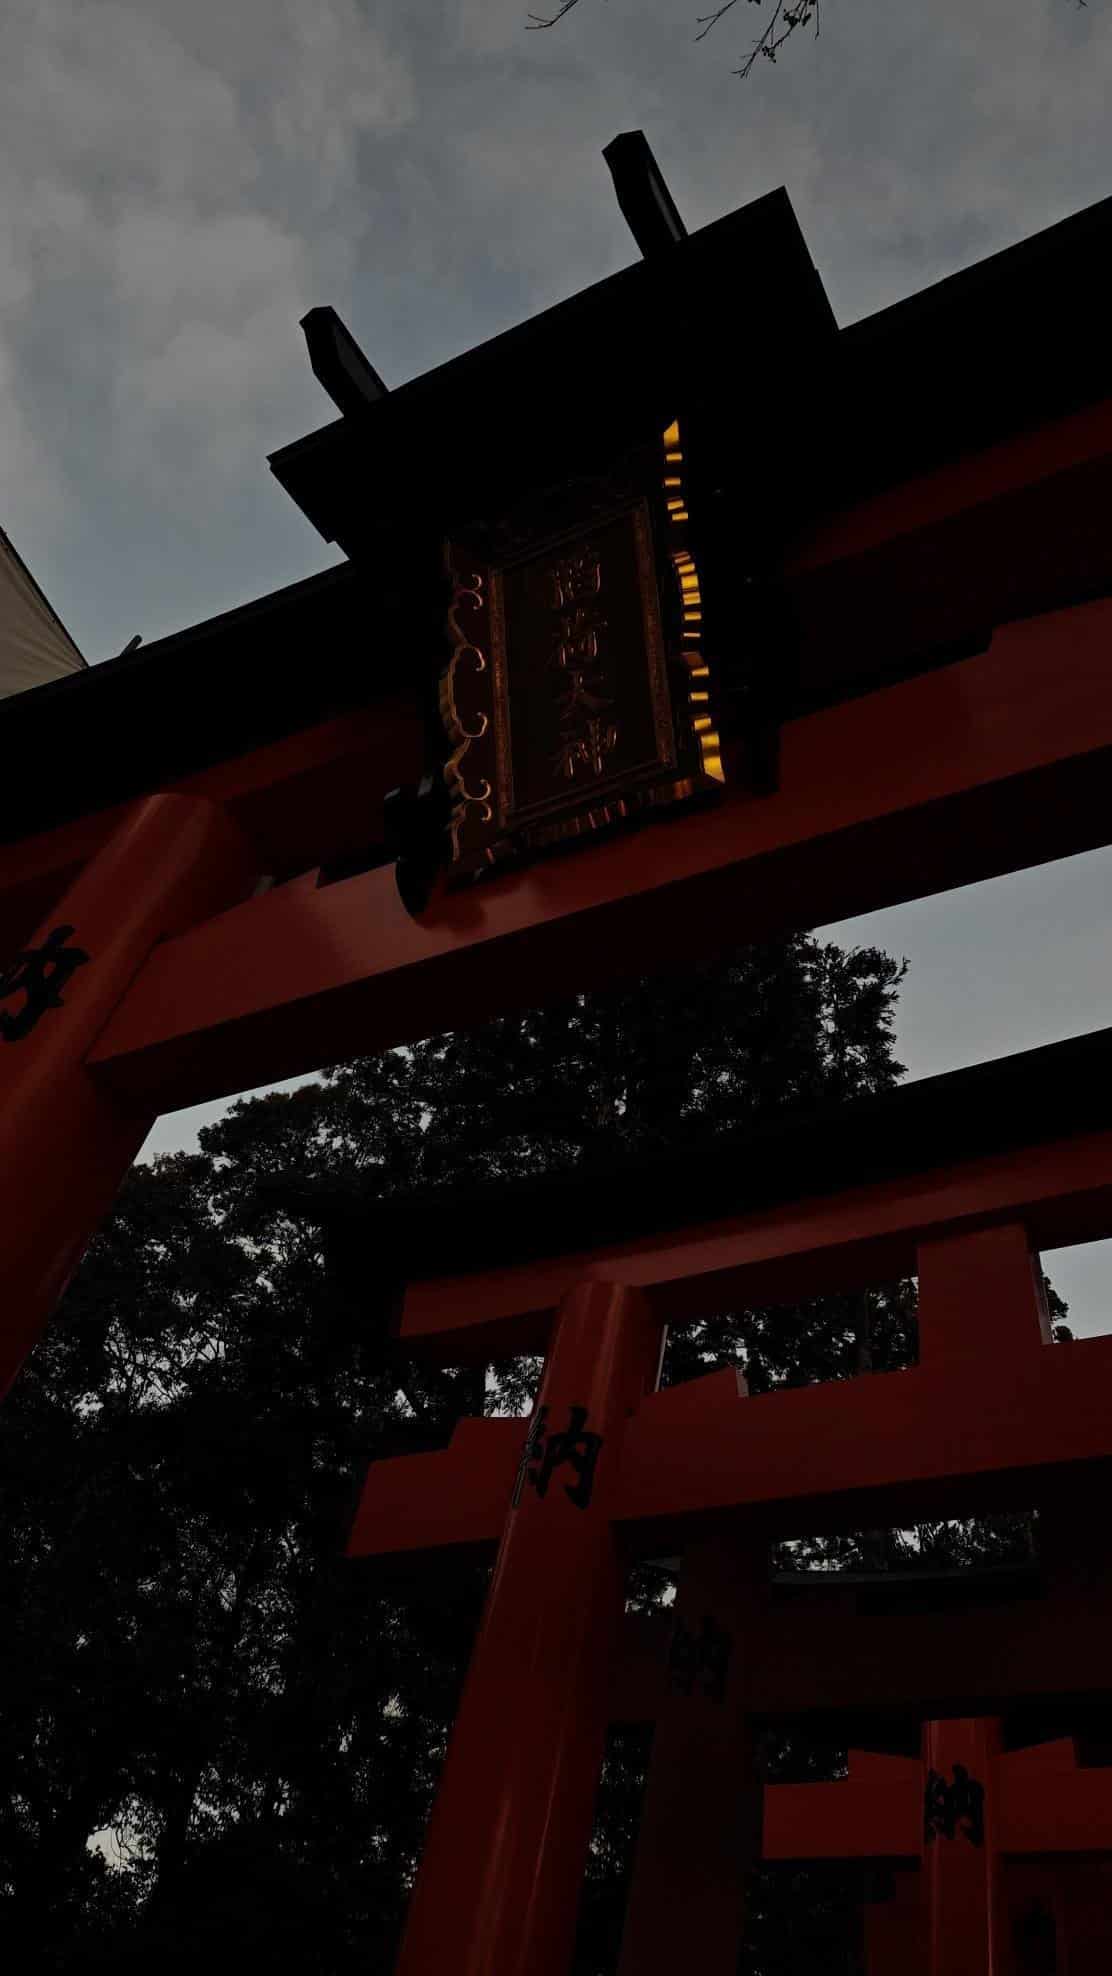
Beside the staircase from earlier is an emagake with some unique looking ema. Aside from the komakitsune, the other feature that Fushimi Inari is known for is the Senbon Tori which I believe these are a reference to. While these are on the pricey side at 1000 yen each, the price is still within the range that ema typically go for in other shrines and temples.
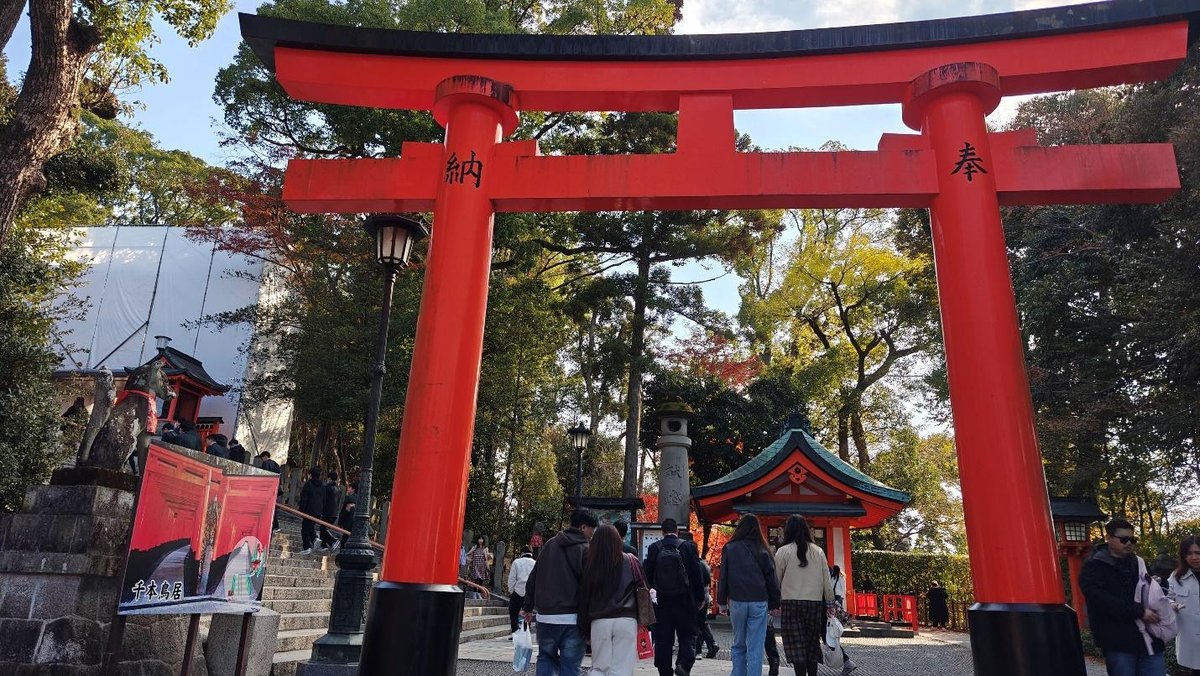
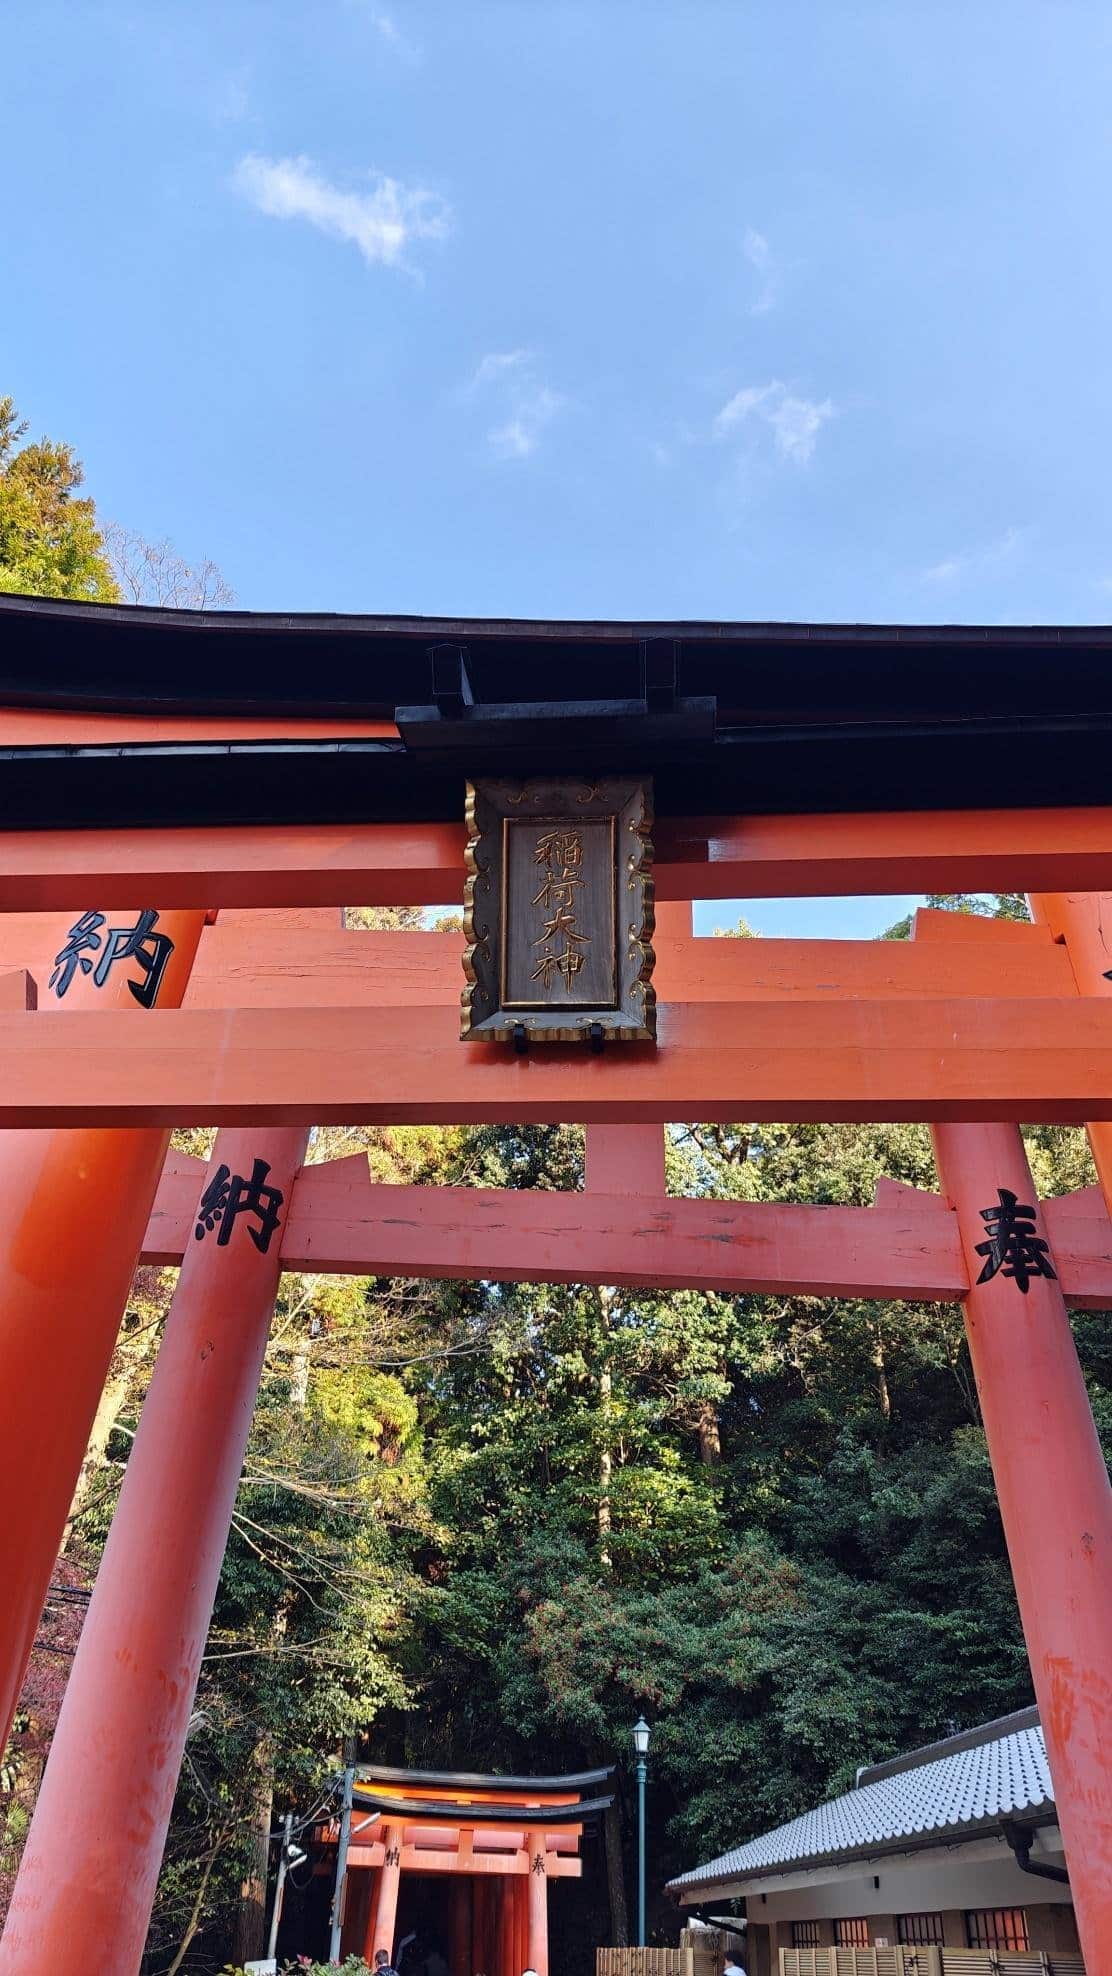
Once you reach the top, you’ll find a minor shrine called the Tamayama Inari Shrine and another torii to your right. If you want to go and see the Senbon Torii then you’re going to want to head past this torii and then go up another set of stairs. From there you’ll come across the Okumiya which is a shrine dedicated to Inari Okami.
Just beside it to its left is a smaller shrine called the Byakossha dedicated to Inari Okami’s white fox messengers.
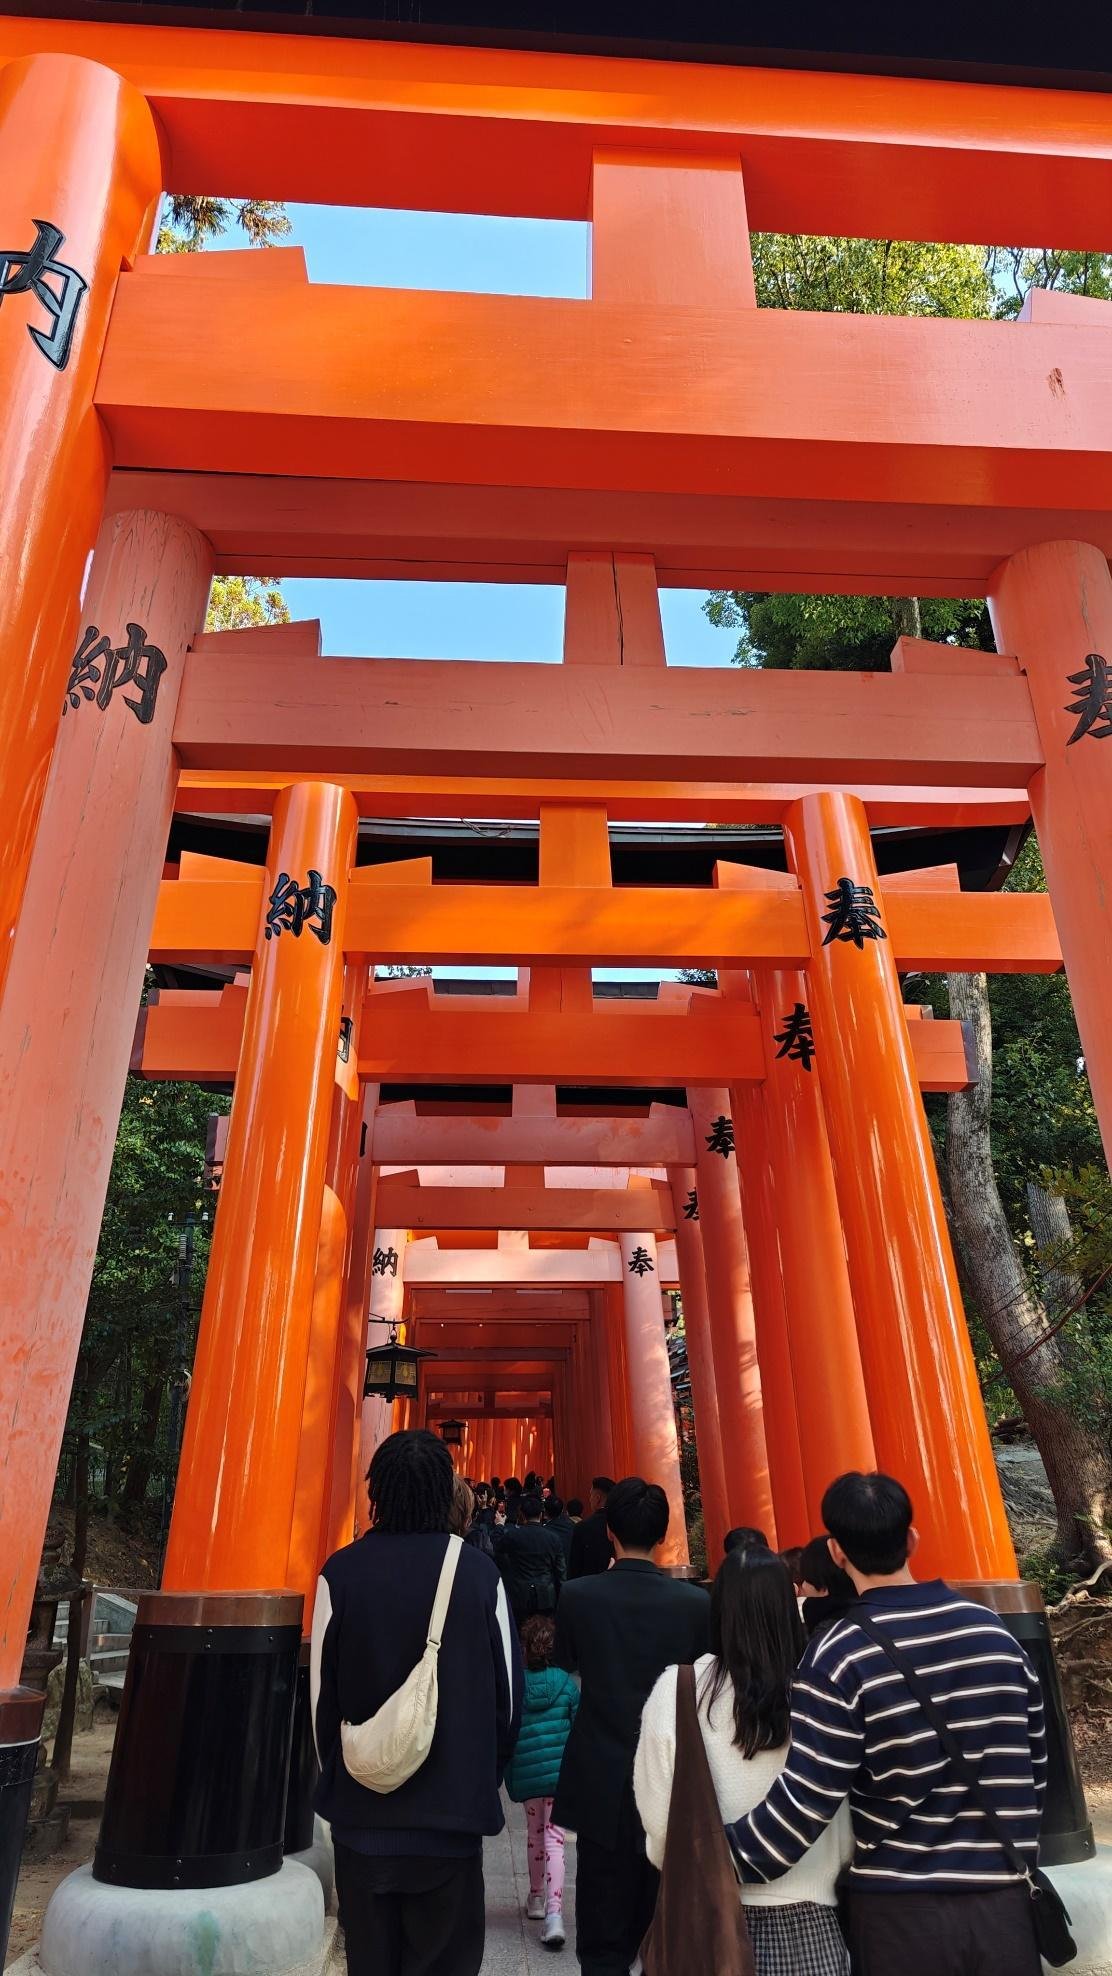
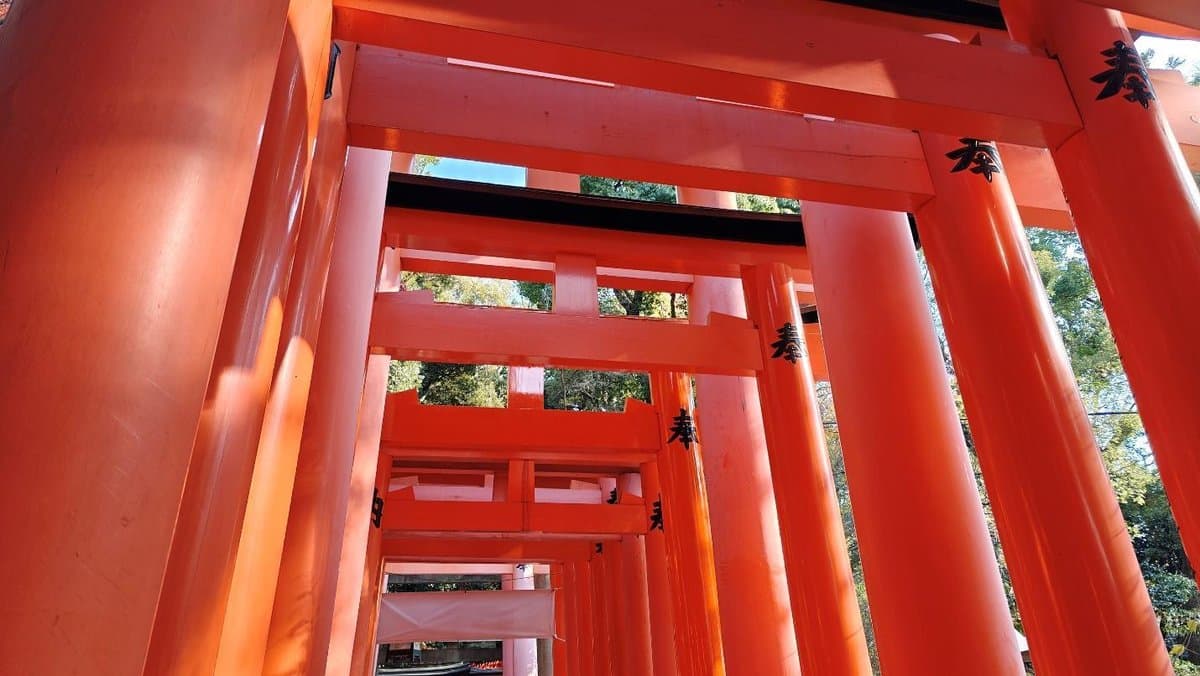
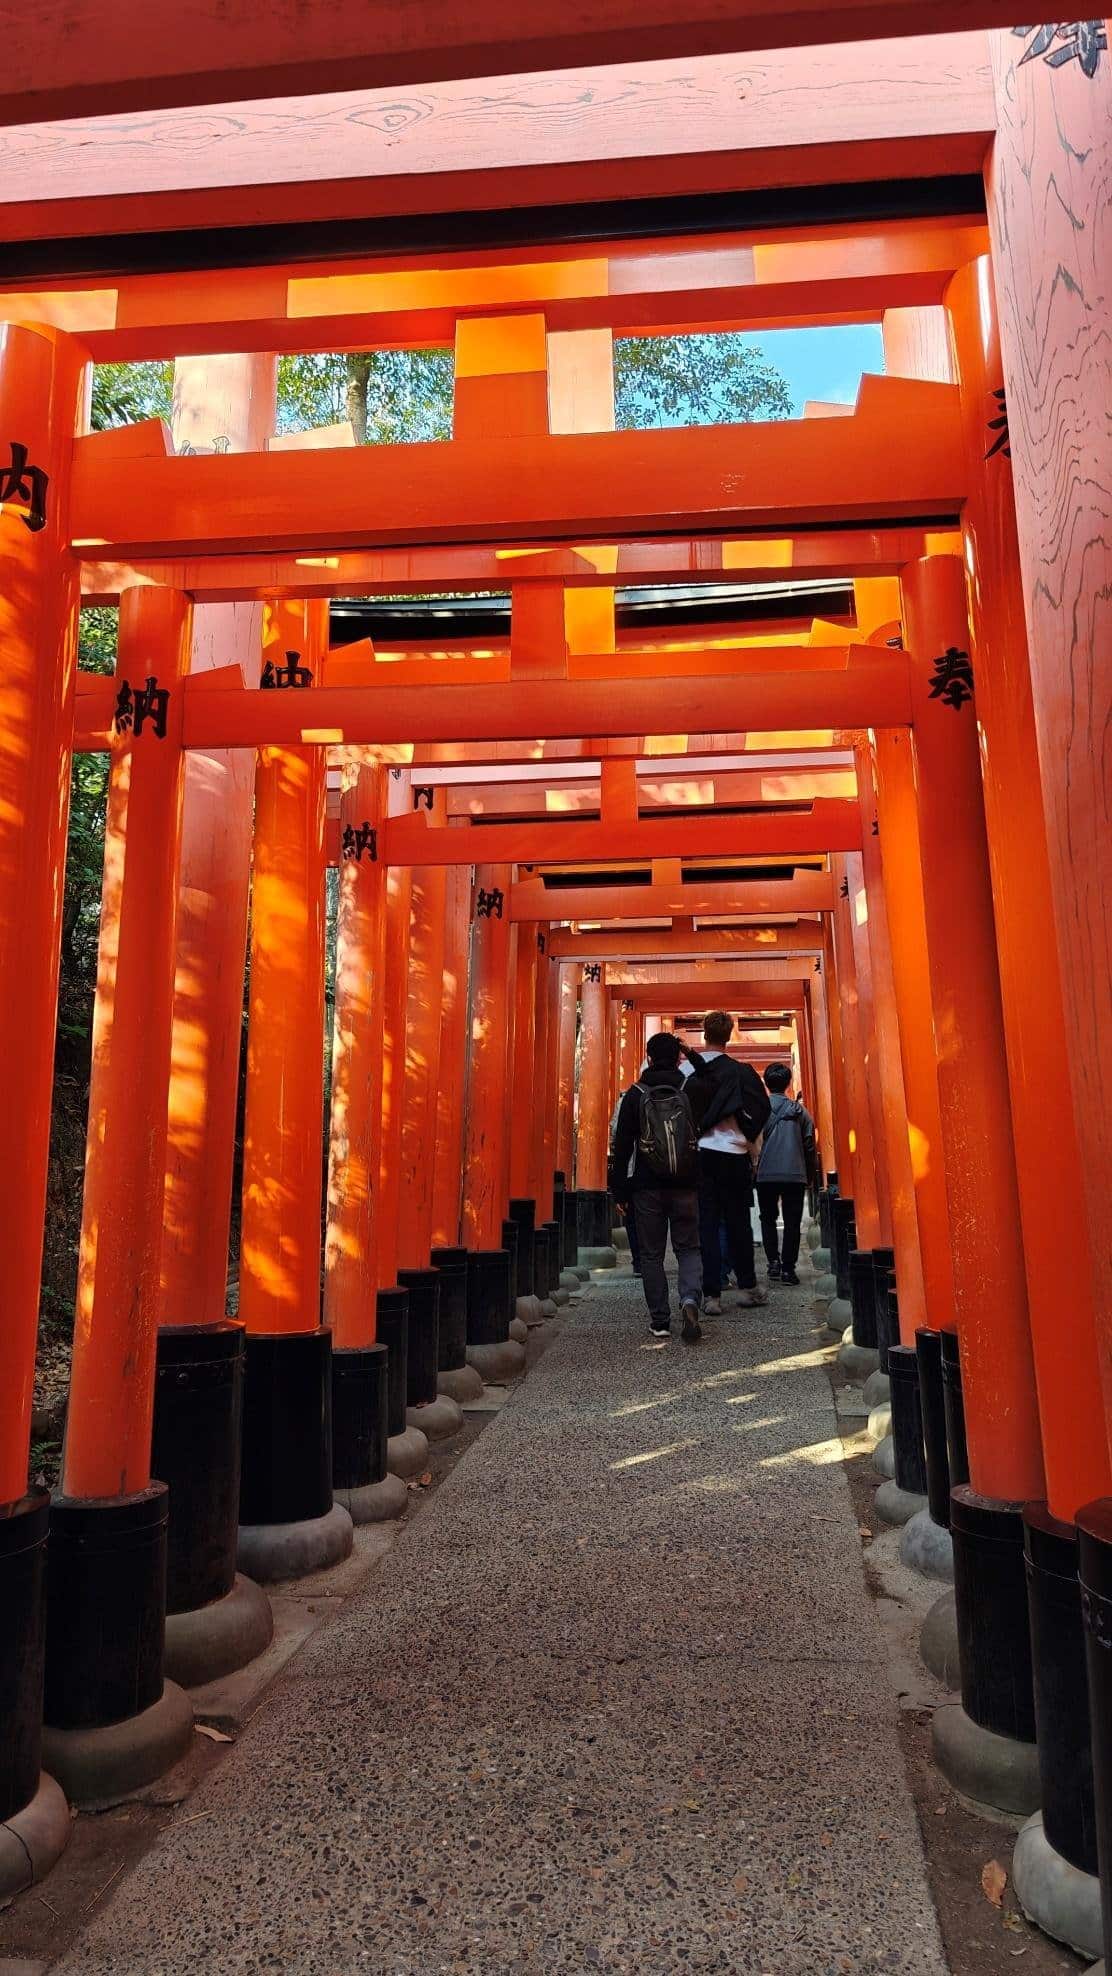
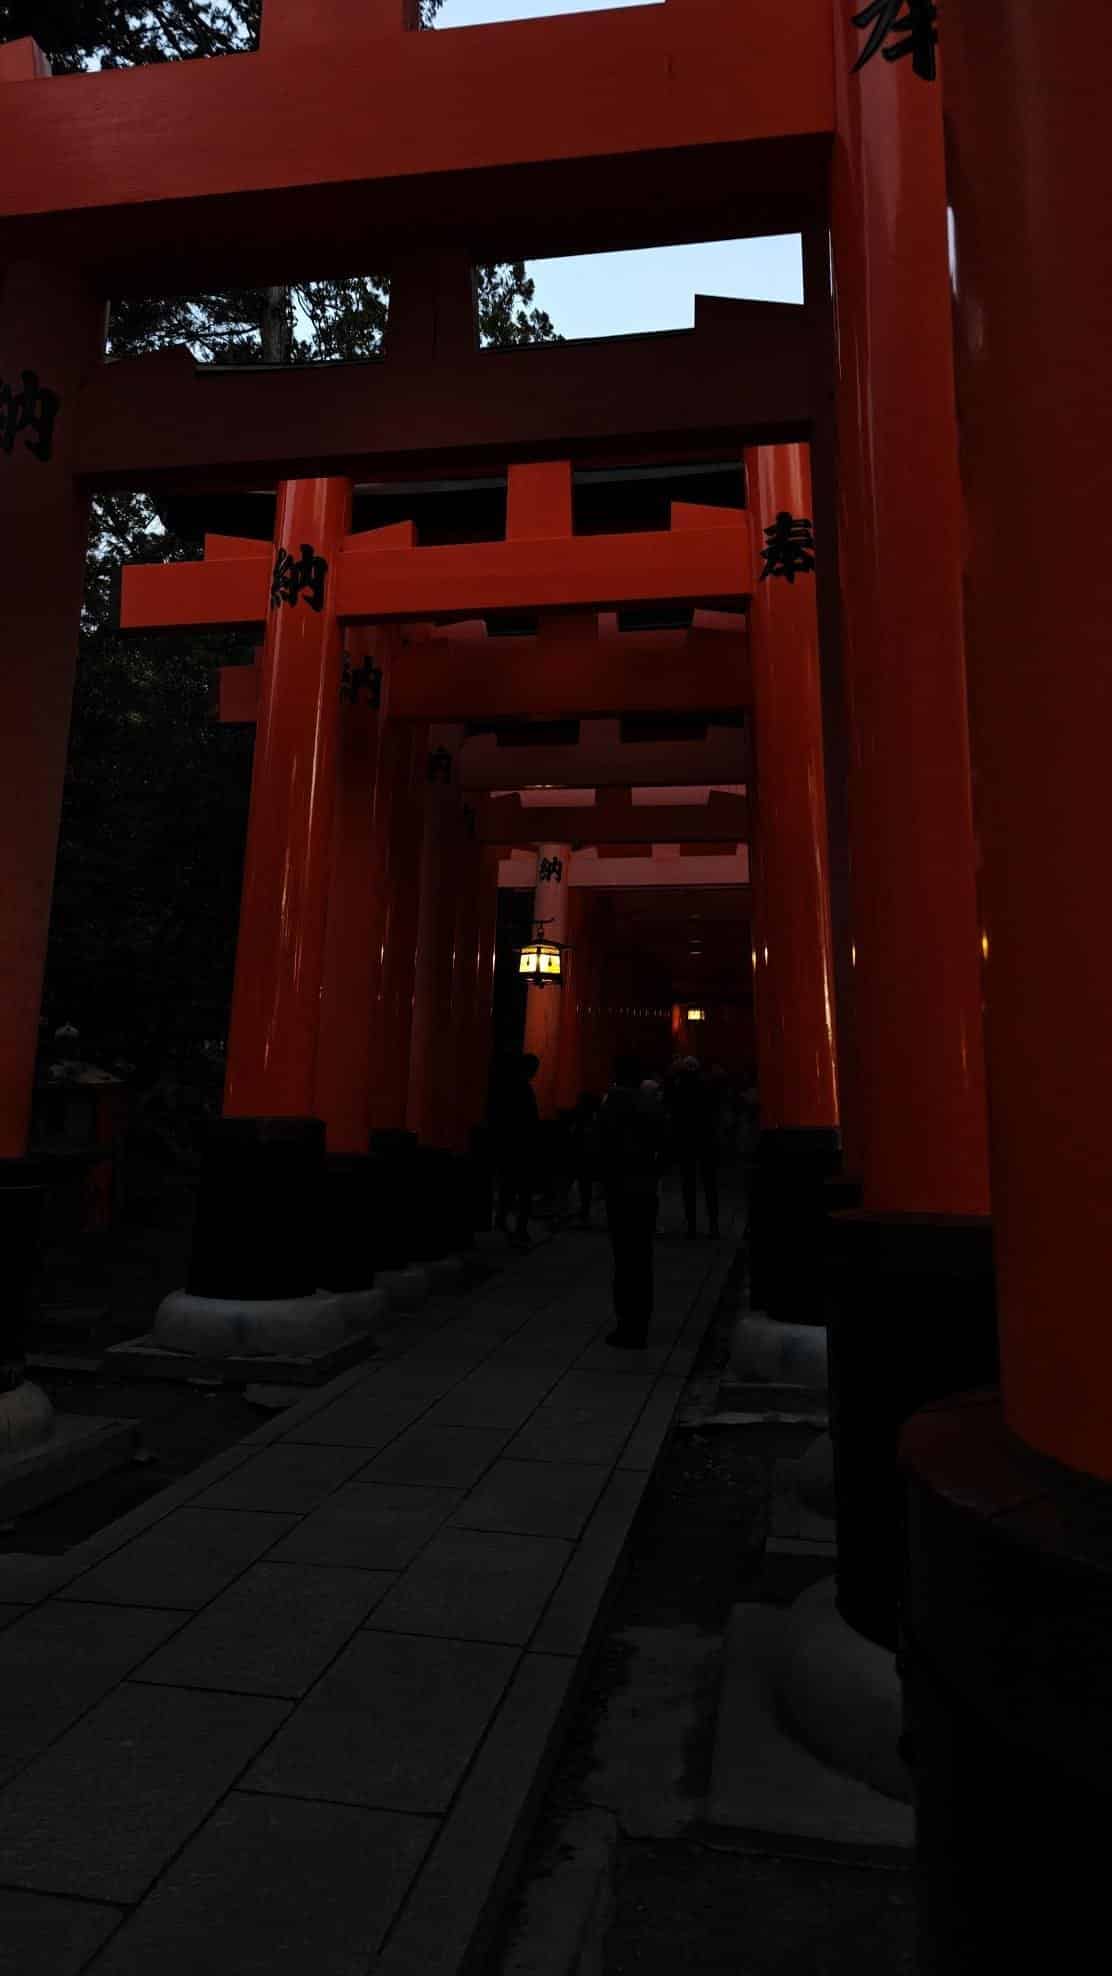
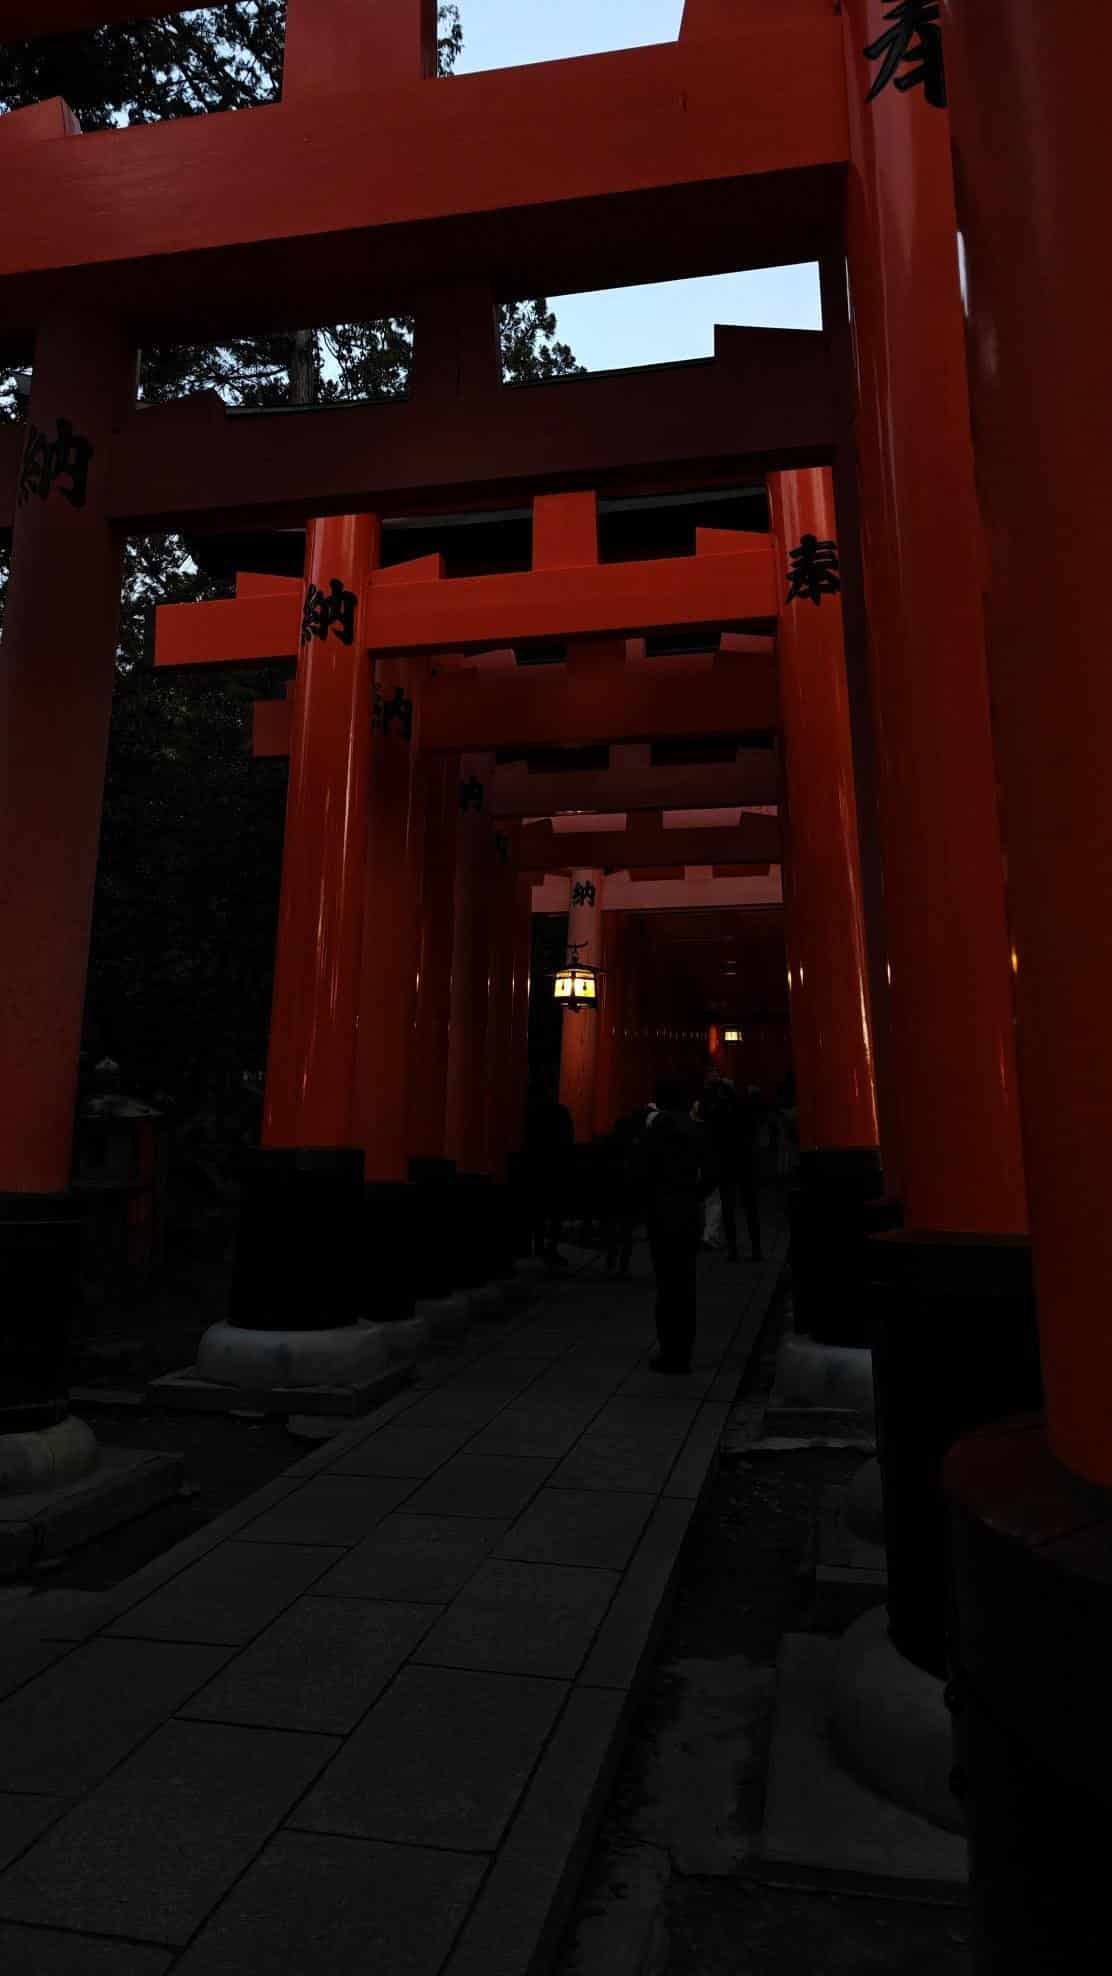
After a very short walk past the Okumiya and the Byakossha, you’re then going to see the start of the Senbon Torii. Roughly translated, the name means “thousands of torii gates” and let me tell you, this was such an awesome sight to see. In fact, I don’t really think the pictures I took do this place any justice.
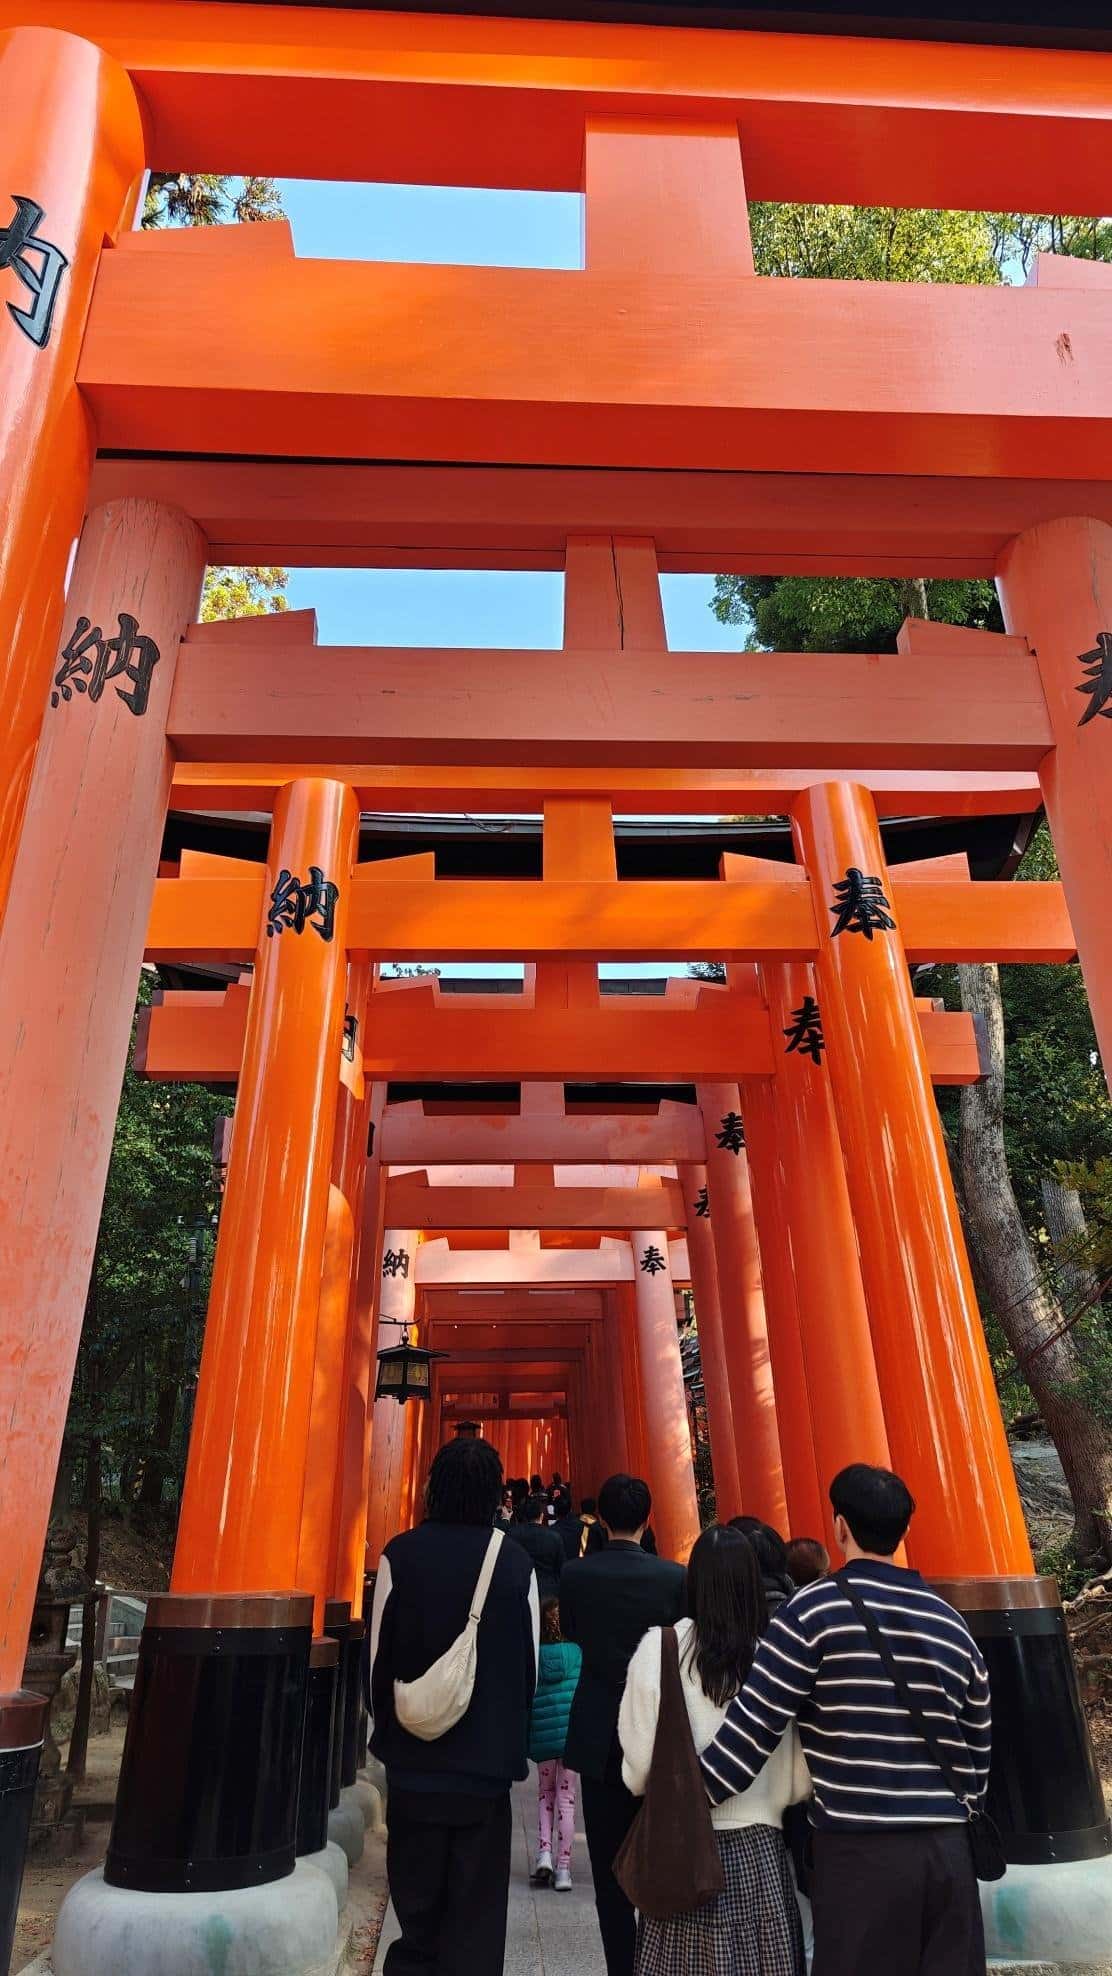
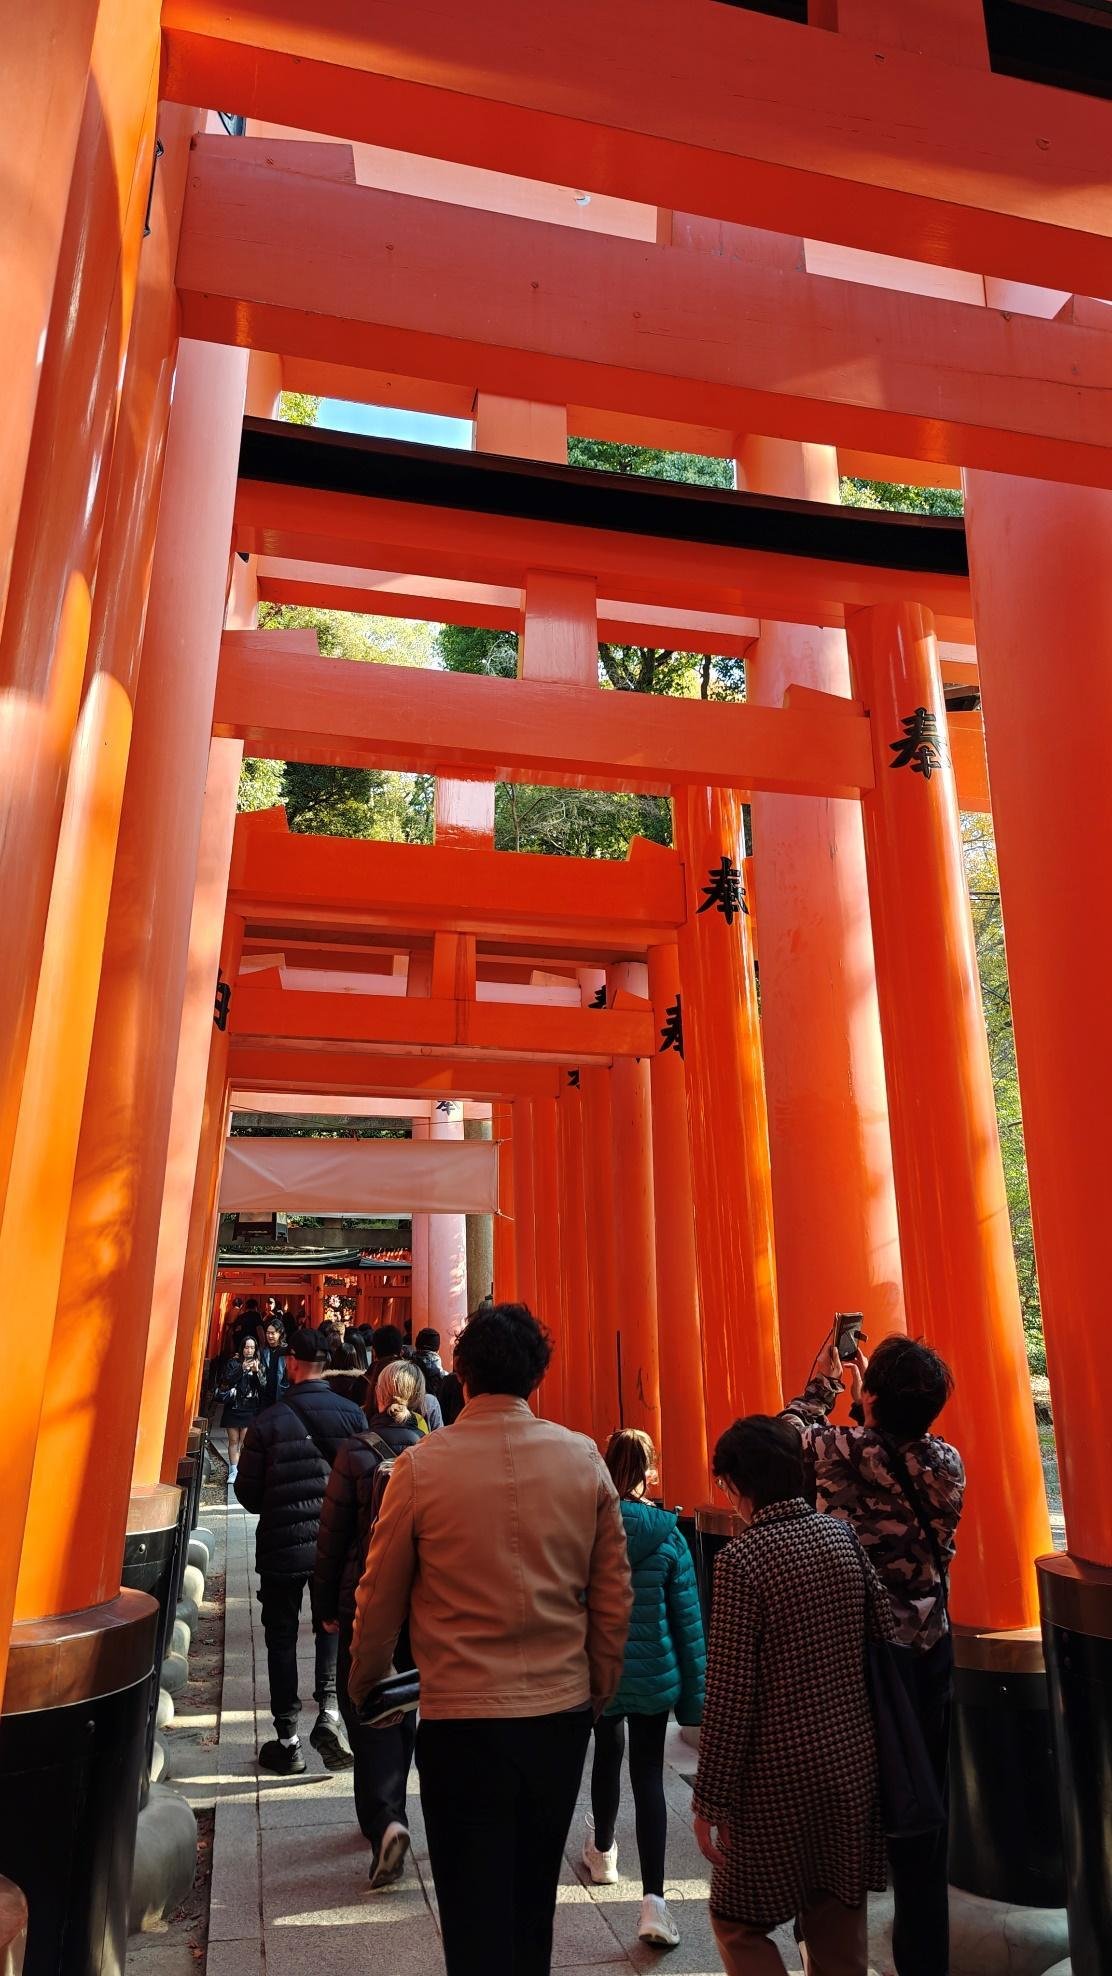
Now the “thousands of torii gates” translation isn’t an exaggeration. There actually are 10000 torii gates here. As for what these gates symbolize, it’s said that they represent the transition of the visitor from the physical realm to that of a space that’s spiritual and sacred.
Moreover, each of these gates are donations from individuals as well as businesses looking to improve their fortunes further.
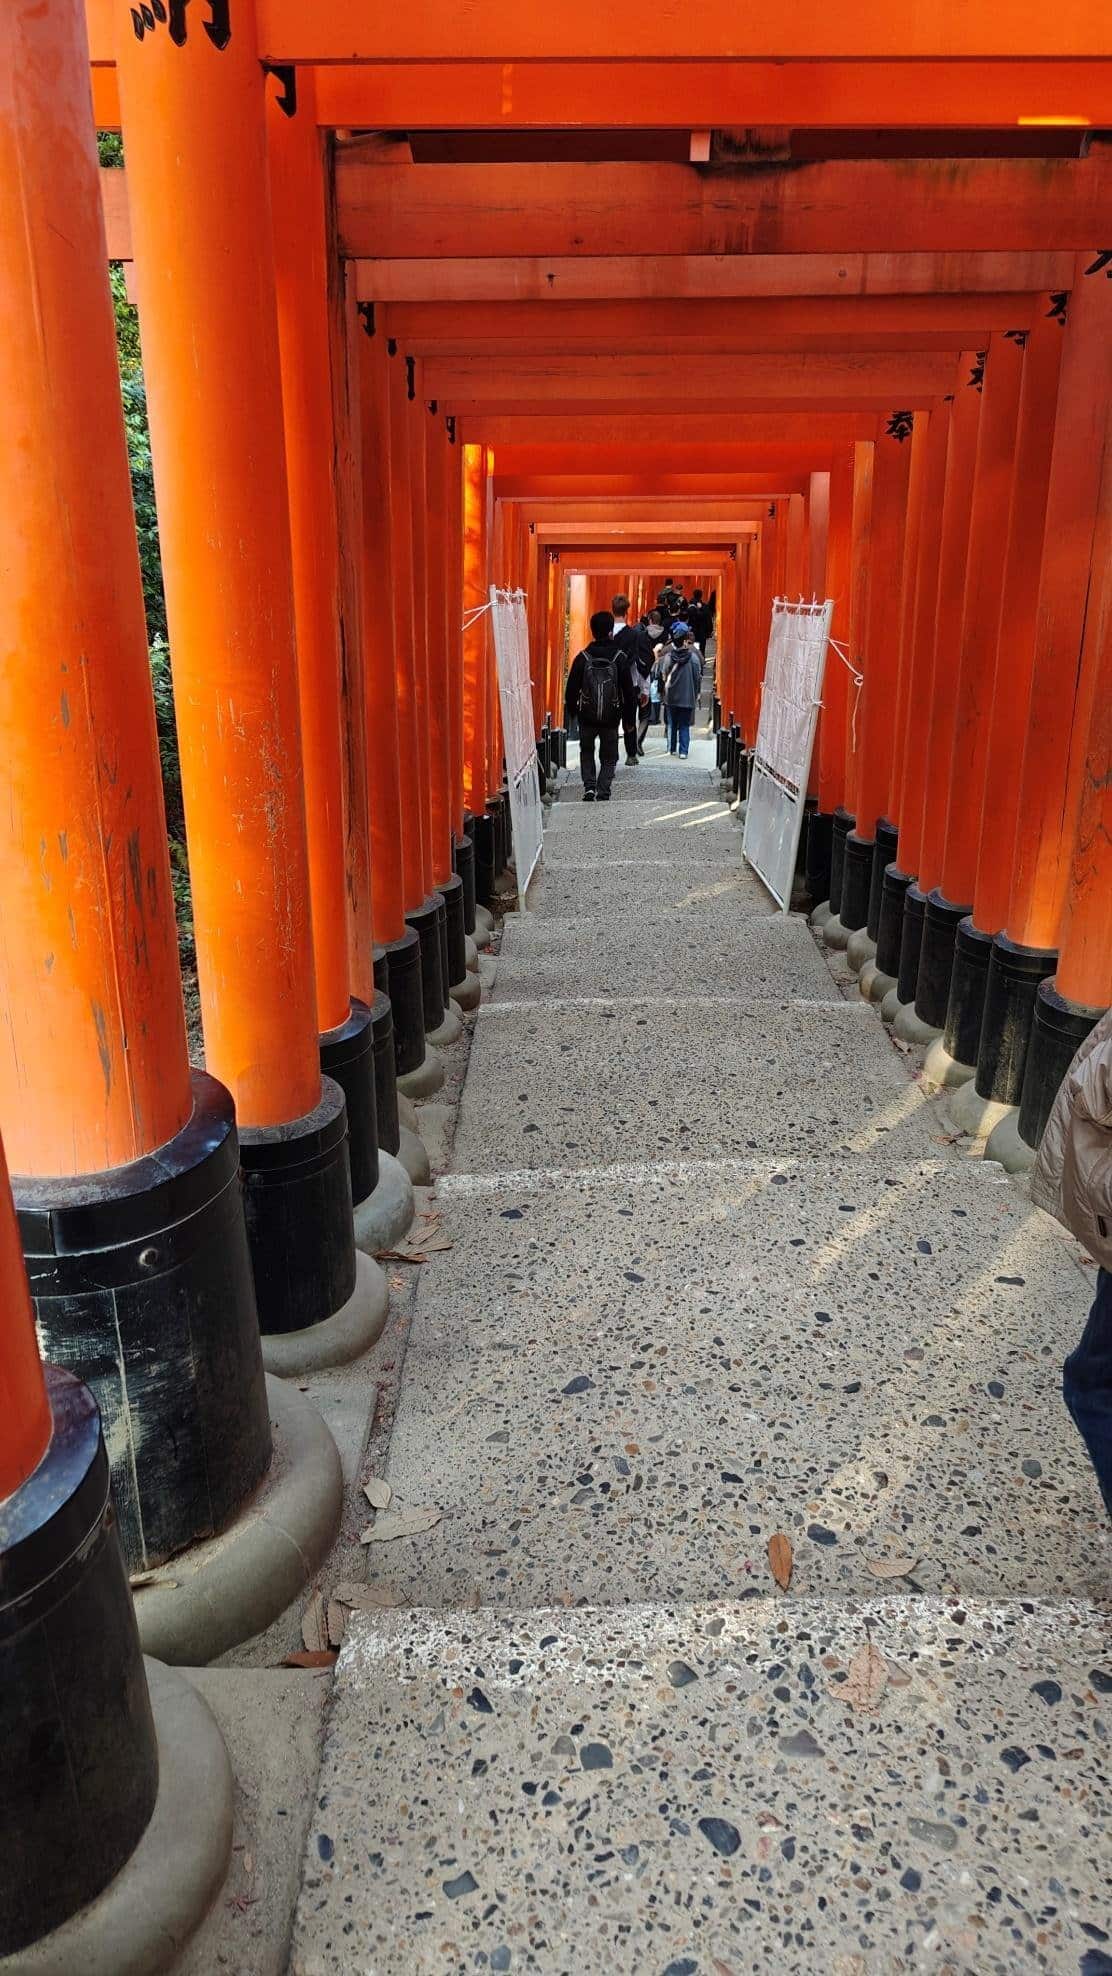
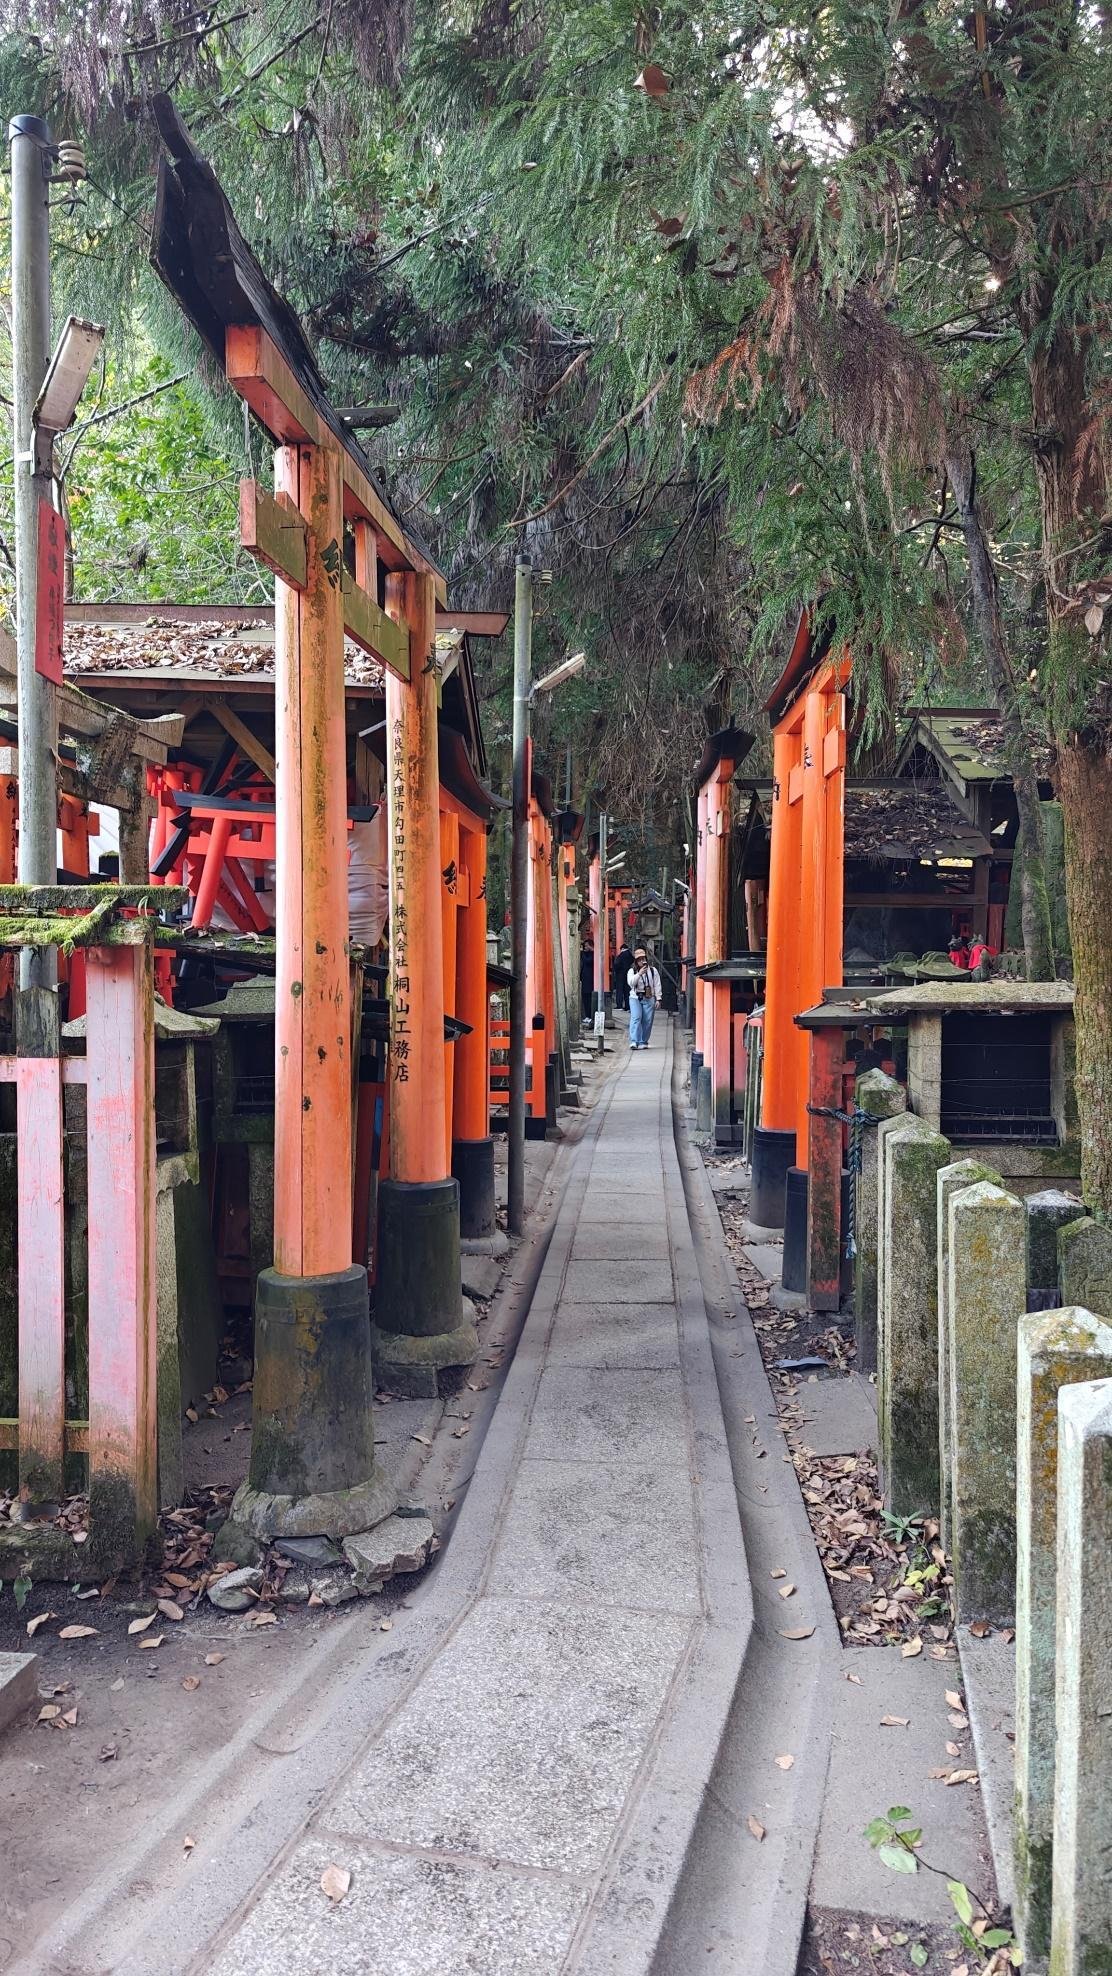
At some point (around a third of the way to the Okusha Hohaisho stop), the path splits into two. Both of these paths still have torii gates but they’re noticeably smaller and shorter. Additionally, these didn’t have the amazing komorebi (sunlight that filters through tree leaves and the torii gates) from the first third of the path due to how close the gates are to each other.

At the end of the two split paths is the Okusha Hohaisho. Visitors can rest here and pay their respects to the shrine in the middle. Moreover, there are stalls that sell food here and even a teahouse called Daisu Chaya.
If they want to answer the call of nature then you can also make use of the public wash and restroom here before you proceed any further.
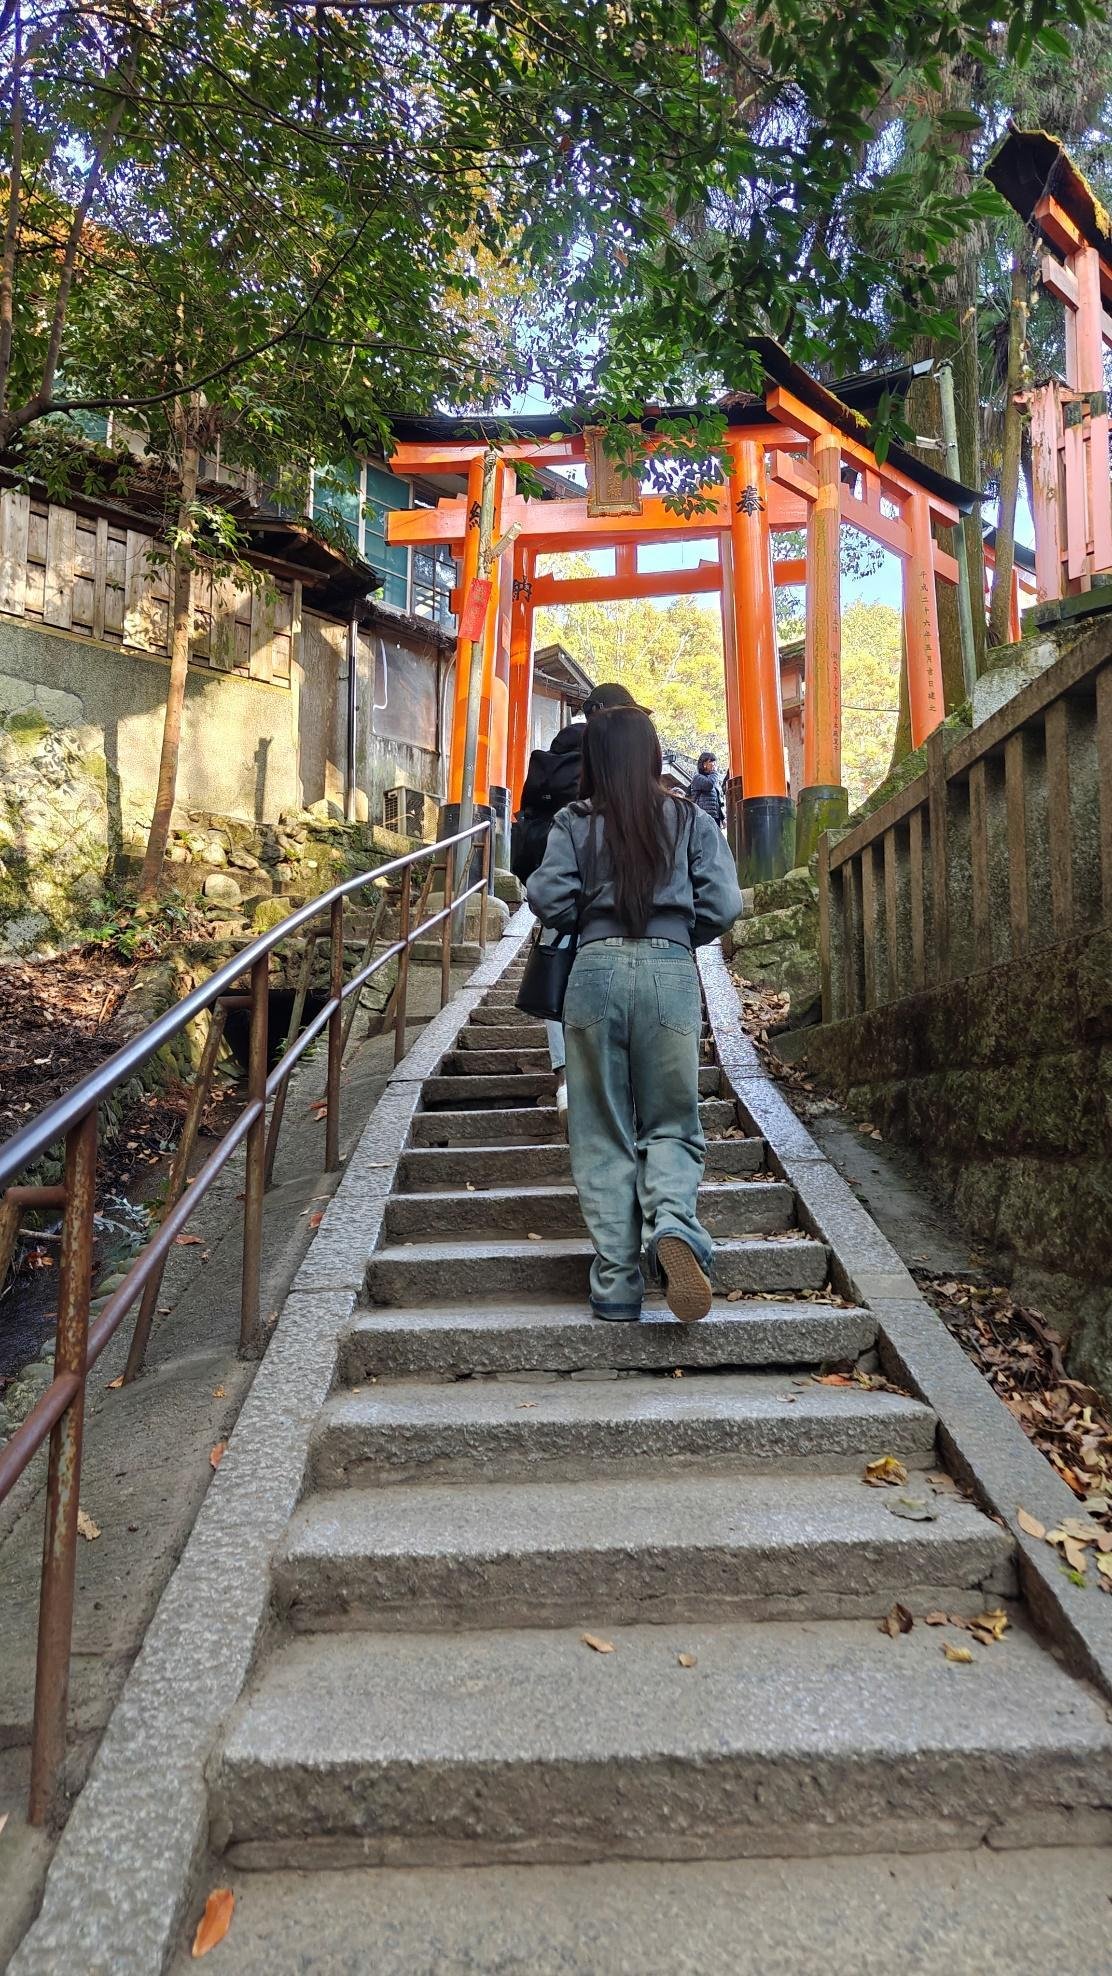
I already managed to rest for a bit so I decided to continue my hike up. From the entrance of the Okusha Worship Center area, I took the path on the left to do so. Now, the hike to get to the shrine on top of Mt. Inari can be a bit daunting if you’re not used to walking.
In total the path is just four kilometers long but a lot of that is going up which is definitely not as easy as walking on flat ground.

Midway through the path is this junction. If you follow the stairs down you can actually get back to the area before the Okusha Hohaisho where the path split in two. I was intent on going up though so I decided to continue following the path.
I eventually came across another junction which gave me the option to go down and head back directly to the Tamayama Inari Shrine or continue up. Thinking that I still had plenty of time, I went on up instead. Anyway, this area is about a fifth of the way from my eventual end destination.
In case you went past Okusha Hohaisho then make sure to do your business here as it’s going to be the last public restroom (it’s in the building in the midground) you’ll be seeing up until your reach the Kumataka Shrine area.
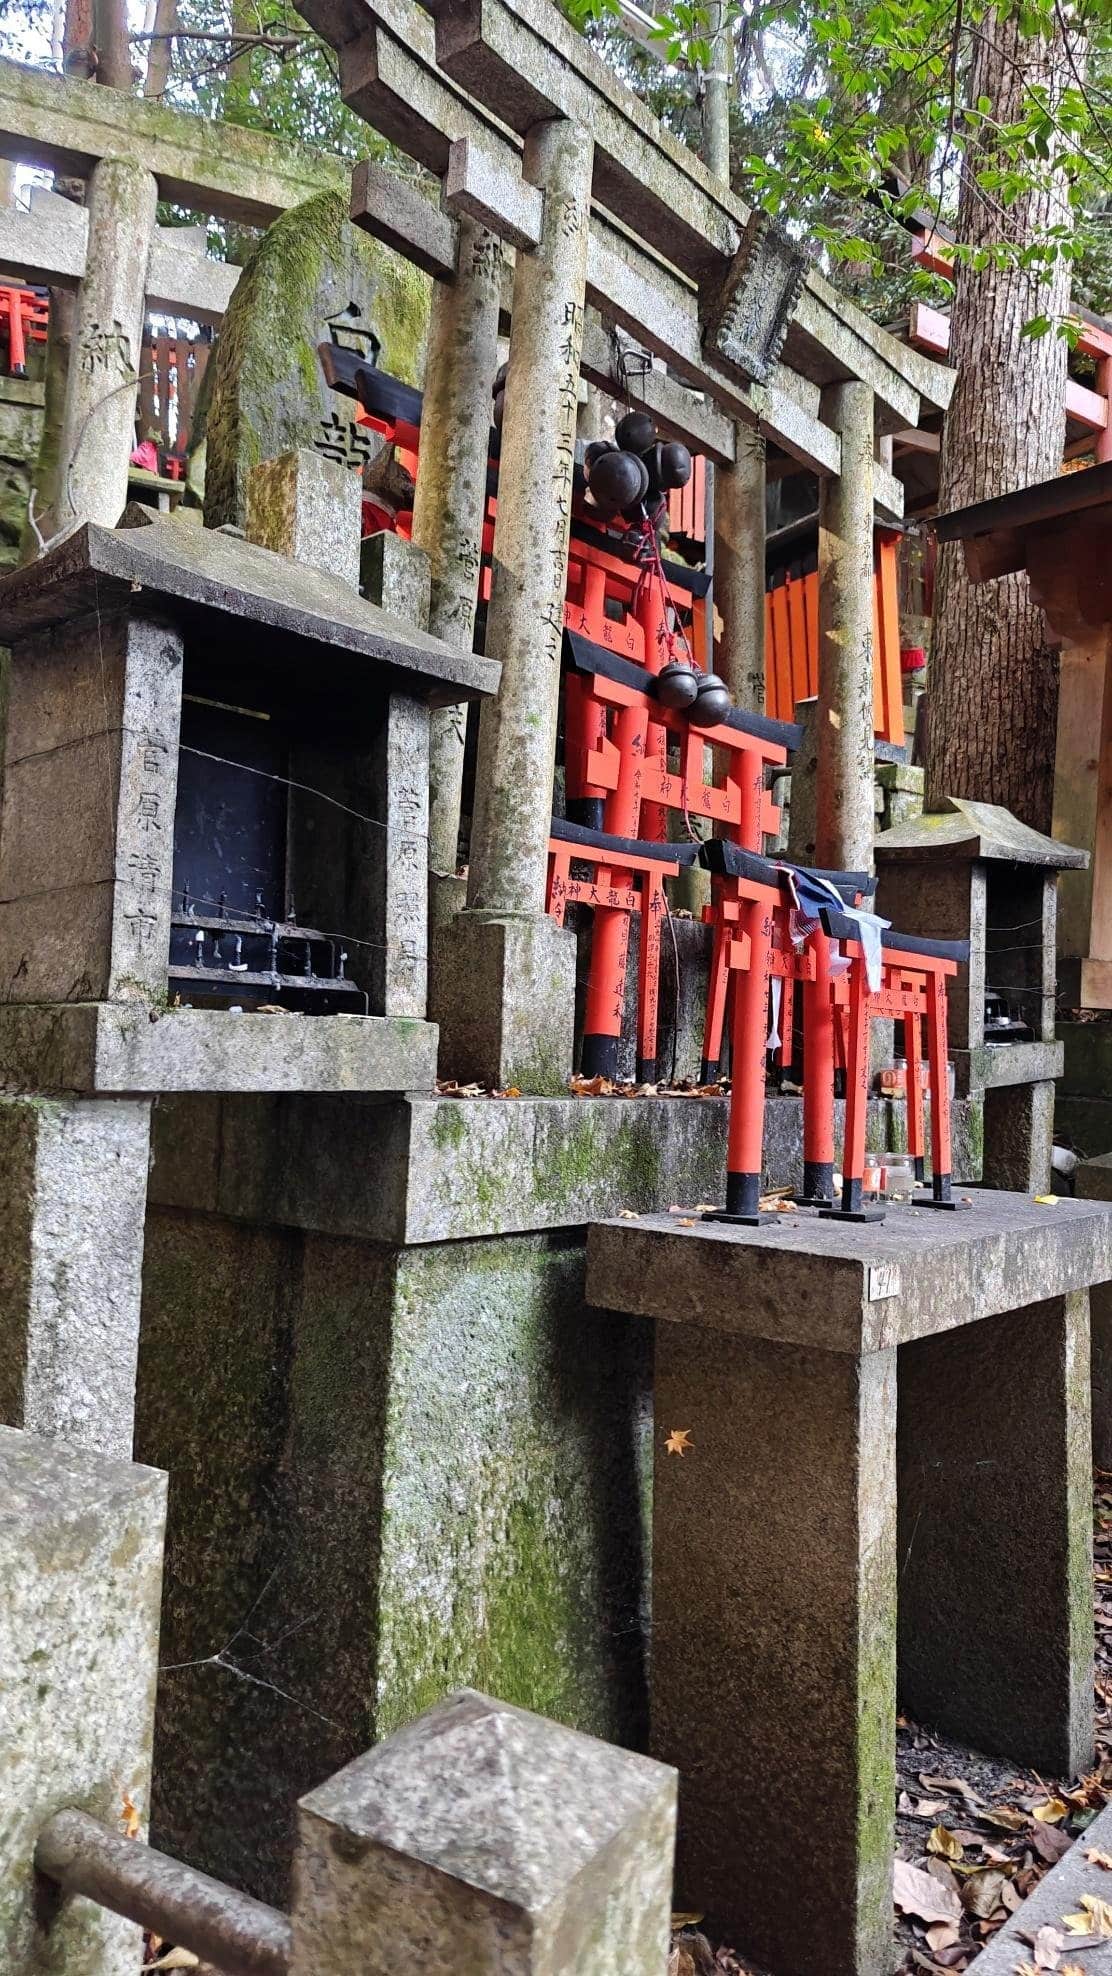
Just before I reached Kumataka Shrine, I came across this minor shrine that’s full of small torii. On maps, it’s labeled as Shirahata-ko Shrine and it looked really eerie. Looking back, I did feel like there were plenty of eerie areas and sights the whole time I was walking up.
I actually tried looking up why this was the case and apparently there have been sightings of ghosts as well as other supernatural phenomena here.
Kumataka Shrine was just a couple more steps from Shirahata-ko Shrine and it was actually quite nice up there. Again there was this eerie feeling thanks to the presence of the torii and stone lanterns but other than that it also felt really peaceful. It was quite hard to not like it up here due to how fresh the air was.
Moreover, there’s also a pond (not shown in the images) here called Shin-ike which gets visits from people praying to find their lost items.
This is the shot that perhaps best encapsulates the eerie and spooky vibe this Kumataka Shrine area had. There weren’t that many people here which was kind of understandable. I’d gone up with a group and most of them seemingly were tired from the hike going up here.
Thankfully there’s an establishment called Kanmidokuro Takeya where tired visitors can rest before continuing the climb up or going back down.
In my case, I decided to hike back down since the sun was already setting. If you’re someone who’s not good with places that have spooky vibes then you better make sure that you come here with a friend or two (maybe even three of them!). Additionally, you might want to come here in the morning as well.
Now while the images here might suggest otherwise, I actually didn’t have a problem seeing where I was going when I was hiking back down.
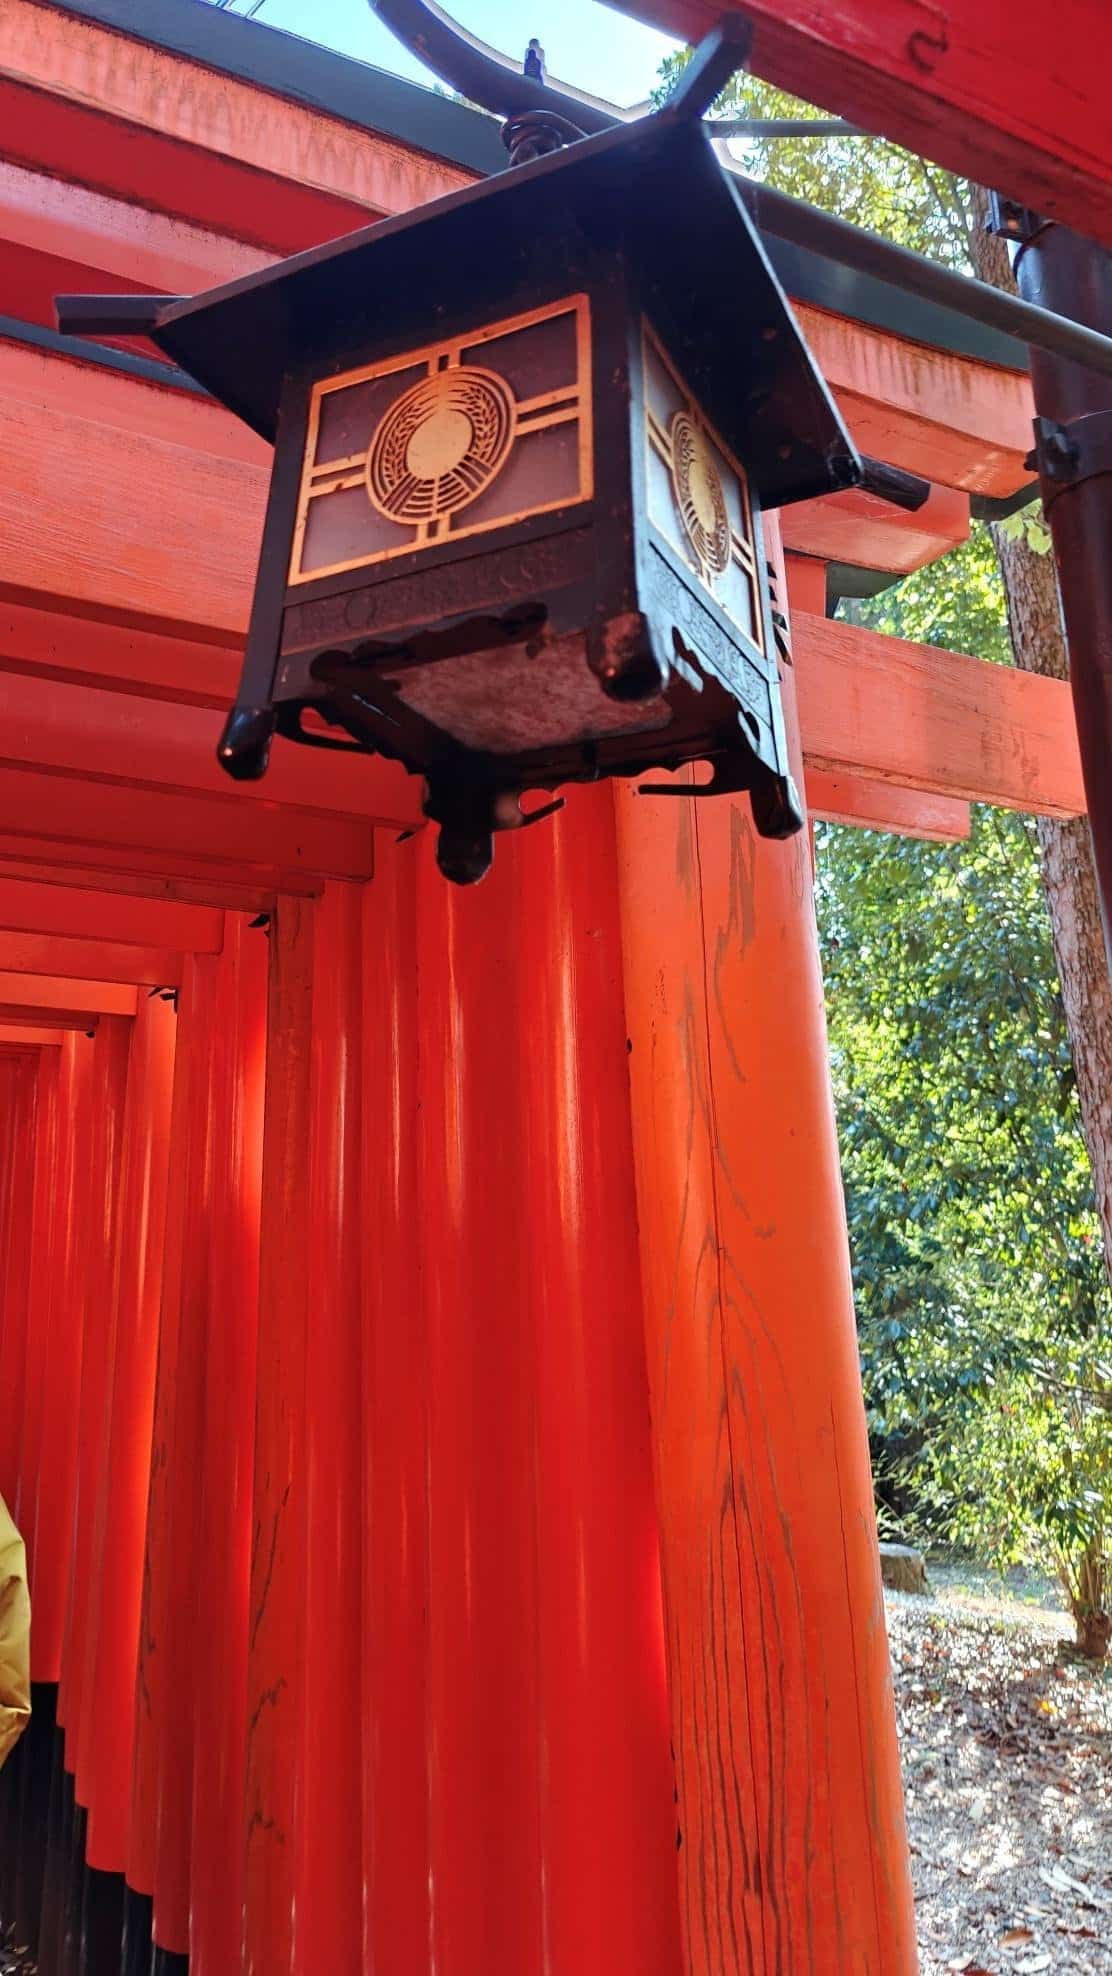
The lanterns provided more than adequate lighting and you could always use your phone’s flashlight feature if you’re really having a hard time seeing in the dark. While I did say that the place was spooky, I also didn’t feel like I was in any kind of danger. I also kind of appreciated how the lighting wasn’t too strong as it probably would’ve taken away from the solemnity of the place.
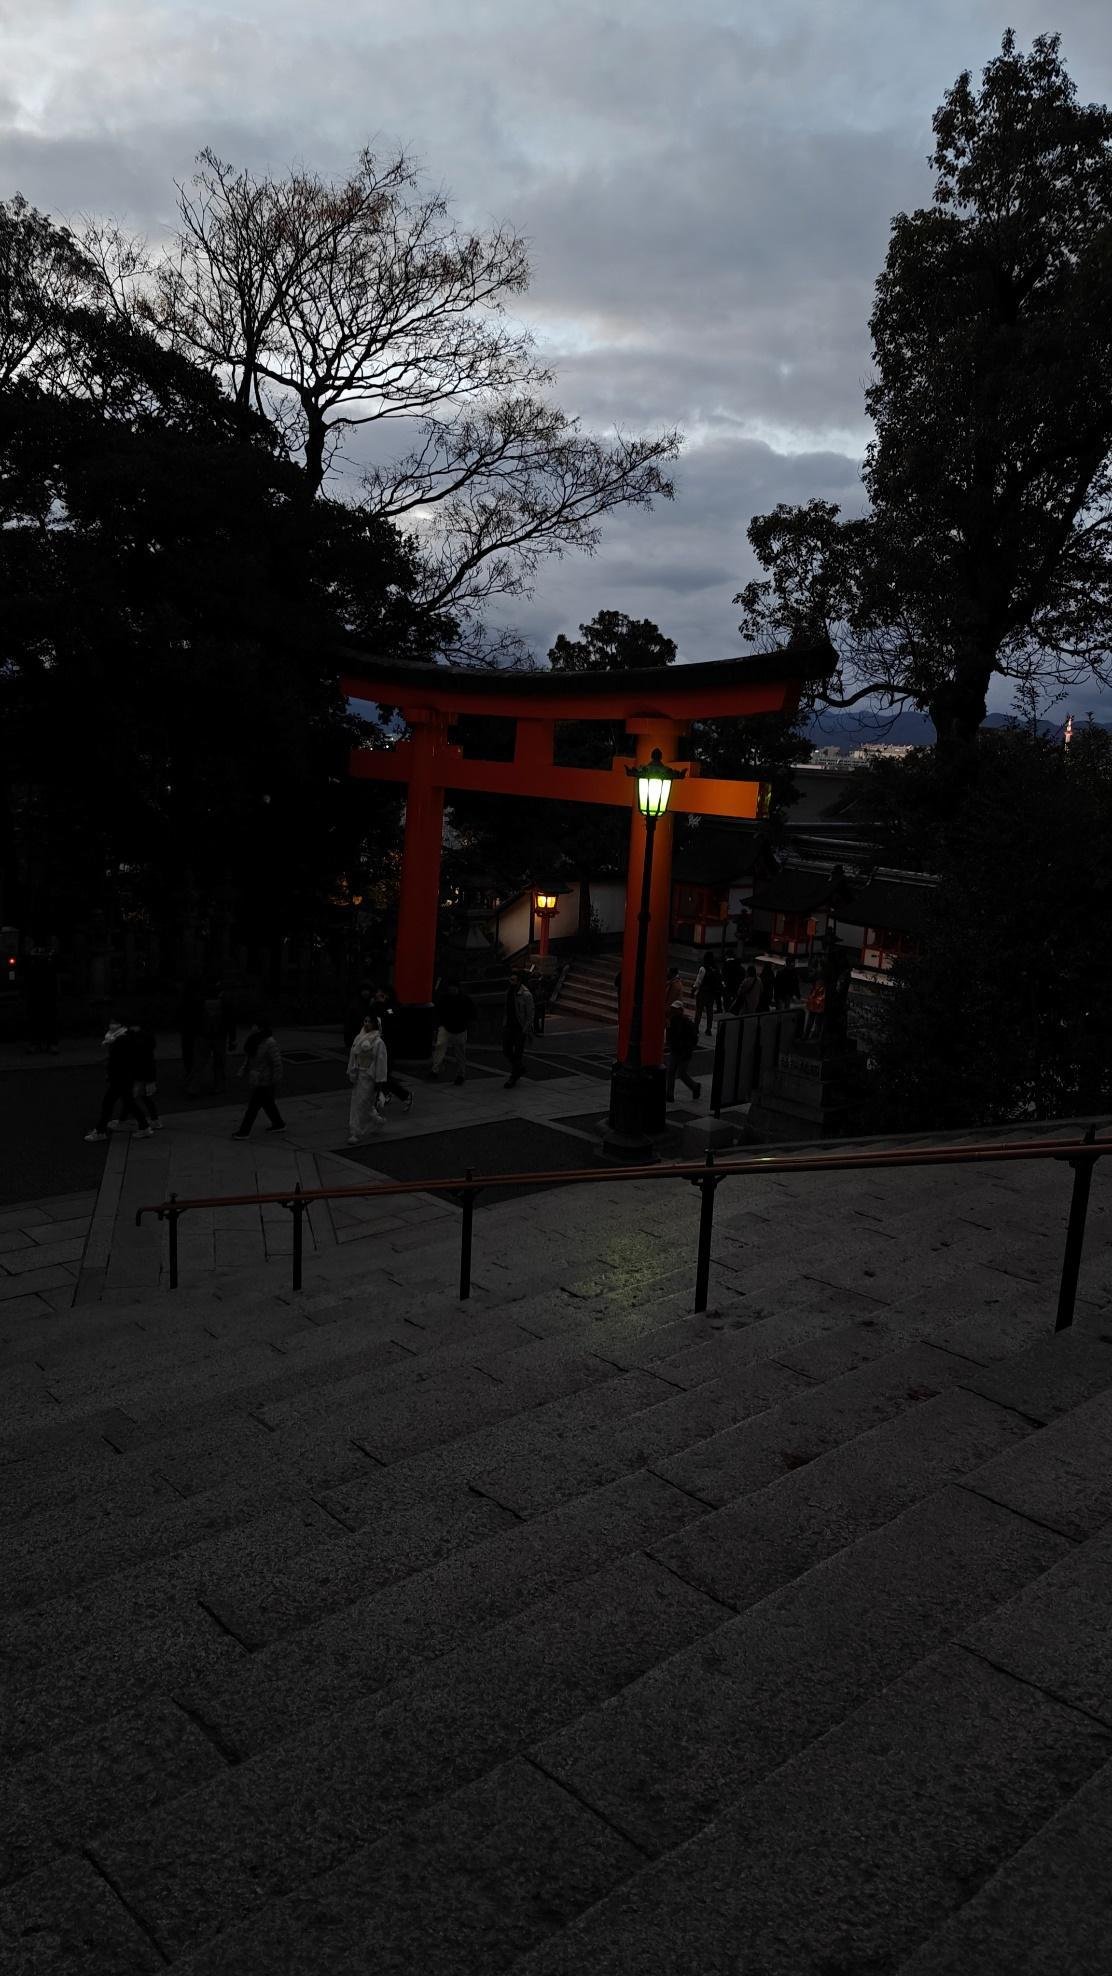
I finally found myself back at the entrance of the Senbon Torii. Well, when I took this picture I was actually past it and back near the Okumiya and Byakossha area. The lights here were a bit stronger now as I was very close to the shrine entrance.
Here you can see the Tamayama Inari Shrine and just in front of it is the stairs going down to the back approach road. From here you could actually go straight and you can exit at a backstreet into the Fukakusa Kaidogugicho residential area. That said, I wouldn’t recommend going through here at night as the shrines in this area are typically only open from 9:00AM to 5:00PM.
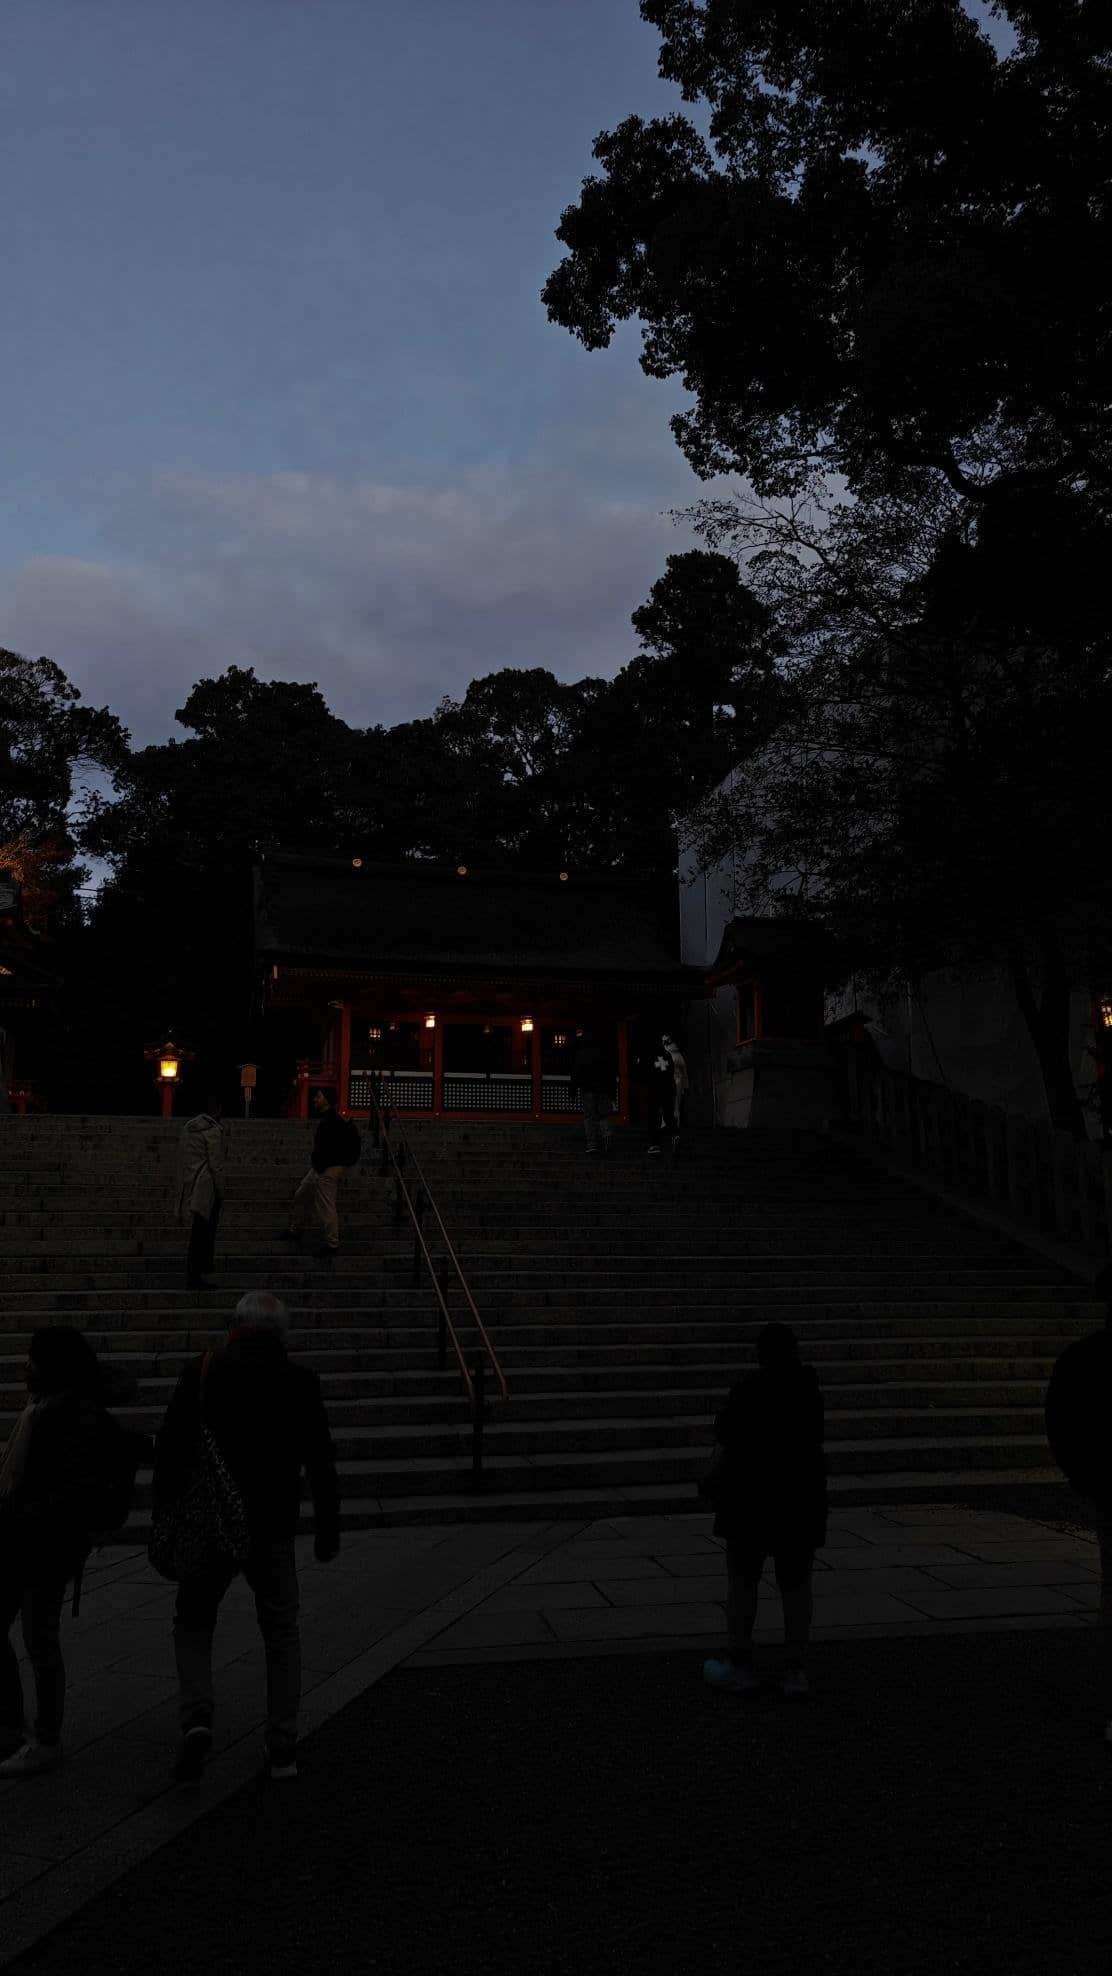
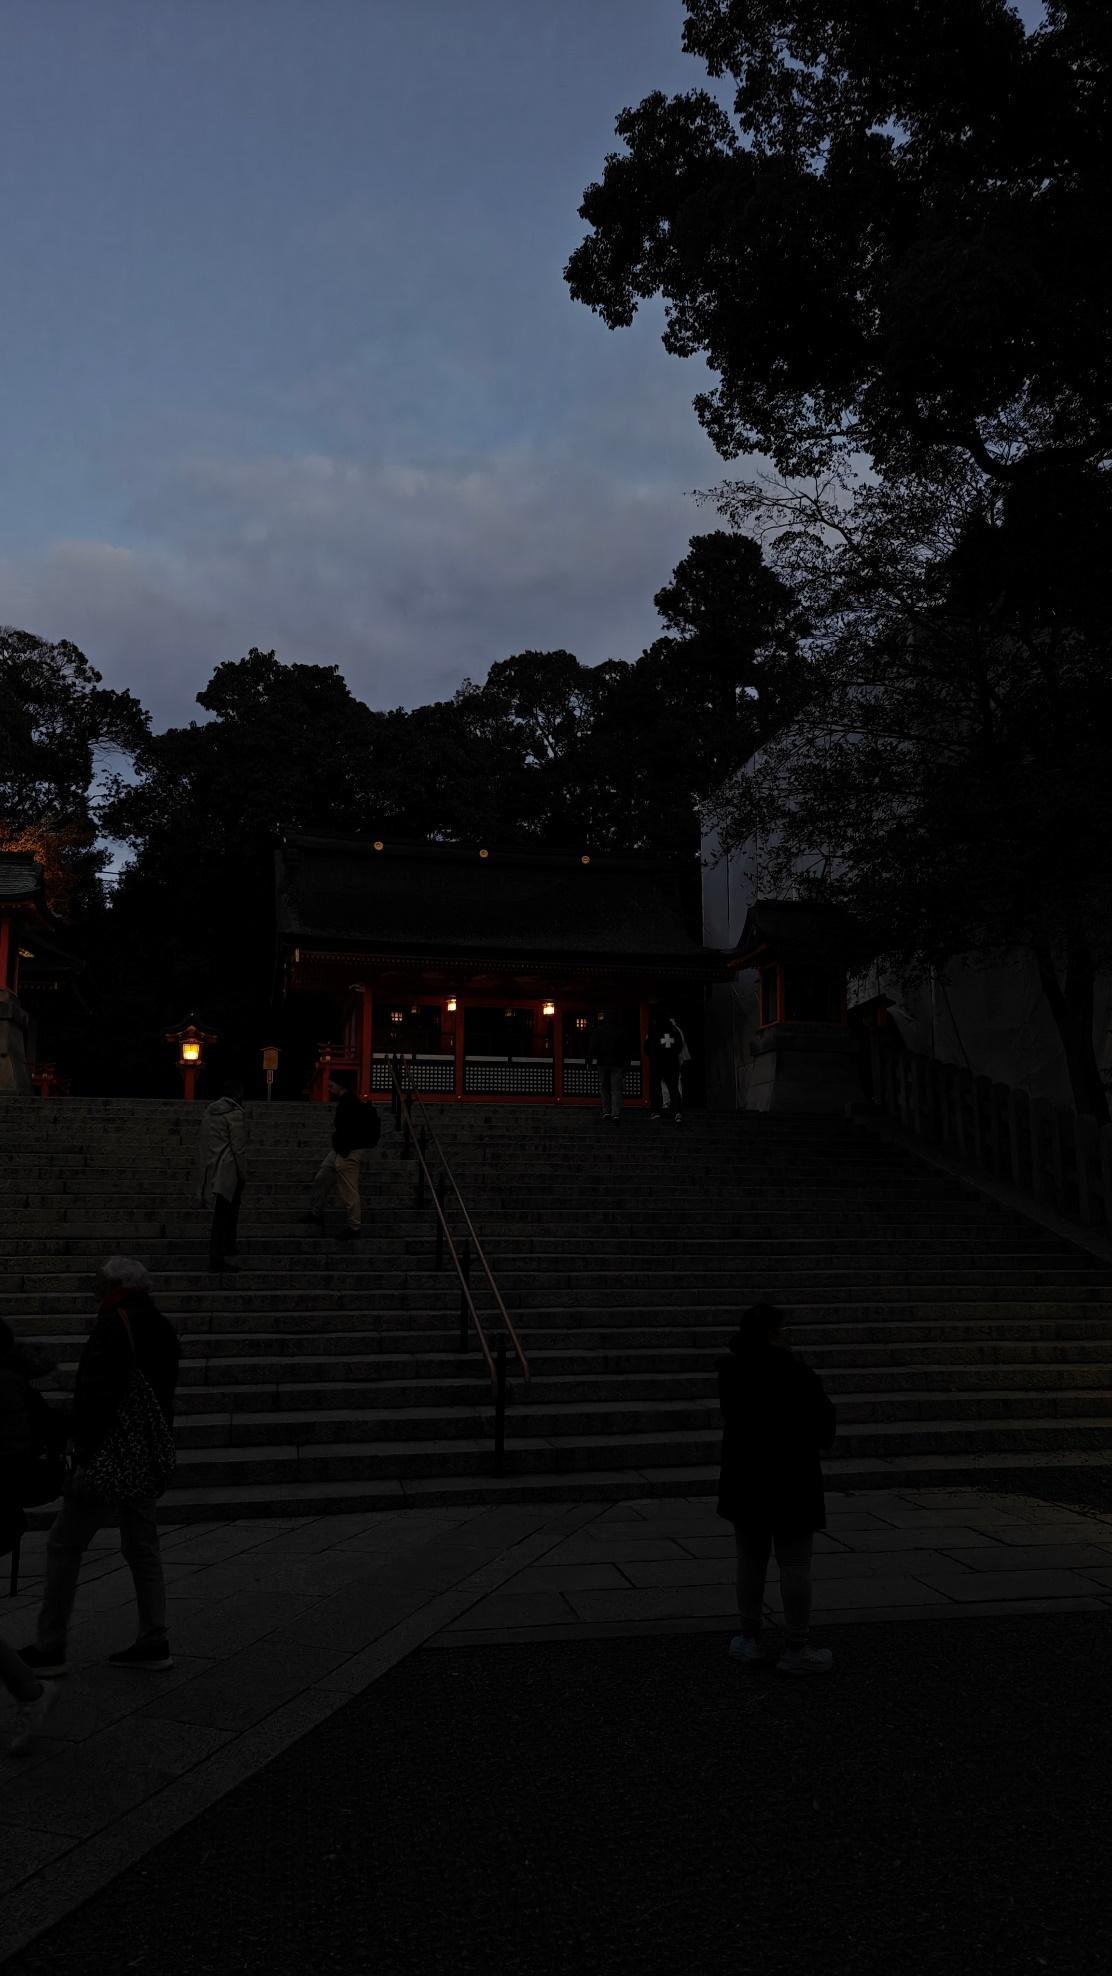
Heeding my own advice, I found myself back down to the level of the Tamayama Inari Shrine. You can sort of see the Okumiya up the stairs in this image. Now that I’m back in this area, I unsurprisingly didn’t have the spooky vibes that I experienced from the hike down.
Even though it was night, this area of the shrine complex still had plenty of people milling about.
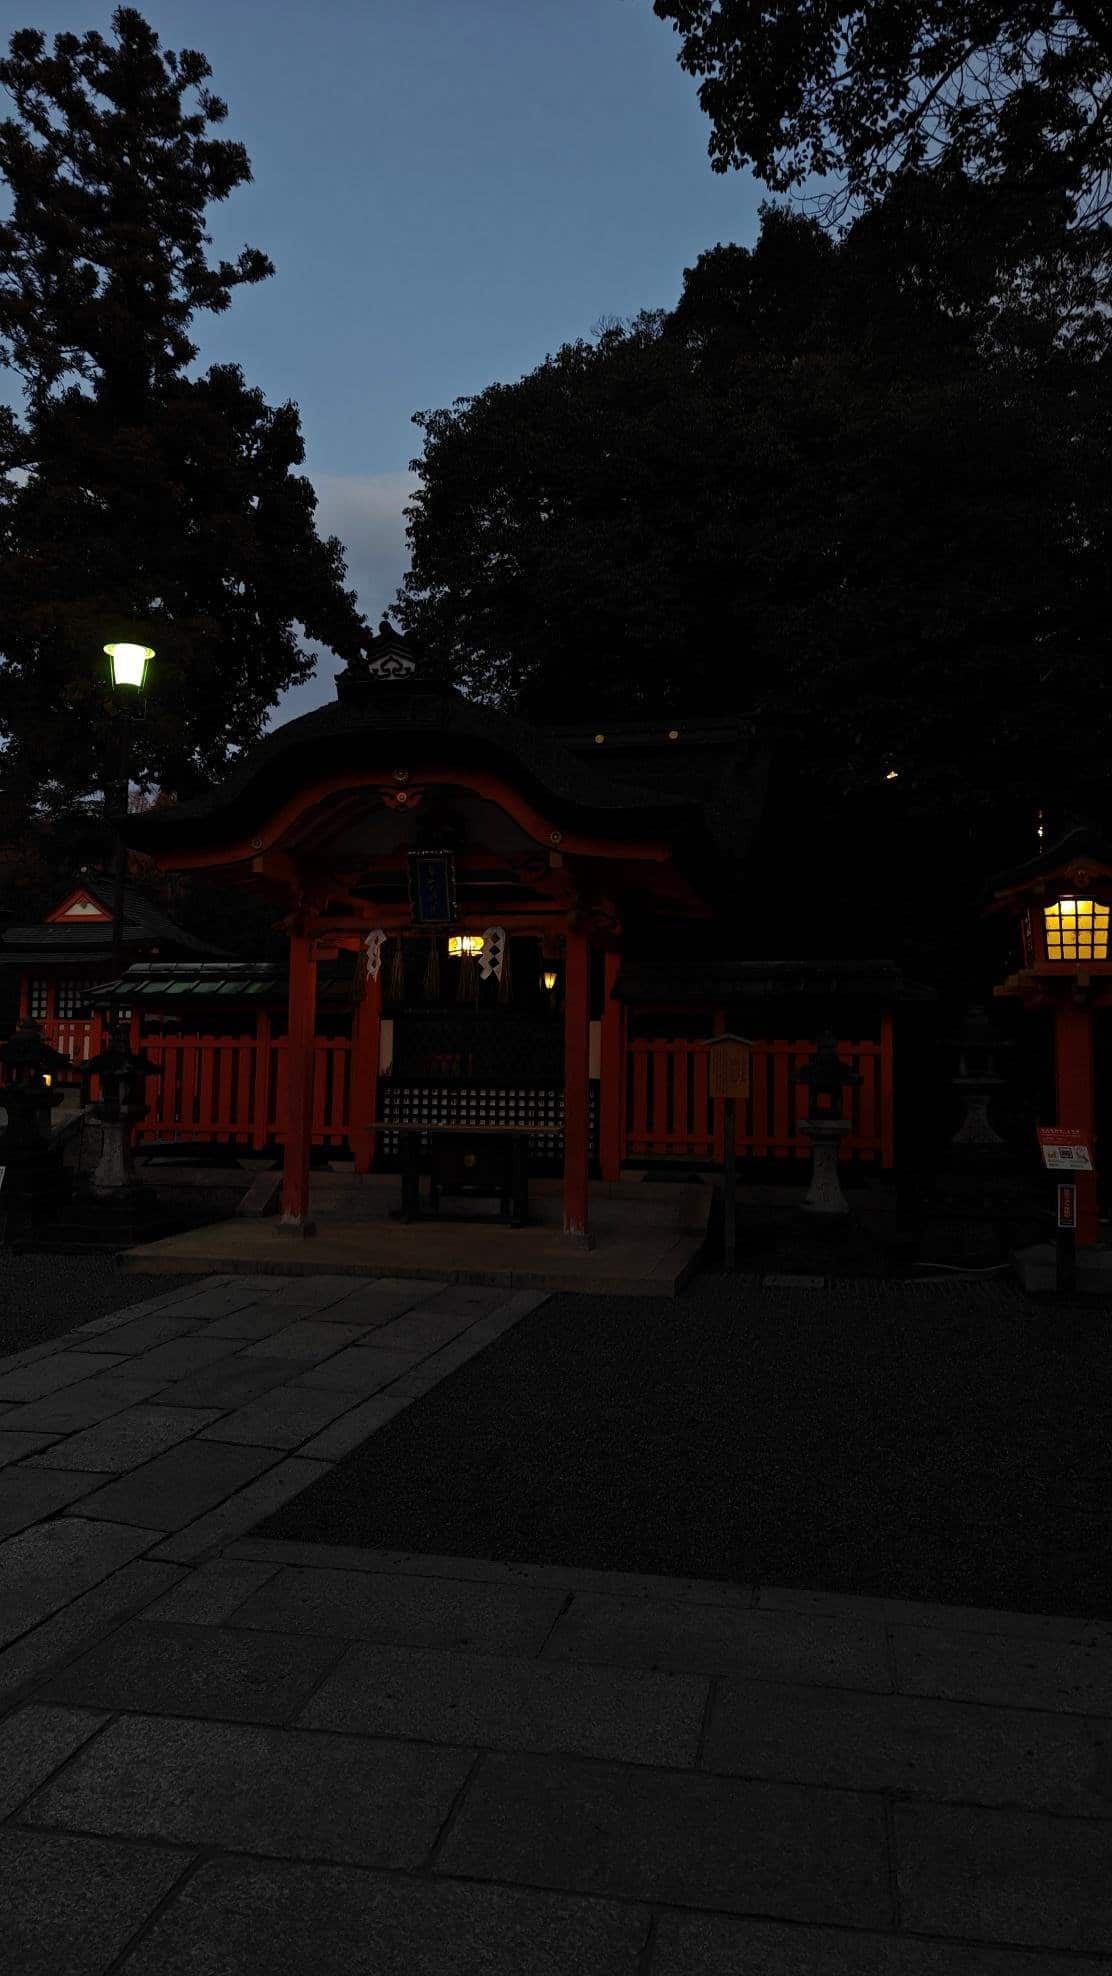
This is a closeup of the Tamayama Inari Shrine. It’s another of the sub-shrines here though I’m not sure which aspect of Inari it’s dedicated to. I will say that if you do plan to learn more about Inari Okami as well as the shrine’s history in depth then getting a good guide is going to be a must.
I don’t think I’ve ever said this yet but the reason why I’m able to stay this late here at Fushimi Inari Taisha is because the shrine complex is actually open 24/7. In fact, there are even night tour packages online for people who might not want to deal with the morning crowds. As for security, the shrine complex actually doesn’t have any because of how rare (you could even say it’s non-existent) criminal activity in the area is.
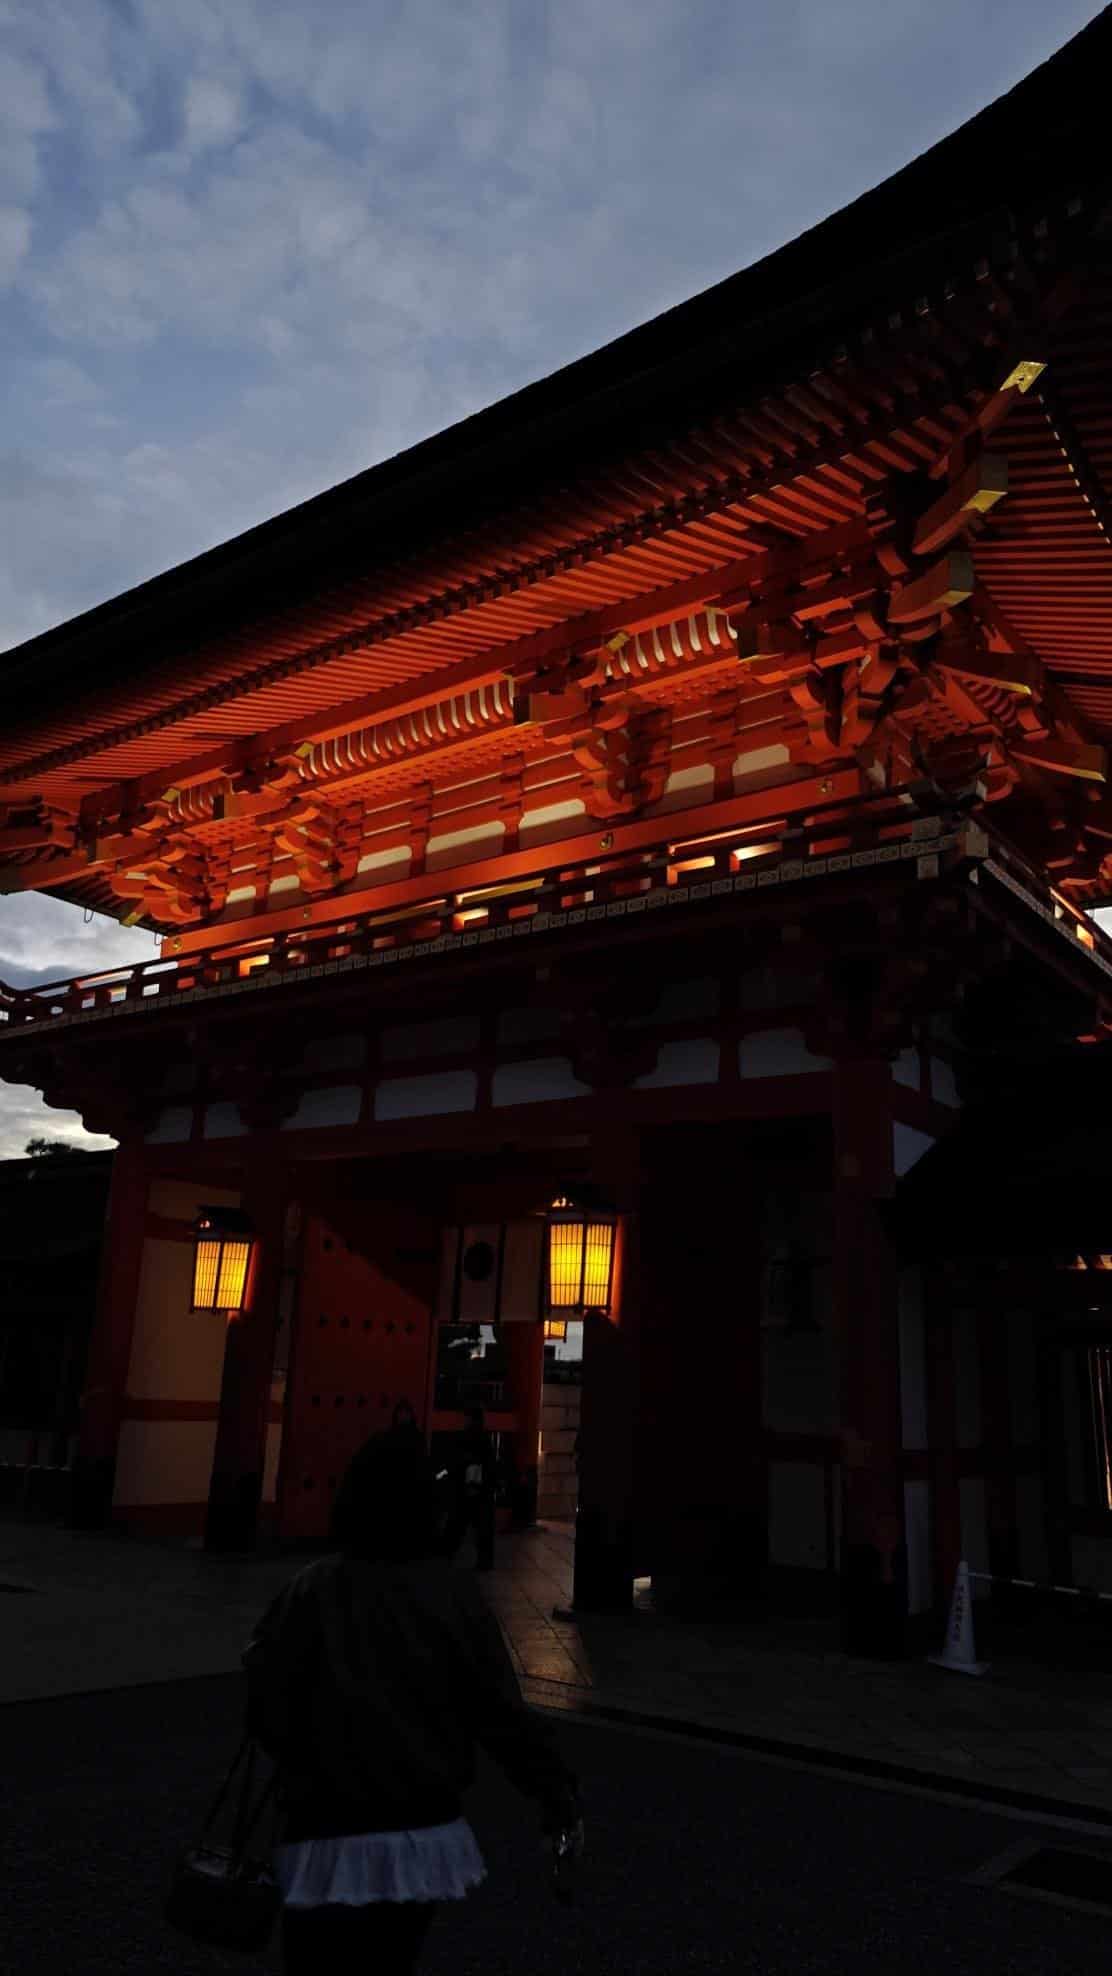
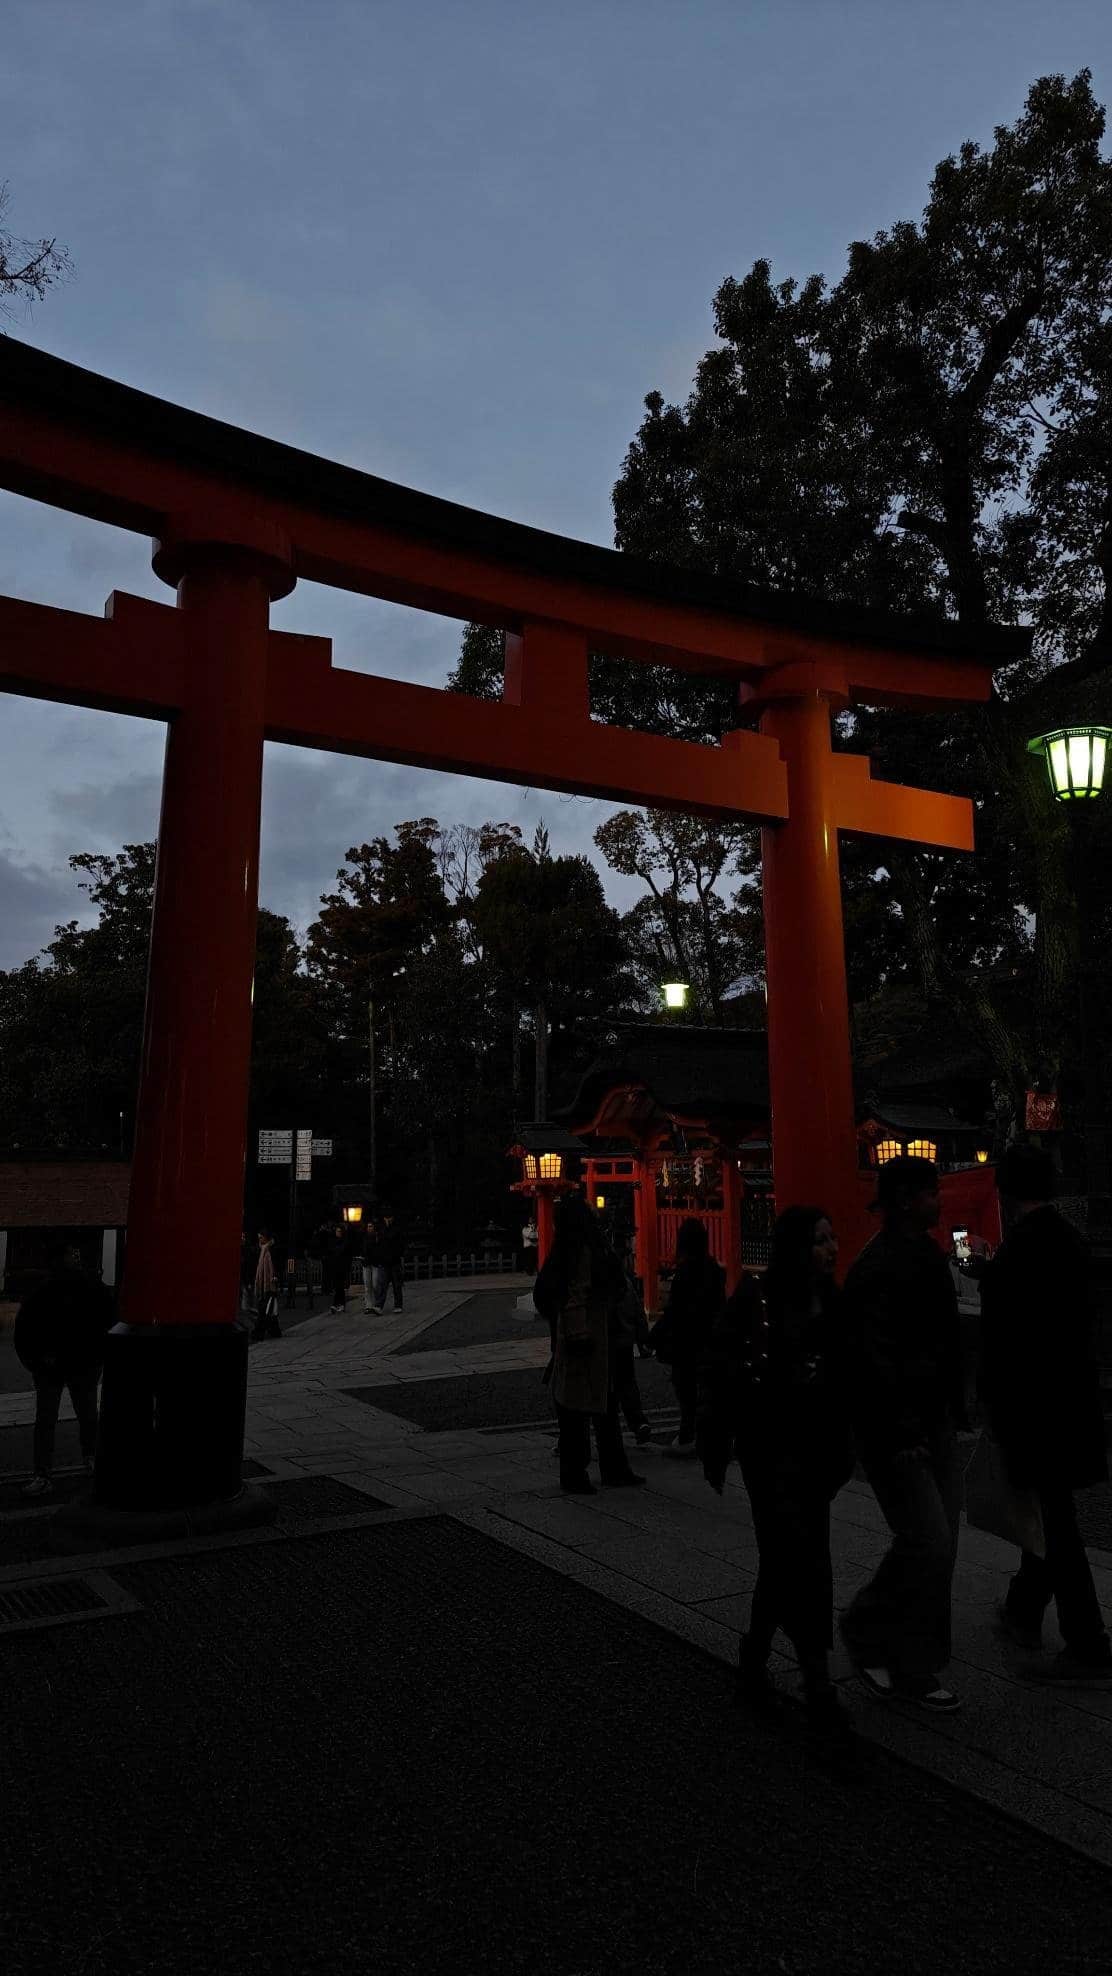
Again, the images I took probably aren’t doing the sights here any justice but I will say that the buildings actually look really nice at night. This is the Romon as seen from inside the shrine area and the lights here perfectly illuminate and highlight its vermillion color. The lighting is not on the blinding level of Hongyadong in Chongqing which I think is actually much better.
Hongyadong is a commercial complex so the extreme lighting there is kind of understandable. If that kind of lighting was used here then I think it will sort of diminish the shrine’s solemnity.
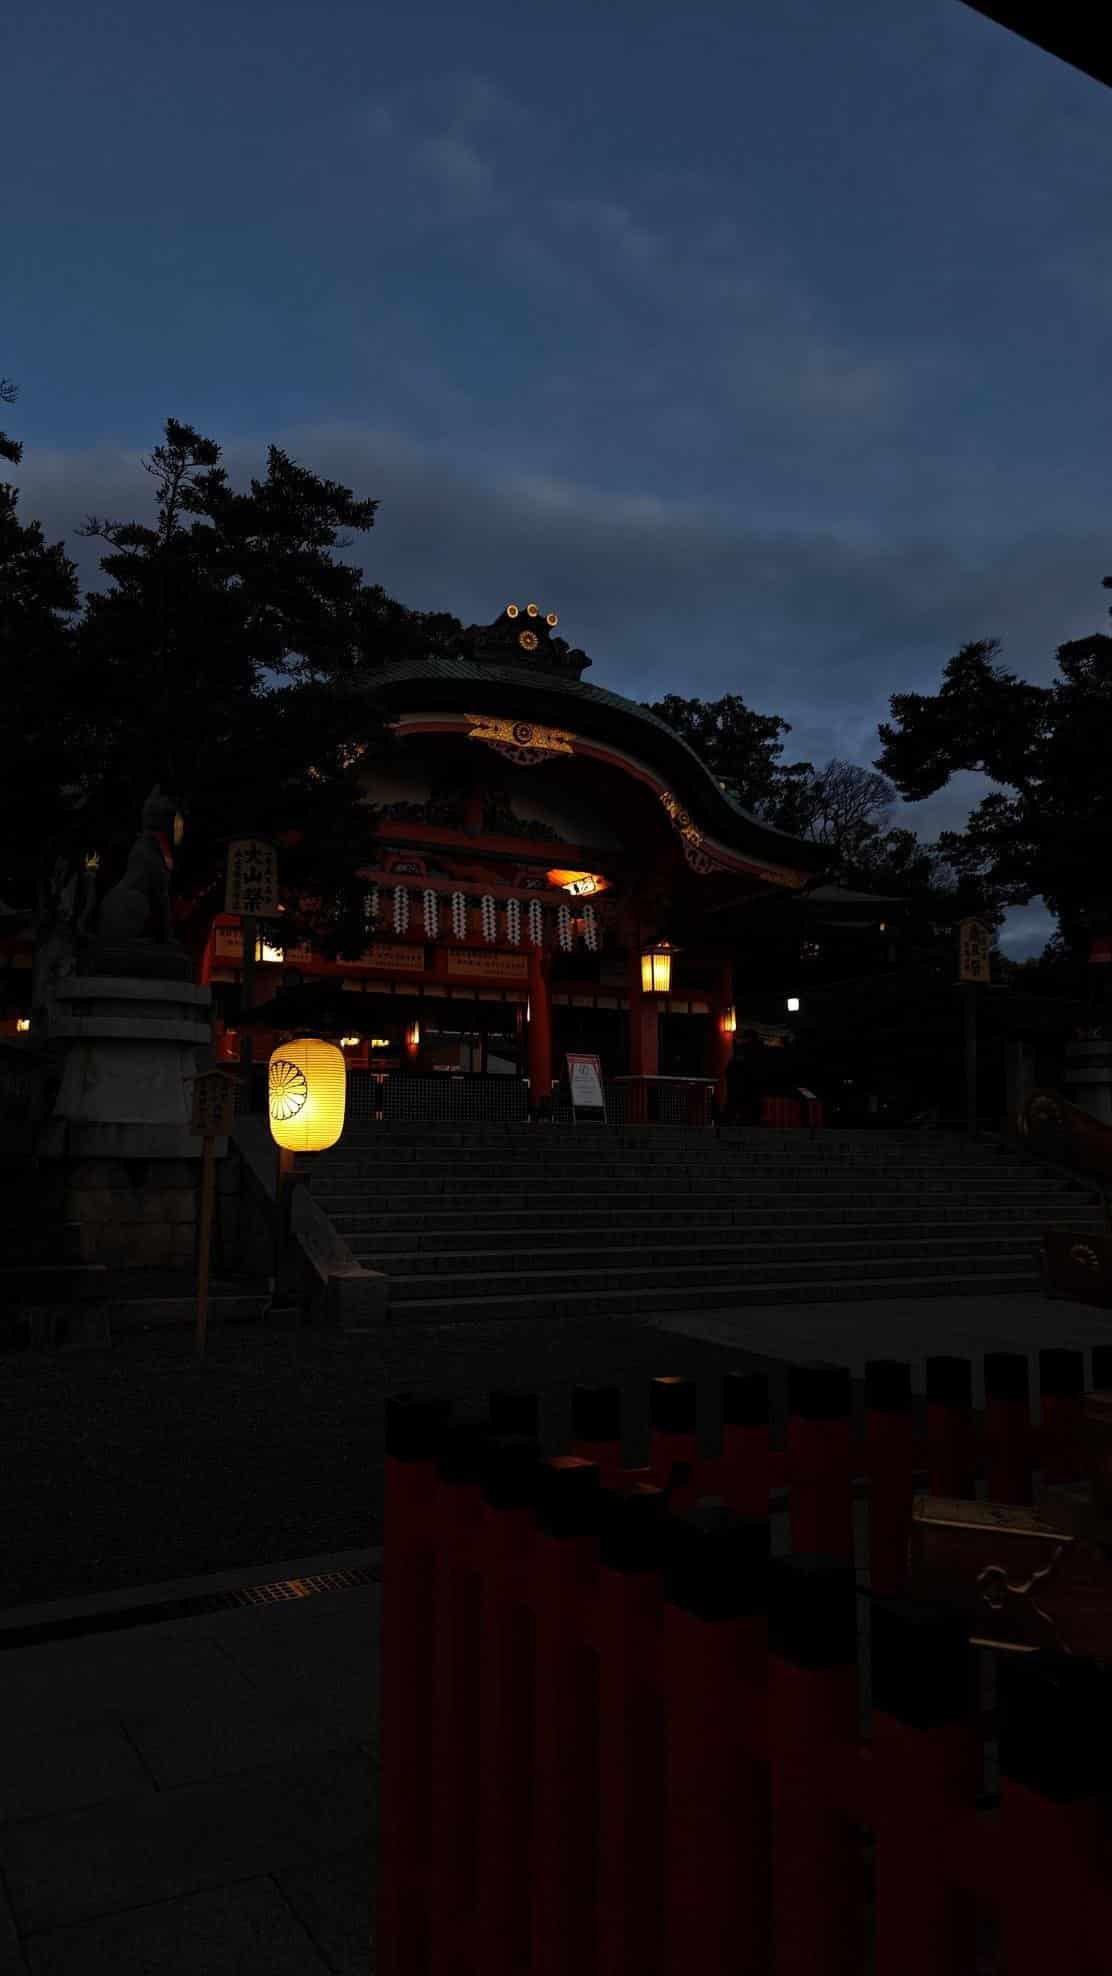
Here you can see the Haiden which is just behind the Romon from earlier. It’s less illuminated though I’d argue it still looks nice even at night. Another reason why it might not look like it’s well illuminated probably has to do with the fact that it was technically still dusk when I took the image.
As the night grew darker, the lighting on these buildings eventually looked much better.
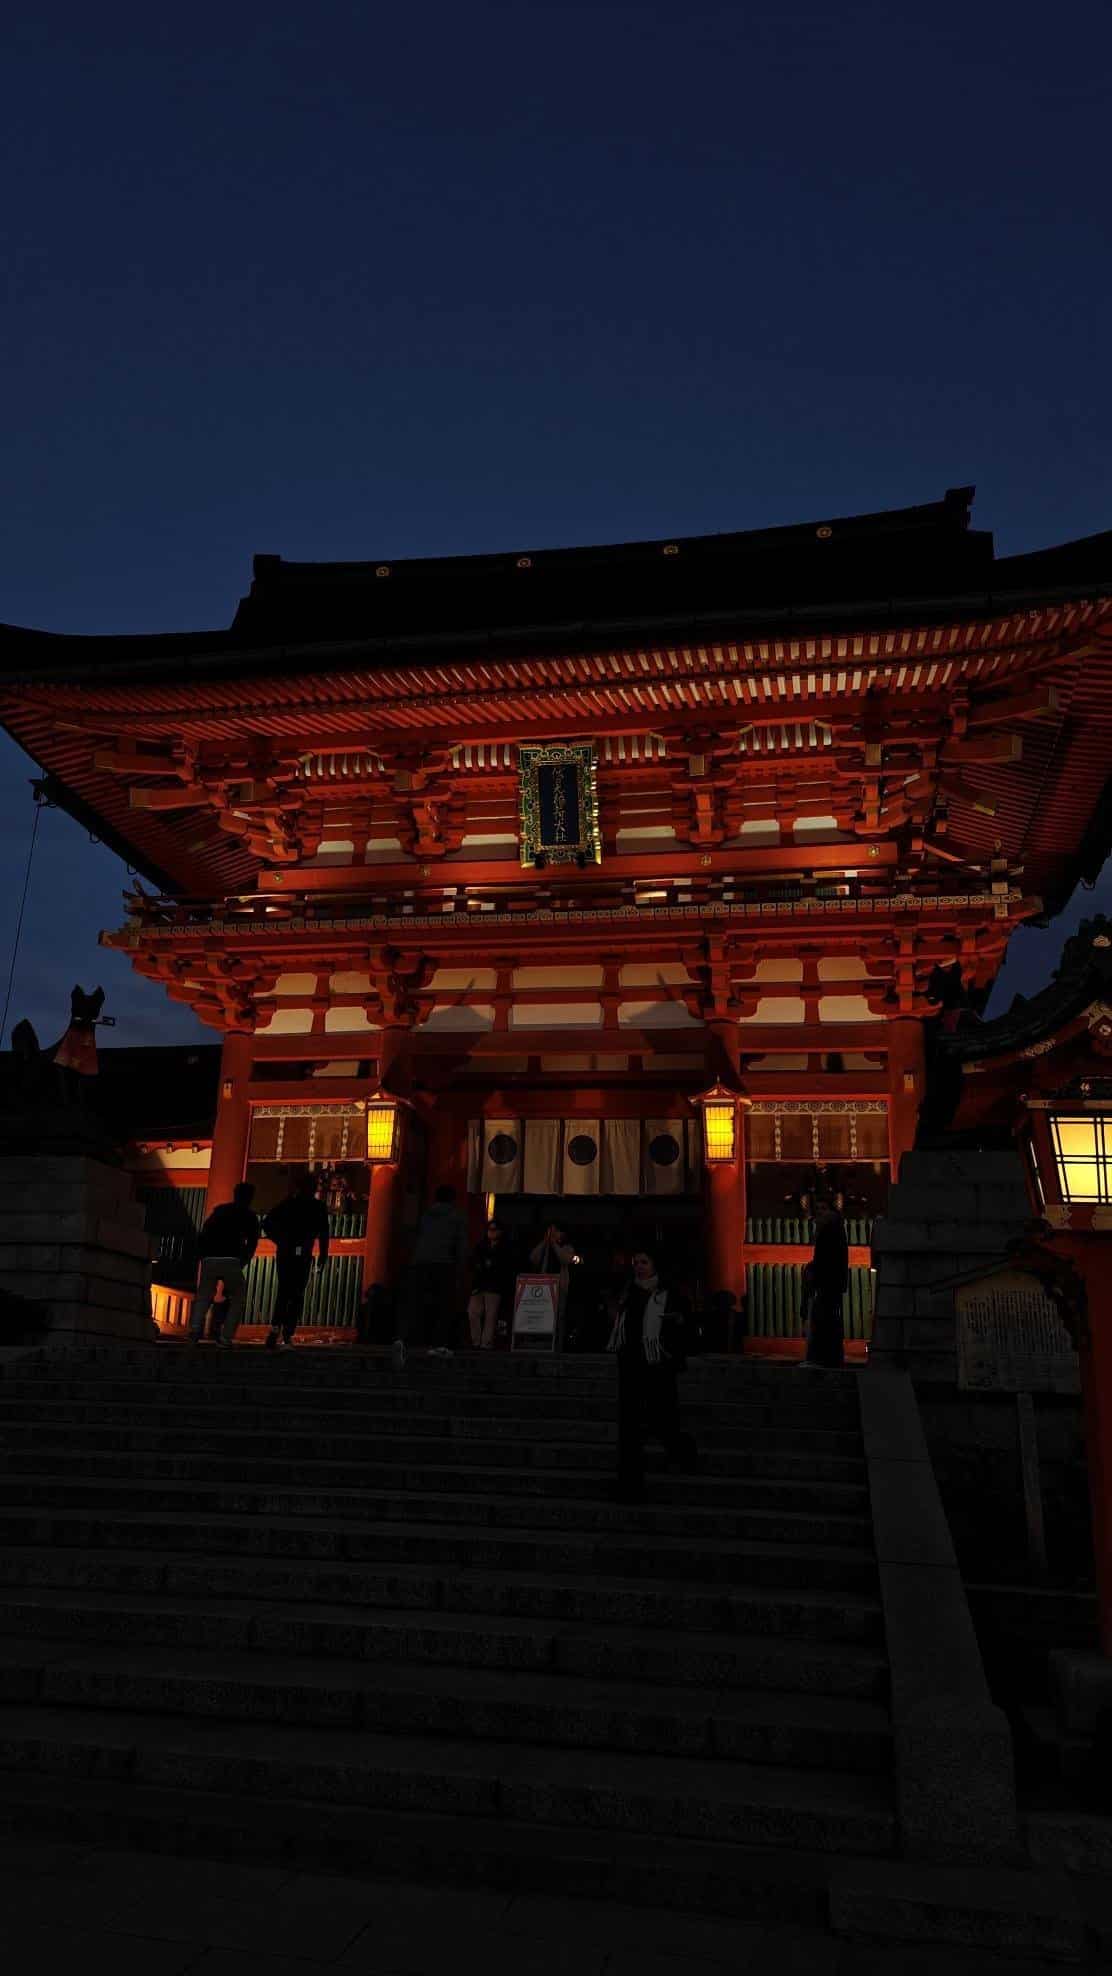
Case in point would be this frontal view of the Romon. Here it looks absolutely stunning and thanks to the lighting, its gold details now seem to shine in the dark. If you’re walking from the Fushimi Inari street entrance then you’ll see it literally lighting up the dark.
Now do I recommend visiting at night rather than the daytime? I actually think a daytime visit is still going to be much better. You’ll get to have a better look at the attractions here when you visit during the day.
That said, a night visit might also be a better option especially if you’re not too keen on dealing with large crowds especially during peak tourist seasons.
This ends my visit to Fushimi Inari Taisha in Kyoto. I think that its reputation as a must-visit location in the city is more than warranted. The buildings here were some of the best preserved that I’d ever seen and walking through the Senbon Torii was such a unique and memorable experience.
More importantly, I didn’t have to pay a single dime to get access to the shrine complex. Yes, you read that right. Fushimi Inari is free to enter.
Literally the only thing you’ll be expending here is the sweat from all the walking you’ll be doing. The offerings aren’t compulsory though I did end up putting in a couple of yen on the saisenbako just as a way to give thanks as well as to help support (in my own small way) the upkeep of the shrine complex.If there’s one thing I kind of regret it’s quite possibly not being able to go up to the top of Mt. Inari to see the Ichinomine shrine. Perhaps if I came here earlier then I might’ve managed to get there.
That said, I was still more than happy to have reached Kumataka Shrine.Overall, Fushimi Inari Taisha was arguably one of the best value for your time and money destinations I’ve ever had the chance to visit in 2025. If you’ve visited Fushimi Inari Taisha as well then make sure to sound off in the comments section. We’d like to hear about your experiences as well as tips and tricks you might have for us and our readers who’ve visited or are planning to visit this iconic shrine in Kyoto!